Opening the Invoice
- Go to the Billing tab using the left-hand menu.
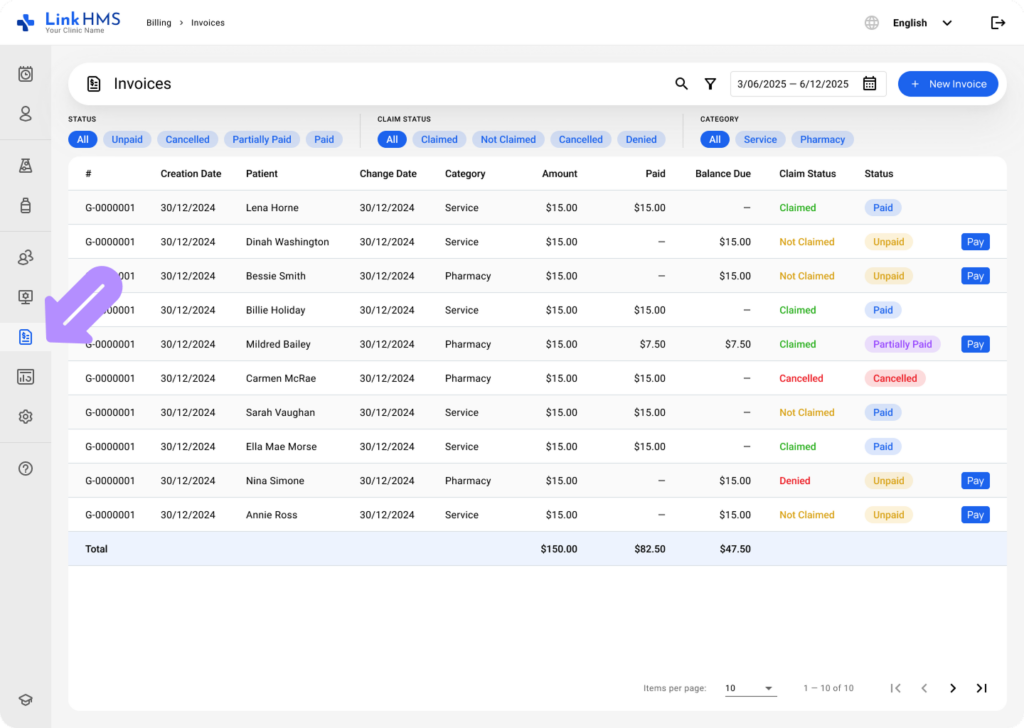
- Locate the necessary invoice and click on it to view its details.

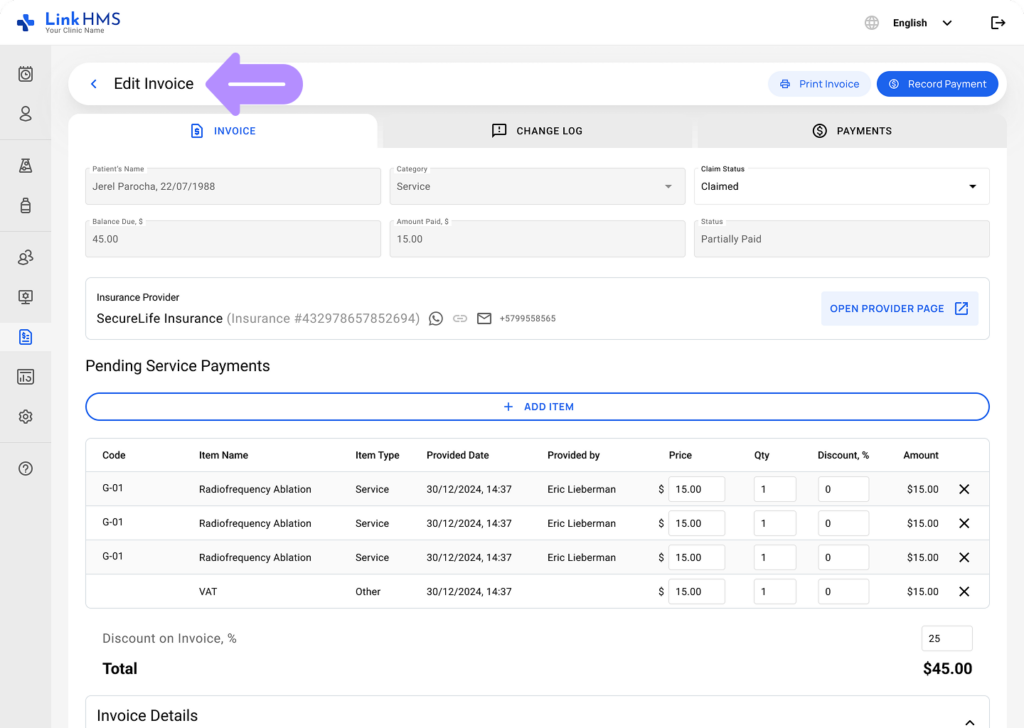
Reviewing the Invoice Details
- Verify invoice details prior to finalizing and update as needed.
💡Notes
Check out the additional instructions in the guide on How to manage and edit invoices.
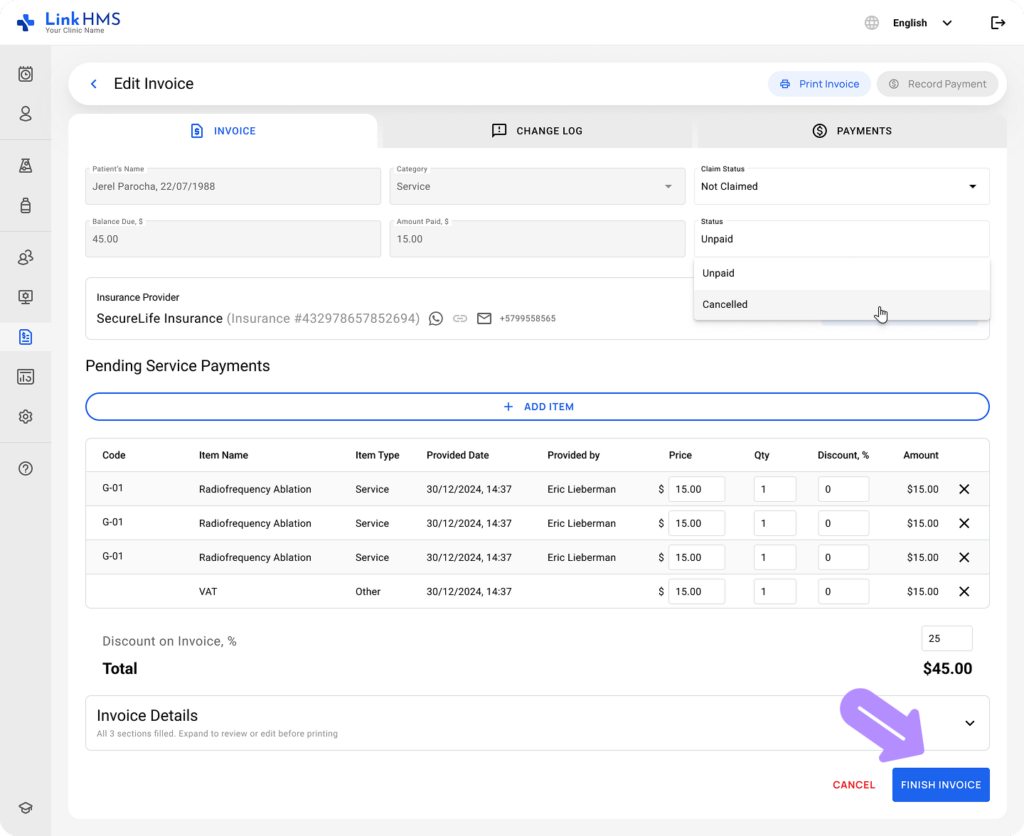
Changing the Status
- Use the dropdown menu to change the invoice status.
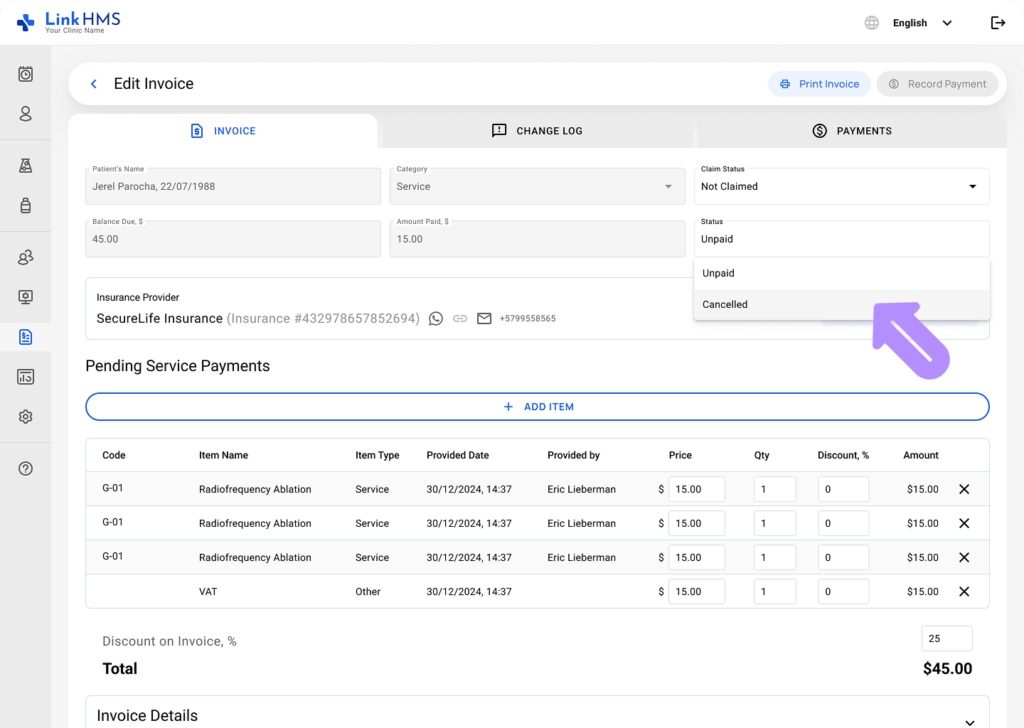
- Choose the relevant invoice status (Unpaid, Cancelled, Partially Paid, or Paid) to reflect its state.
Changing the Claim Status
- Update the claim status using the dropdown menu.
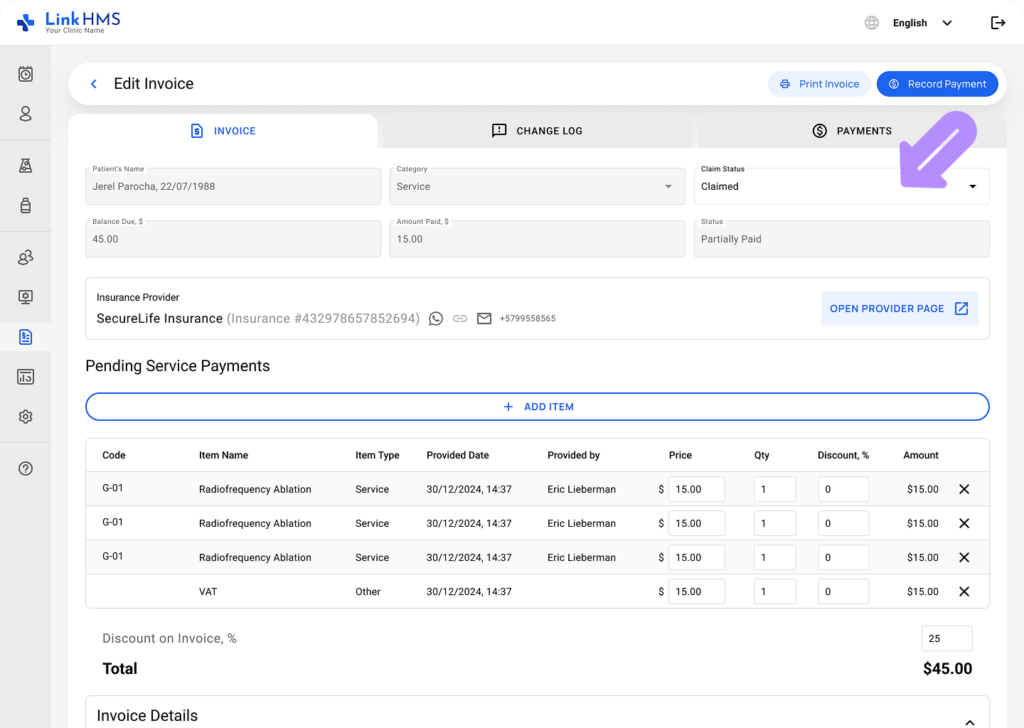
- Set the claim status (Claimed, Not Claimed, Cancelled, or Denied) based on its current state.
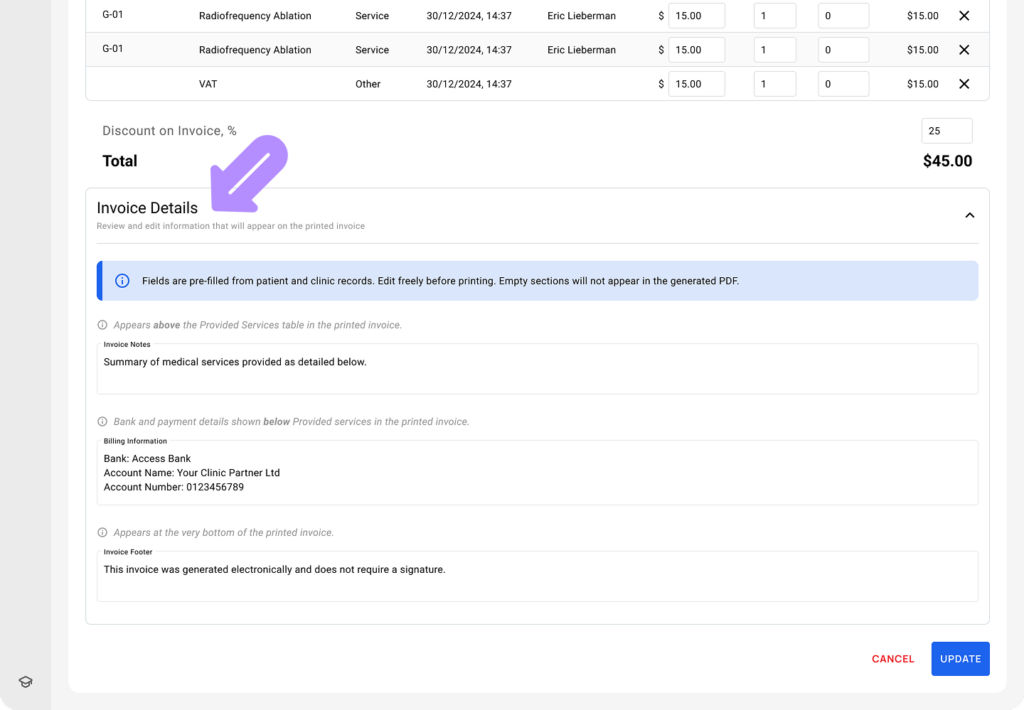
Editing the Invoice Details
💡Notes
You can review and edit Invoice Details before printing the invoice. Any empty sections will be excluded from the generated PDF. See the full guide on how to edit invoice details before printing the invoice.
- Invoice details fields are automatically filled from the clinic info records added by the administration. If required, update the details needed to be included in this printed invoice.
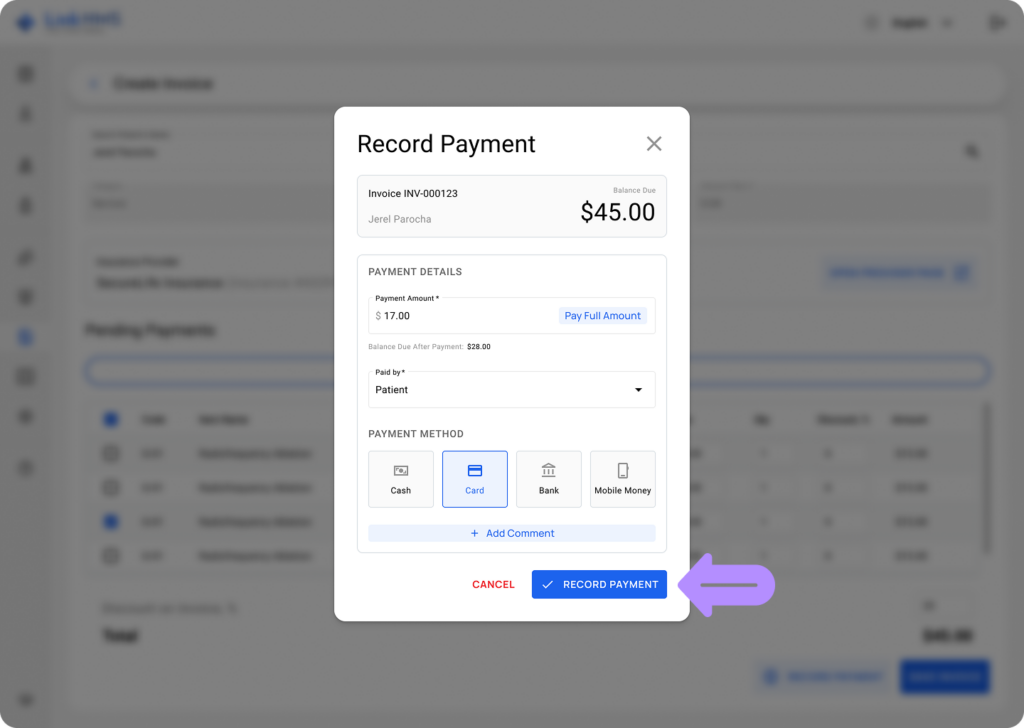
Recording Payments
- Click the Record Payment button to add a new payment to the chosen invoice.
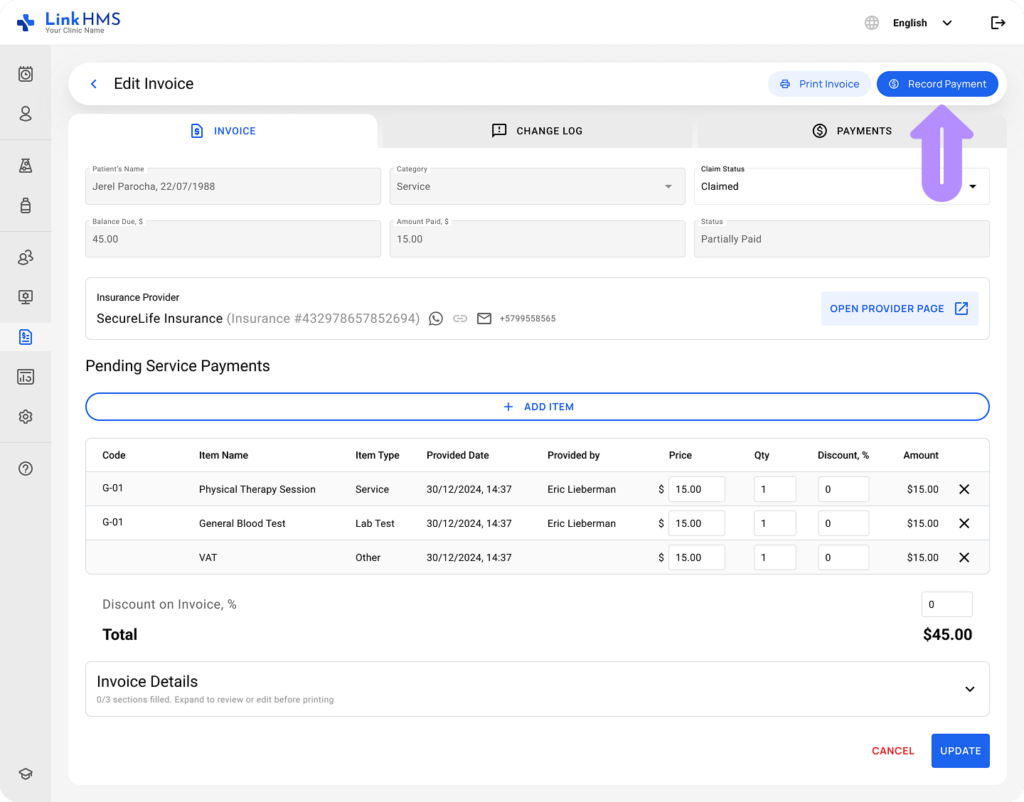
- Fill in the payment details and click Record Payment. You can record both the full amount or a partial payment. For additional information, check the full guide on how to record payments on invoices.
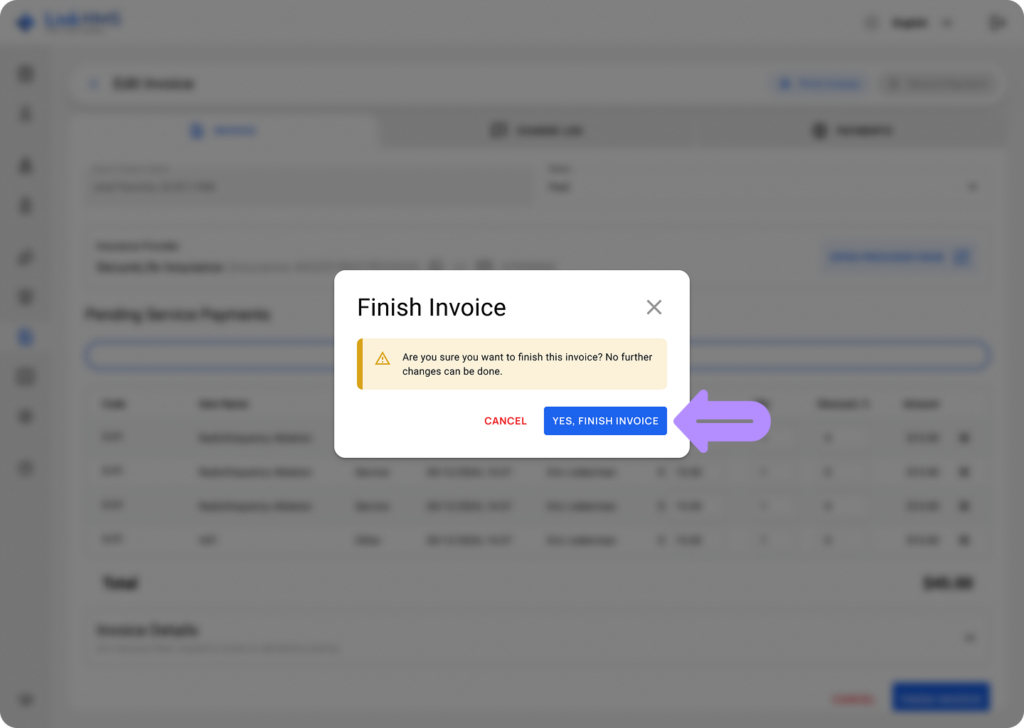
Finalizing the Invoice
- Click the Finish Invoice button to save the changes and complete the invoice.
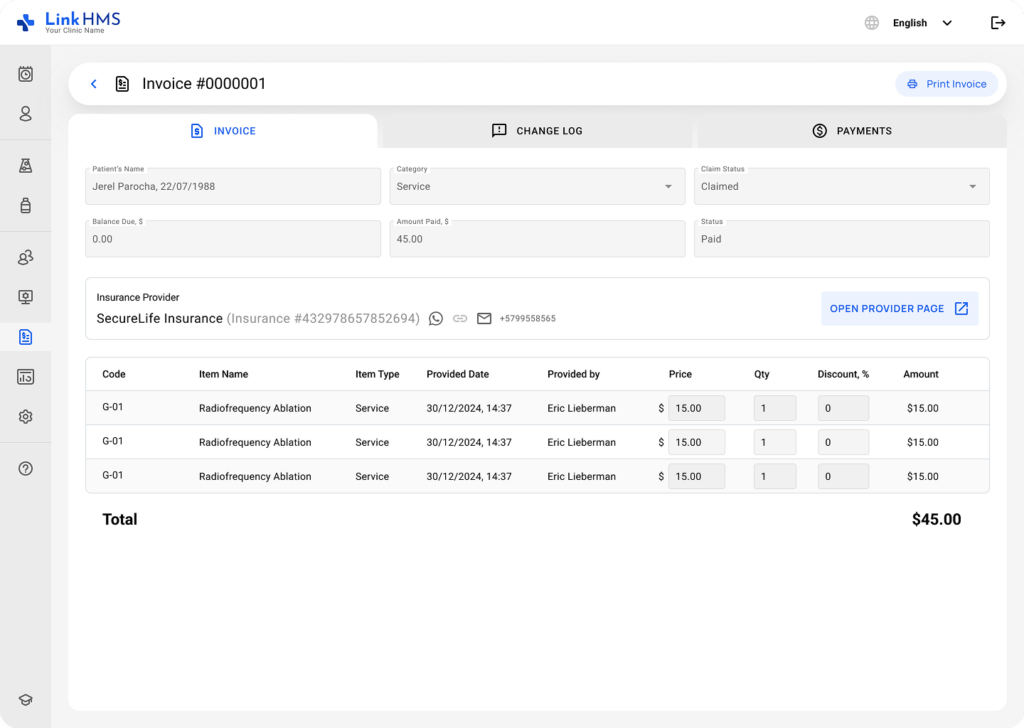
- Once finished, no further edits can be made to this invoice.
- All invoices are securely saved in the system and remain accessible at any time for future reference, review, or administrative use.
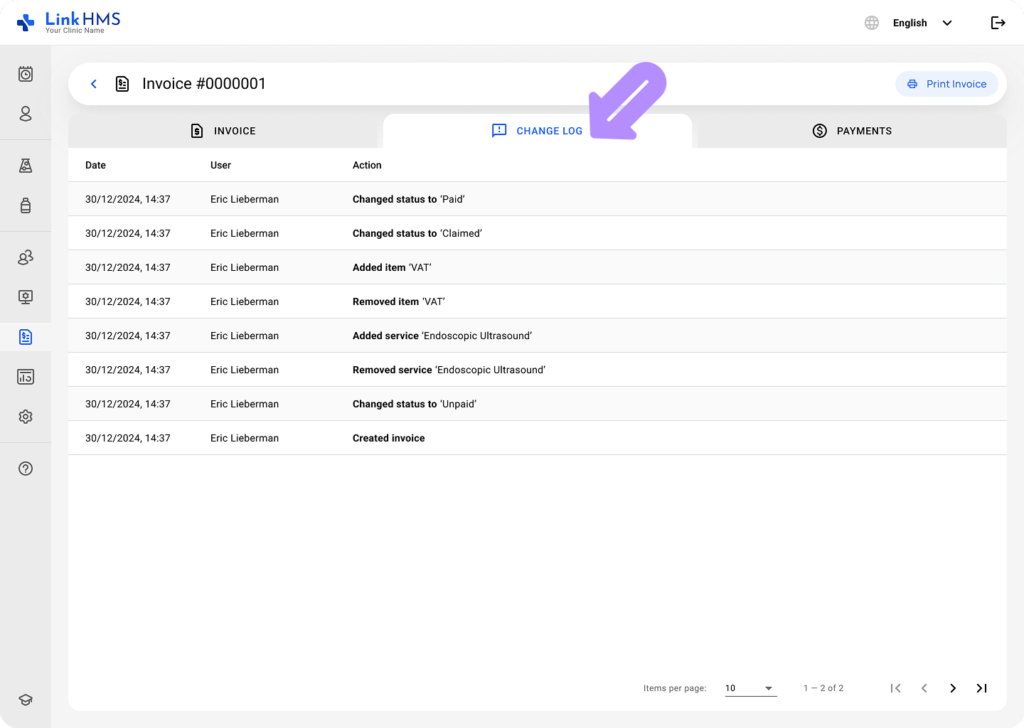
- Use the Change Log tab to see a detailed history of all modifications made to the invoice.
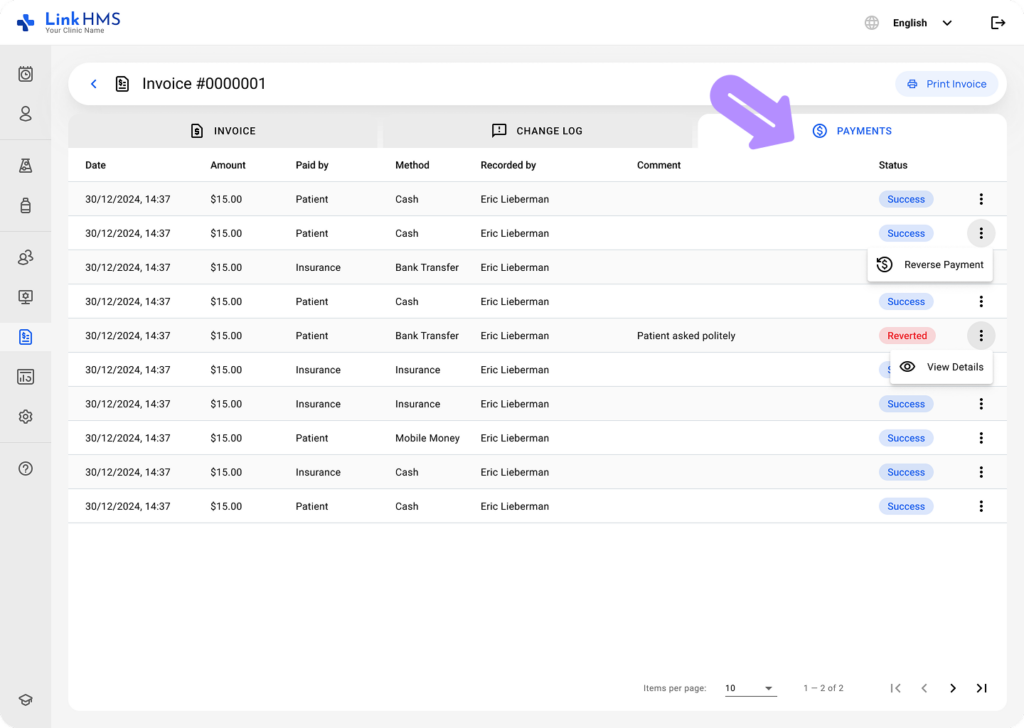
- Open the Payments tab to view amounts paid, payment methods, and statuses.