LinkHMS helps your facility provide well-organized, continuous, and high-quality care throughout a patient’s hospital stay.
💡Notes
To proceed with the following workflow, ensure that you have started an admission. Find the additional instructions on How to make an inpatient admission.
Accessing the Created Inpatient Admission
- Go to the Patient’s Profile and select the Admissions tab.
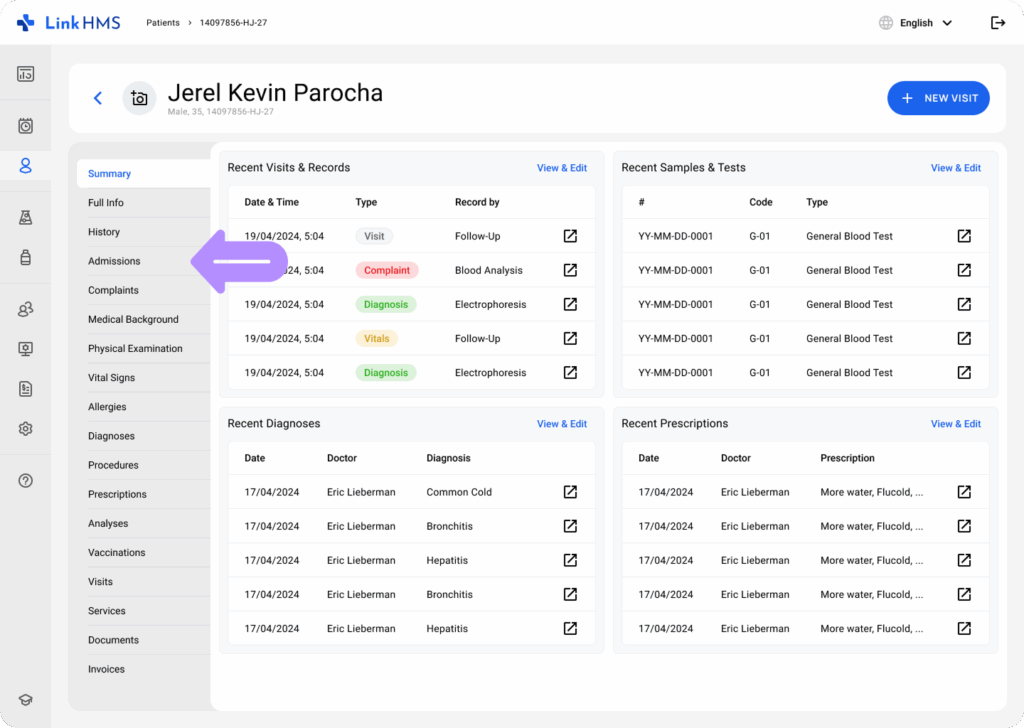
- Find a list of the patient’s active and previous admissions. It displays numbers, start and end dates, doctors, and discharge details. To continue, select the active admission labeled with the On Admission status.

Managing the Admission Workflow
💡Notes
The admission remains open throughout the entire hospital stay and can be viewed, updated, and edited at any time by authorized medical personnel. LinkHMS functionality allows you to easily navigate between necessary tabs to document activities and essential information.
- Use the following tabs to complete your admission-related tasks.
- Info & Inpatient Journal
- Fluids Chart
- Complaints
- Questionnaires
- Medical Background
- Physical Examination
- Vital Signs
- Allergies
- Diagnoses
- Procedures
- Prescriptions
- Analyses
- Vaccinations
- Comments
- Services
- Discharge
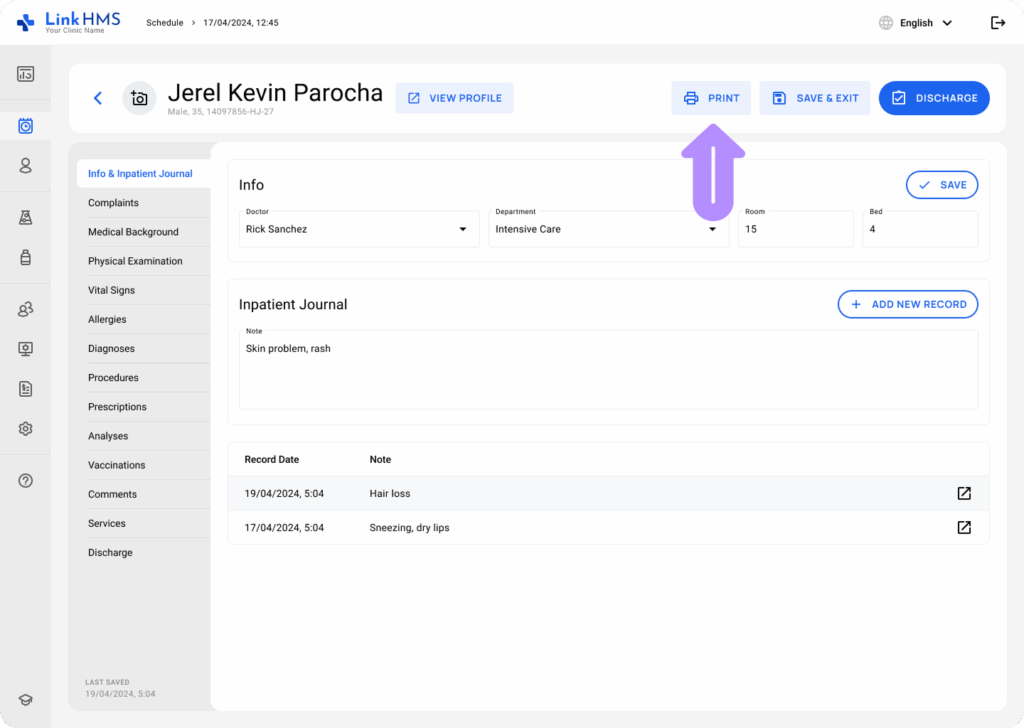
- You can easily switch between all the required tabs to fill in the data or even exit the admission features to return when needed. Click the Save & Exit button to save your progress and close the form. You can return to the admission records as many times as required to update or complete them later.
- Also, use the Print button to print the admission records even before the discharge.
💡Notes
The Print, Save & Exit, and Discharge buttons are displayed at the top right of every tab. The Discharge button takes you to the Discharge tab to complete the admission.
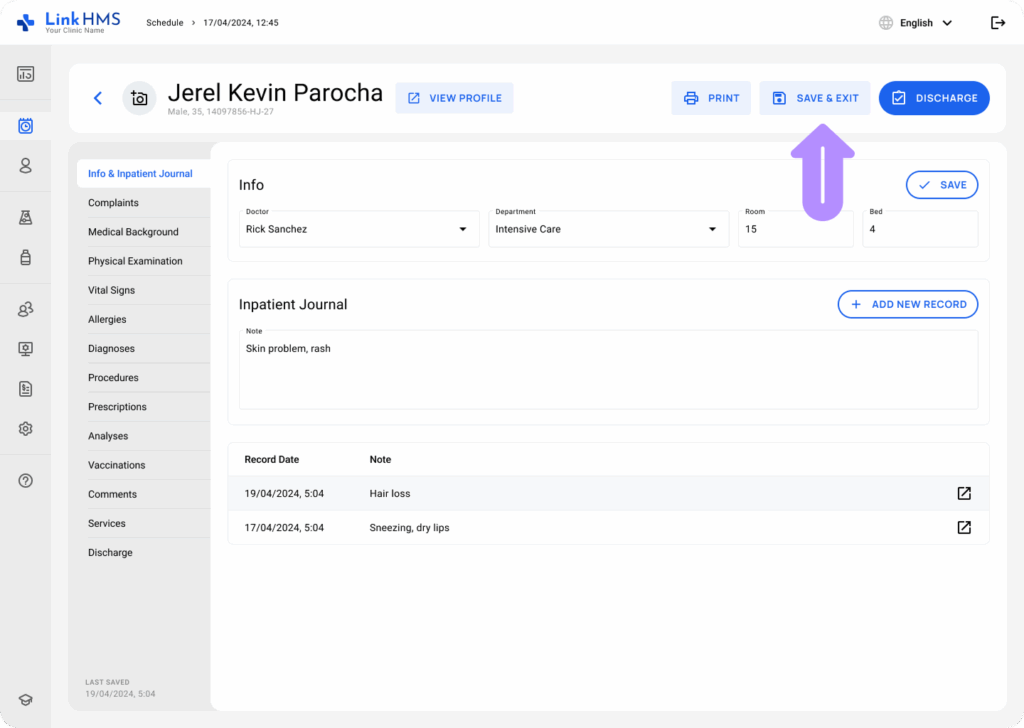
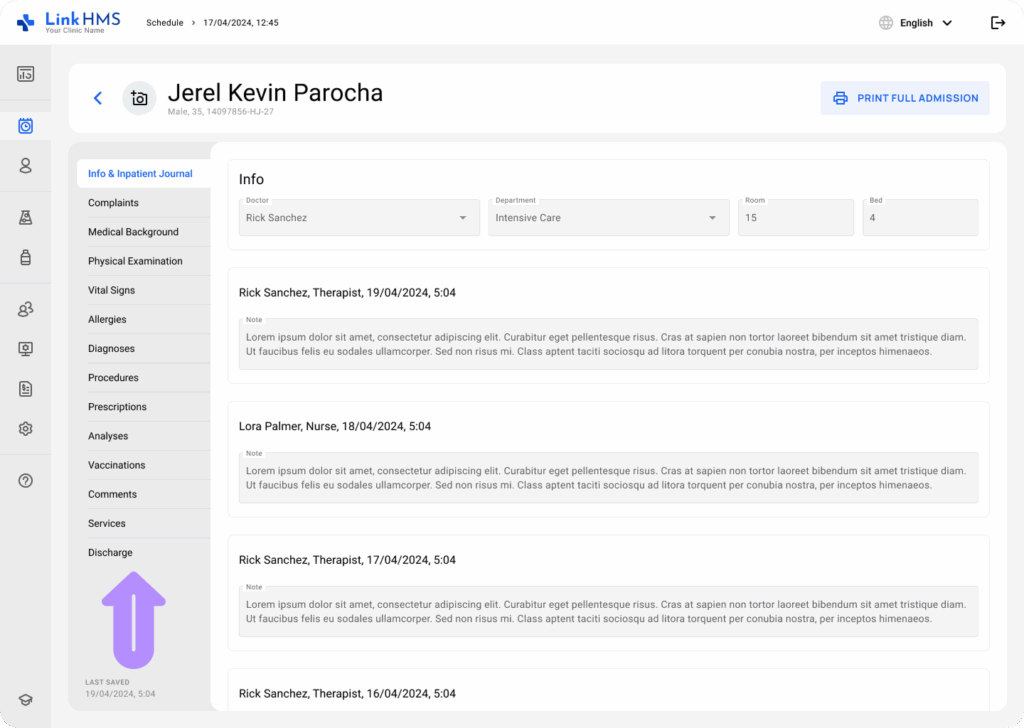
Keeping the Inpatient Journal
- Navigate to the Info & Inpatient Journal tab.
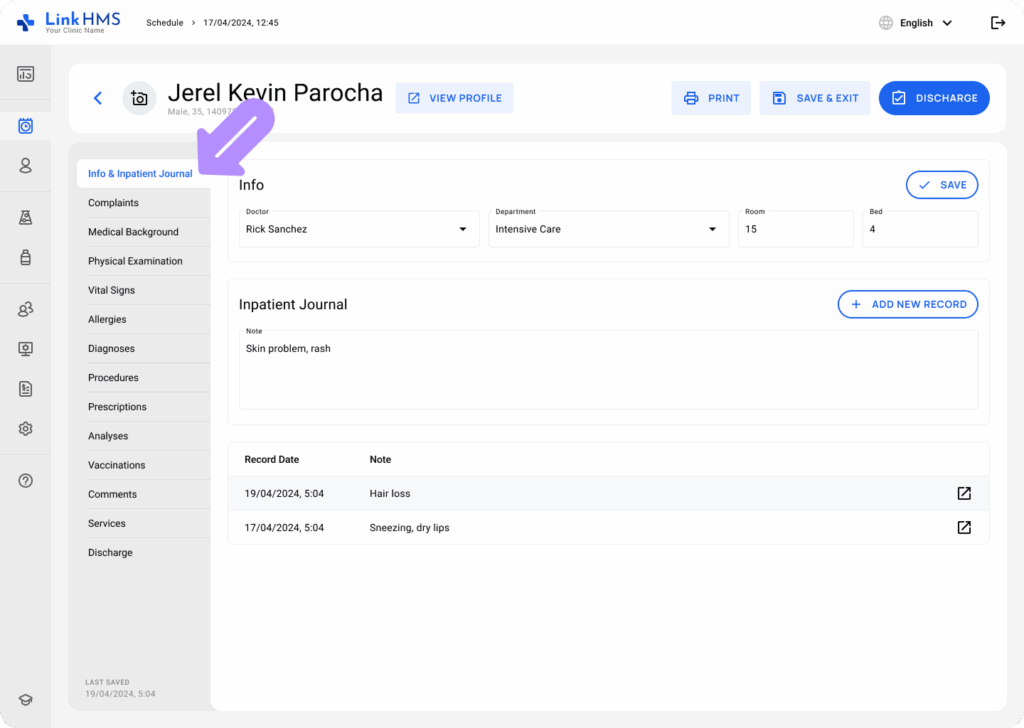
- Record all the necessary notes on the patient’s condition during the admission. Fill in the details and click the + Add New Record button.
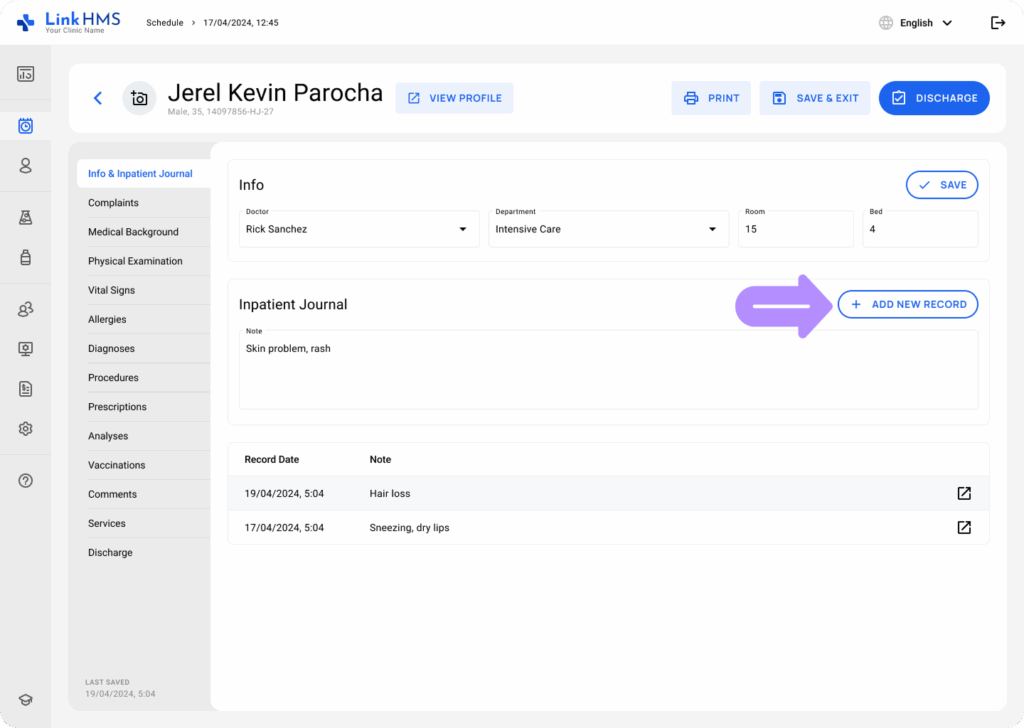
- All the added notes will be listed below, along with the corresponding record dates. Use the navigation arrow to open the detailed note record.
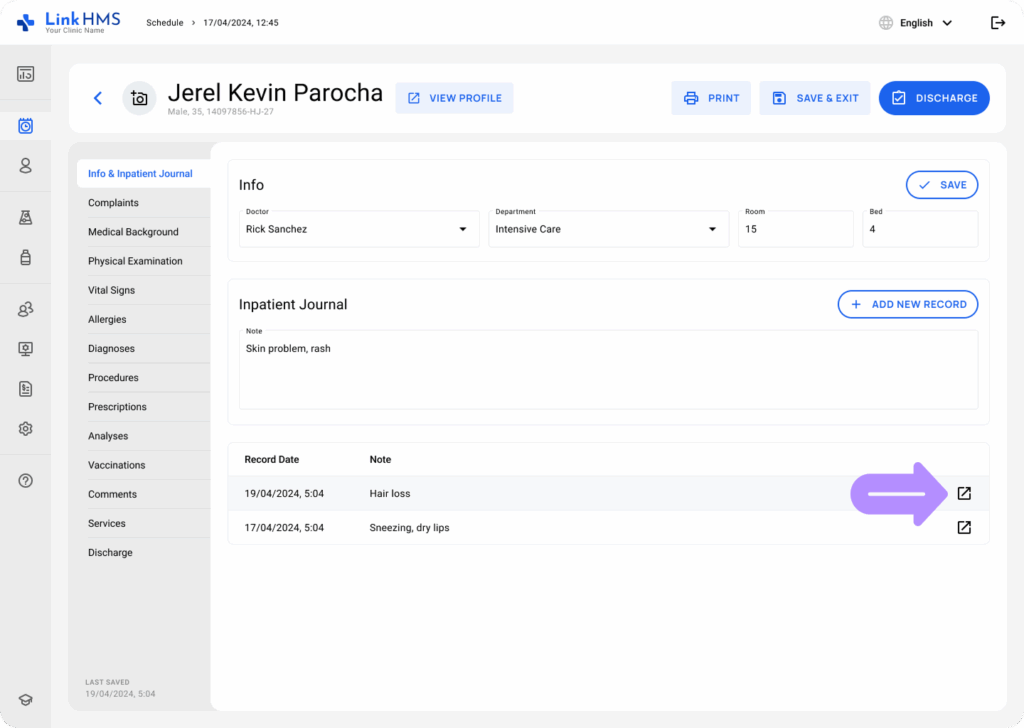
- In this tab, you can also update admission information, such as the doctor, department, room number, or bed number if changed. Edit the data and click the Save button.

Updating the Fluids Chart Records
- Access the Fluids Chart tab.
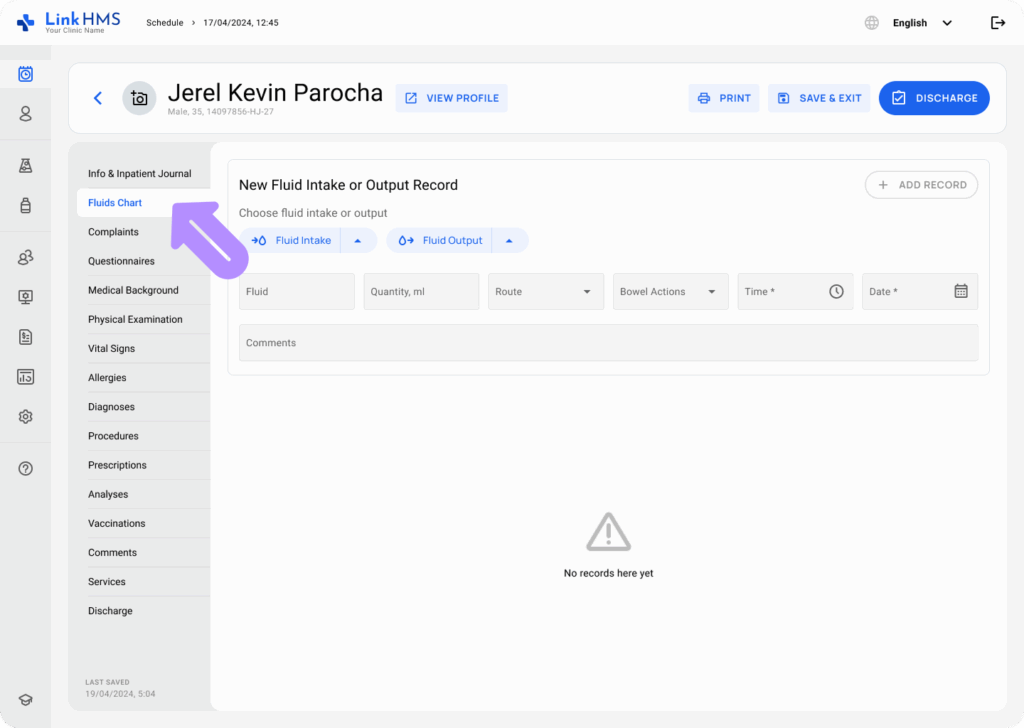
- Choose fluid intake or output from the dropdown menu or type your own.
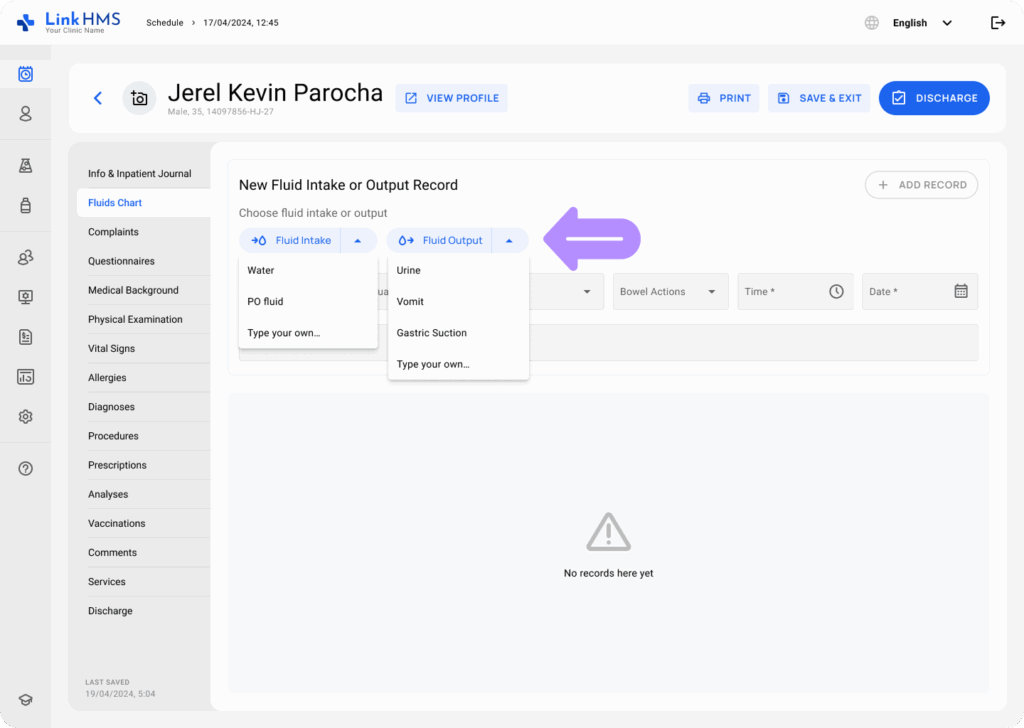
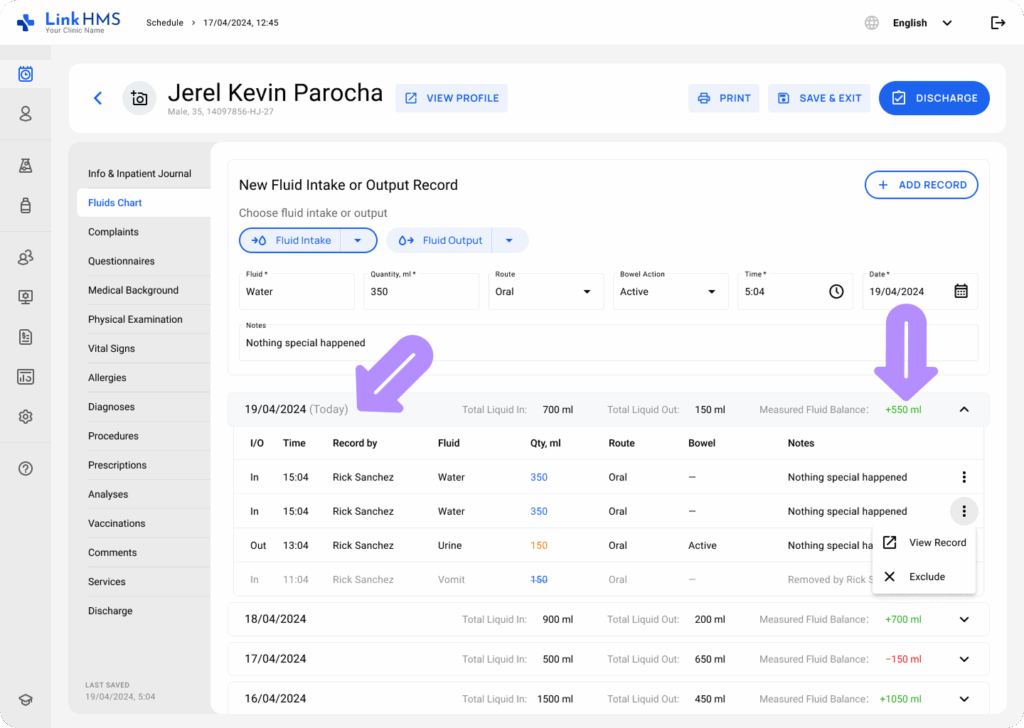
- Fill in the required field on the chosen fluid (quantity, route, bowel action, time, date, and notes) and click the + Add Record to include a new fluid intake or output record.
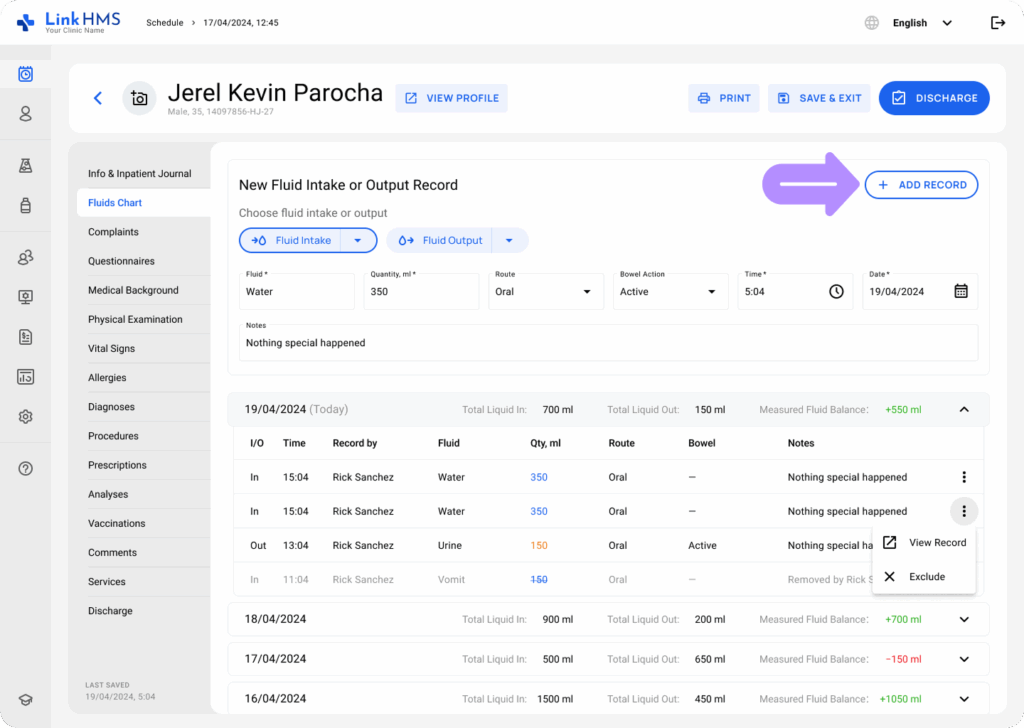
- View details on added fluid intake and output records by date and check the measured fluid balance.
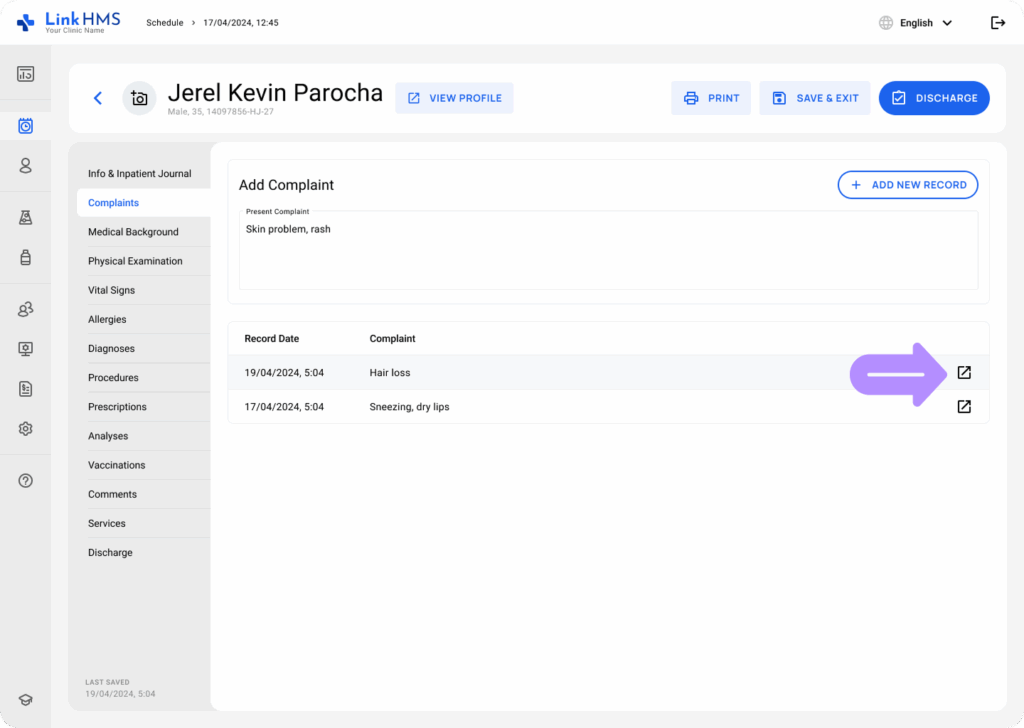
Adding Complaints
- Open the Complaints tab.
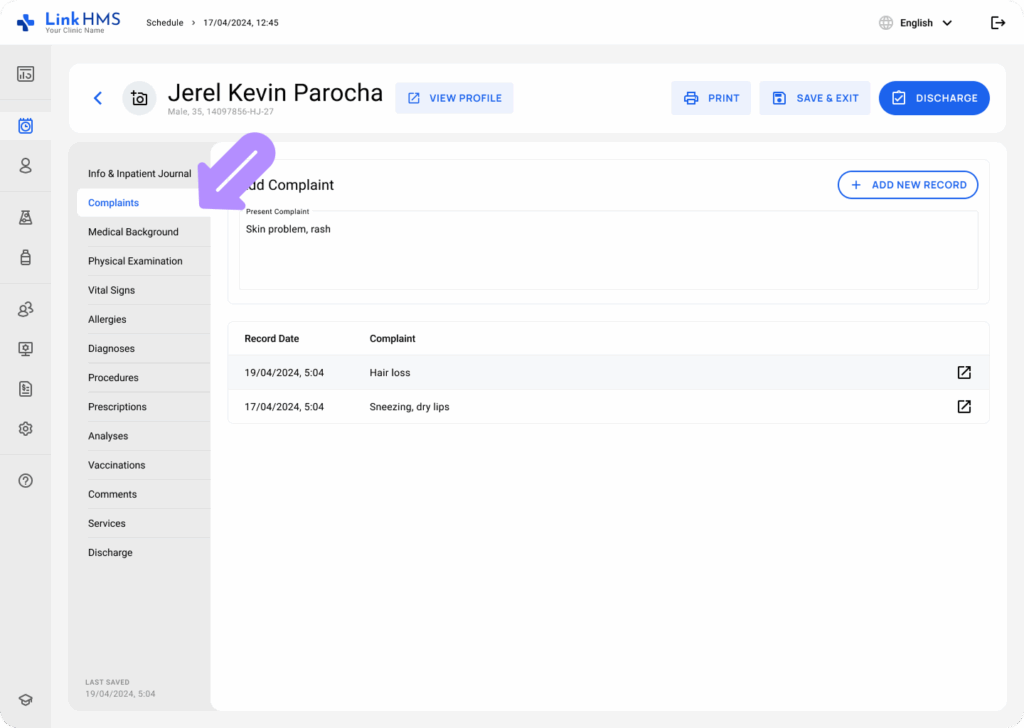
- Fill in the present complaints and click the + Add New Record button to save the patient’s complaint.
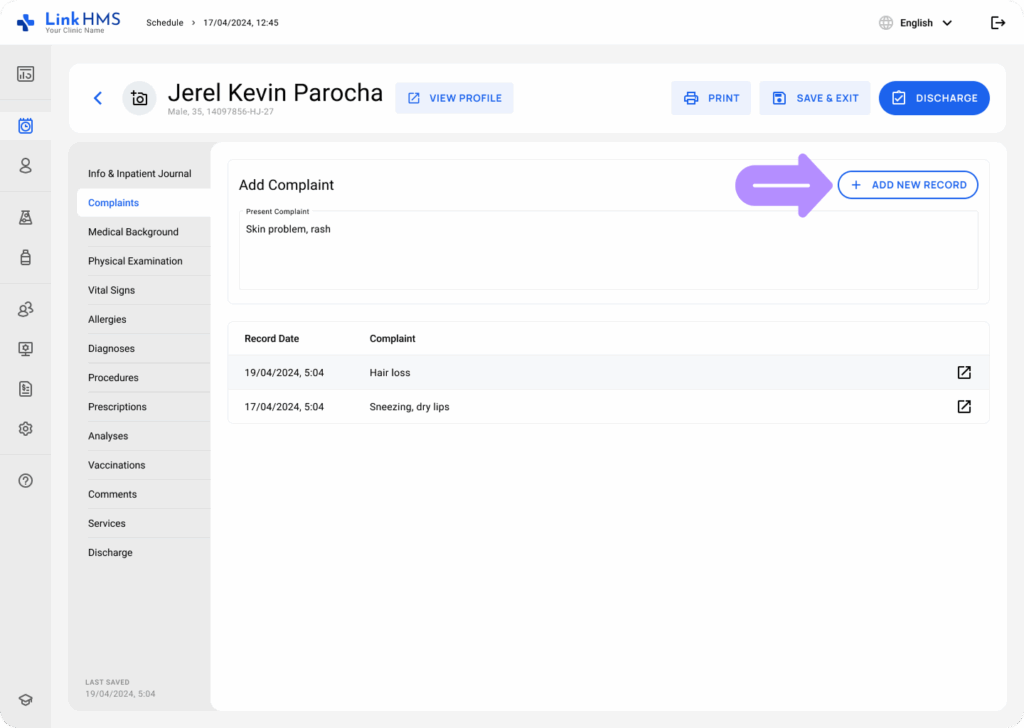
- Find all the saved complaints by dates below and use the navigation arrow to open the detailed record.
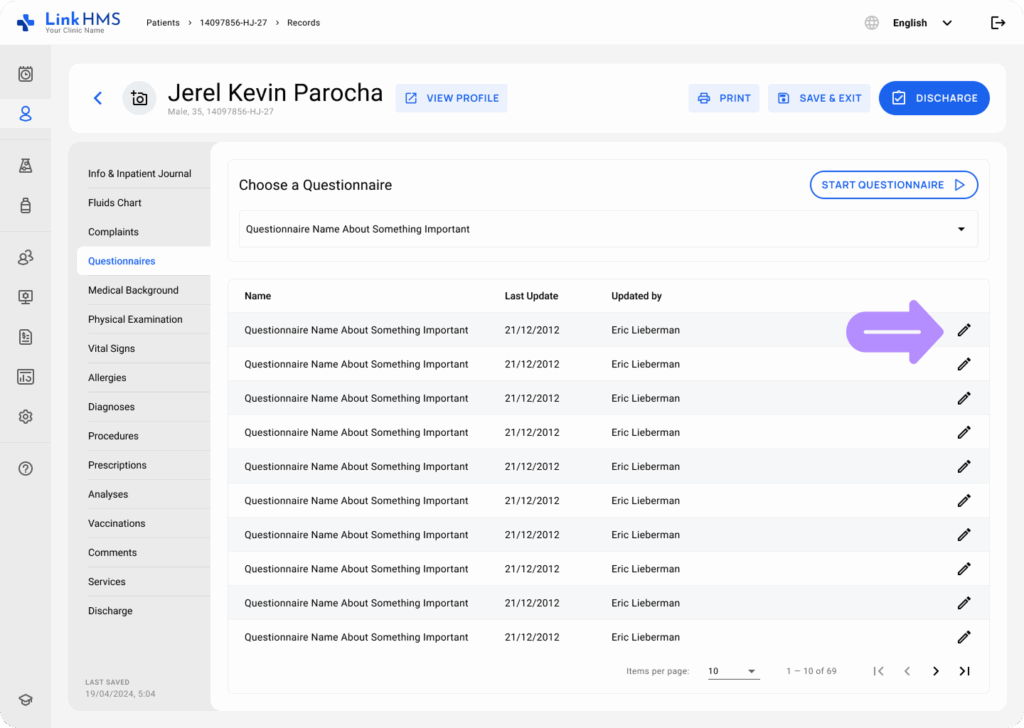
Starting the Questionnaires
- Click on the Questionnaires tab.
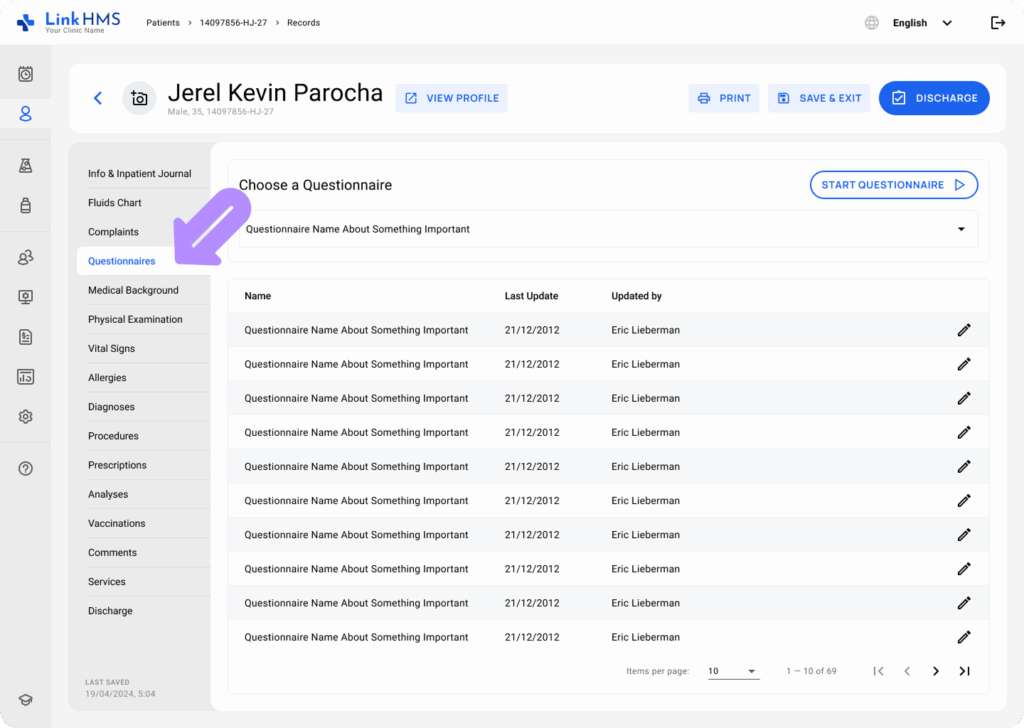
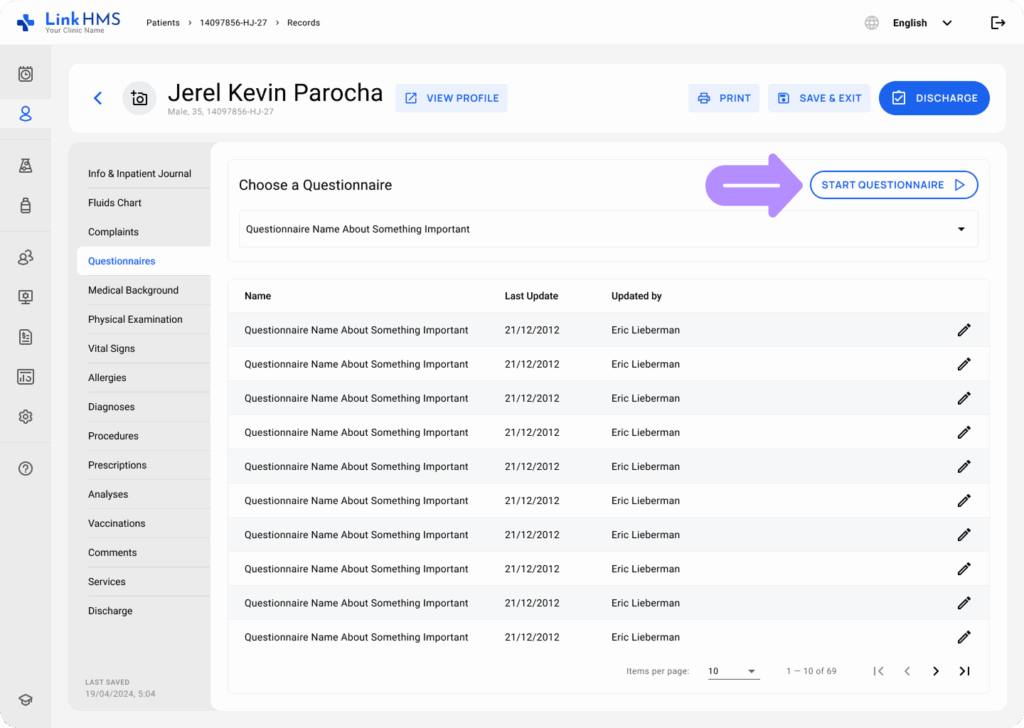
- Choose the required questionnaire from the dropdown menu and click the Start Questionnaire button.
- Fill in the answers for listed questions and click the Update & Close button.
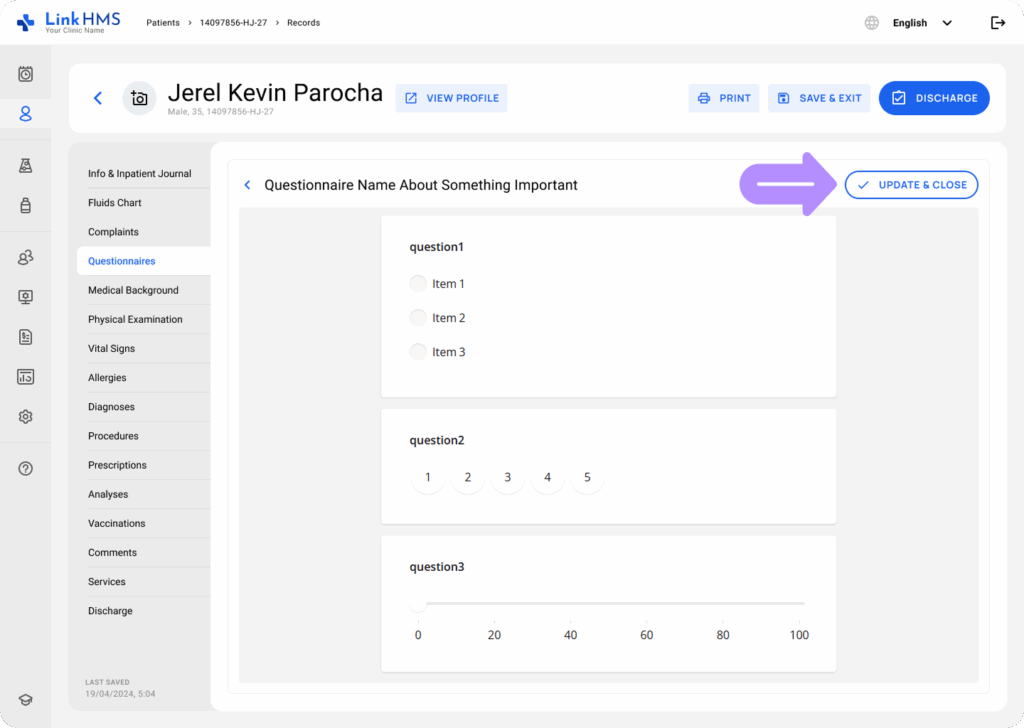
- Review and update previous questionnaires by opening the detailed record.
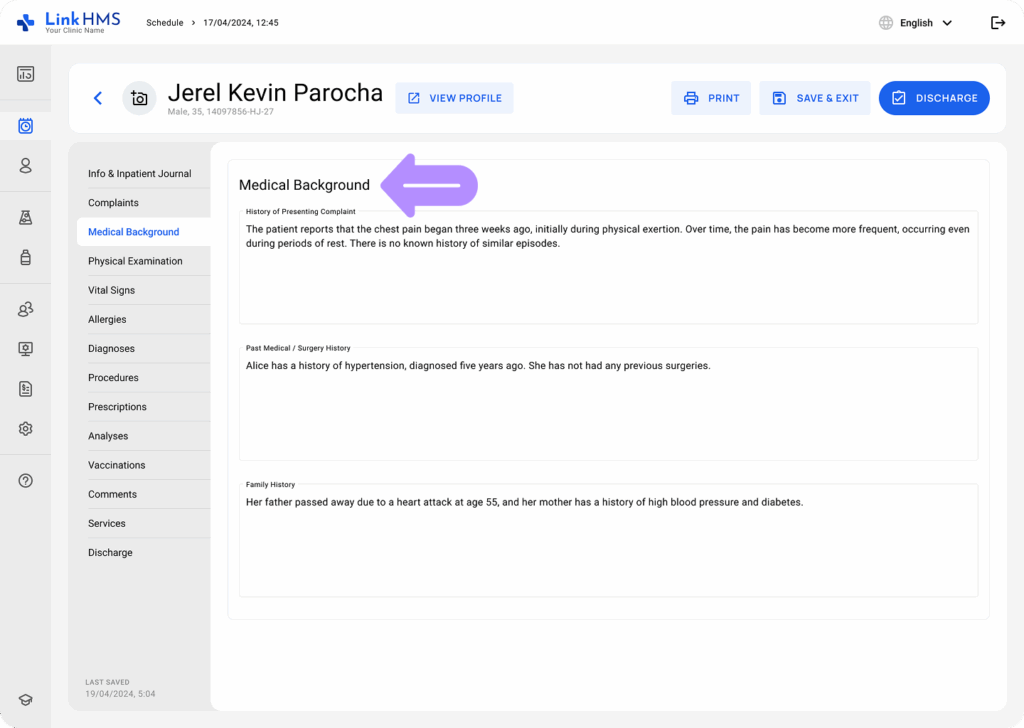
Using the Patient’s Medical Background Info
- Go to the Medical Background tab.
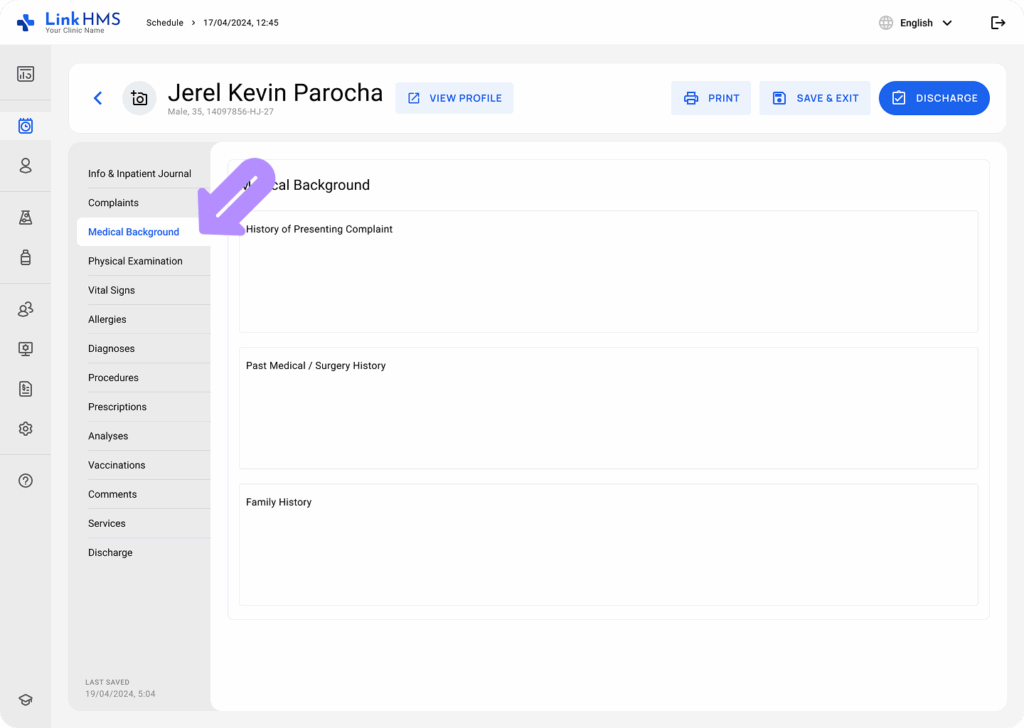
- There, you can enter notes for the following aspects: History of Presenting Complaint, Past Medical/Surgical History, and Family History.
💡Notes
Medical background for existing patients is filled automatically by the system from the previous records, though you can also add new findings.
Conducting the Physical Examination
- Navigate to the Physical Examination tab.
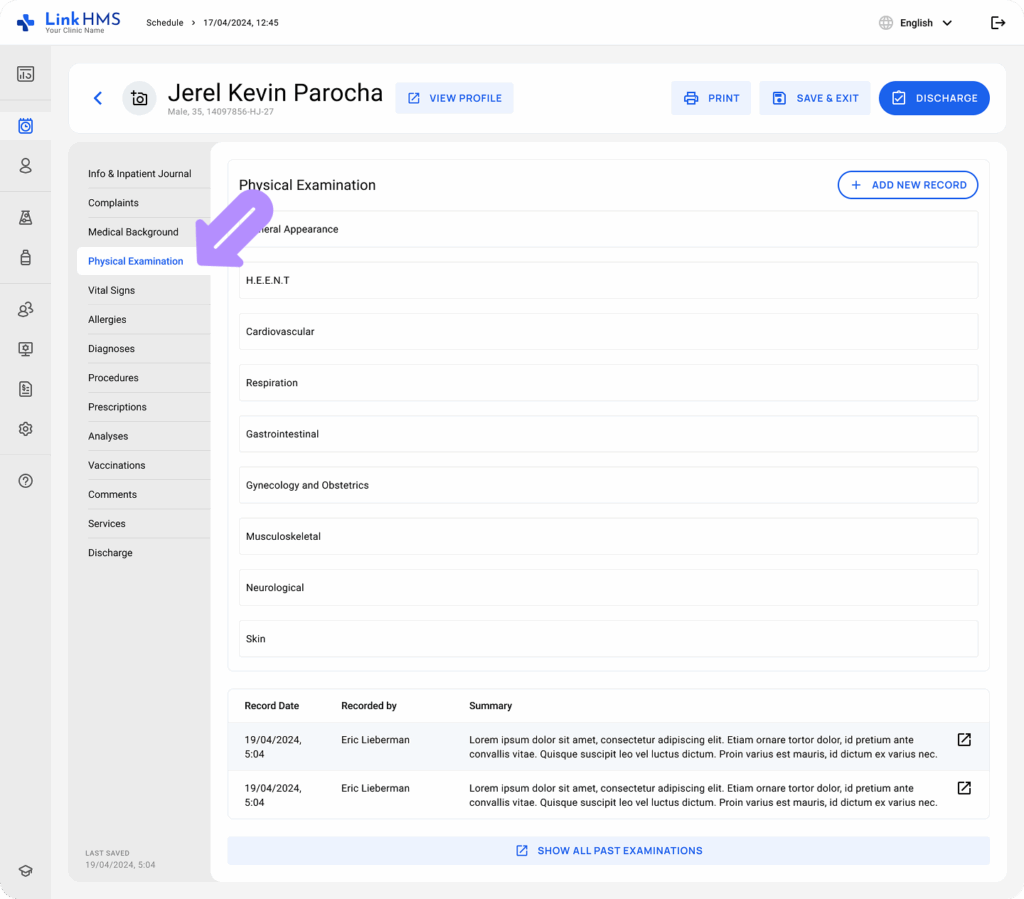
- As you conduct the examination, you can add notes by following the fields: General appearance, H.E.E.N.T, Cardiovascular, Respiration, Gastrointestinal, Gynecology and Obstetrics, Musculoskeletal, Neurological, and Skin.
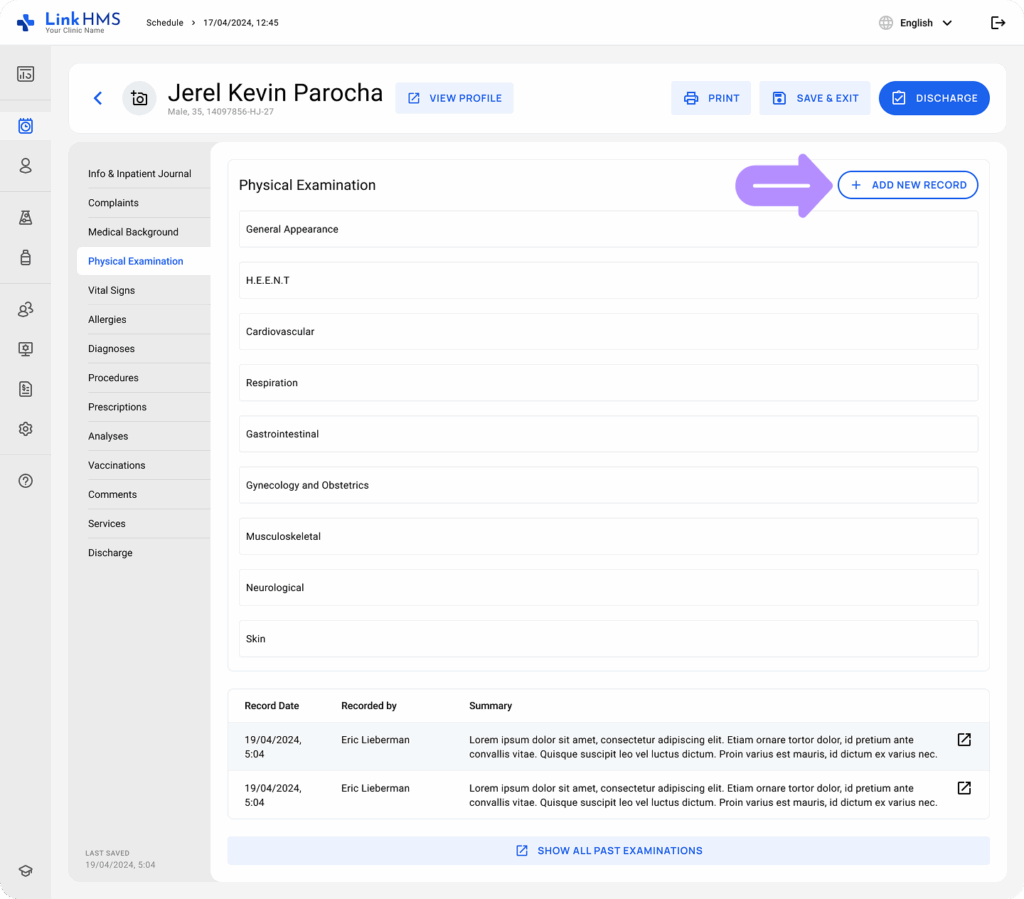
- Fill in all or just some of the necessary fields and click the + Add New Record button to save the gathered information.
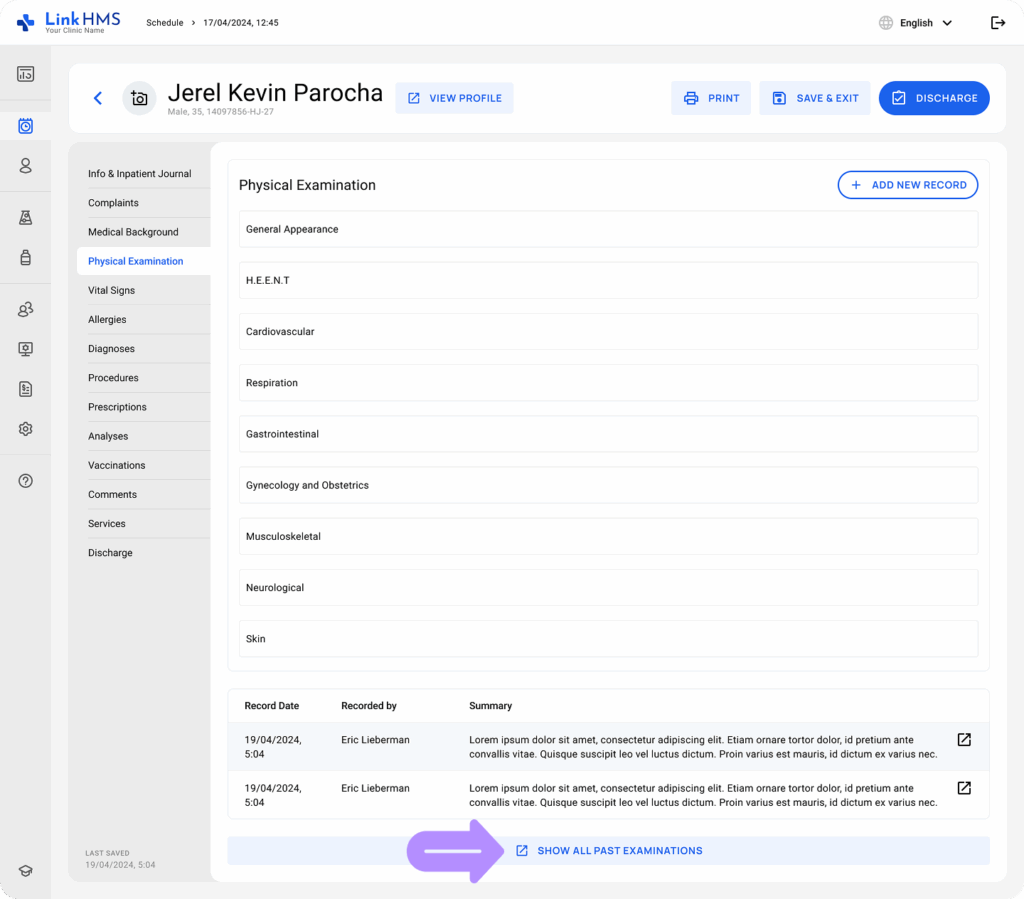
- Review the previous examinations below, which include the date, recorder, and summary. You can use the Show All Past Examination button for the whole record.
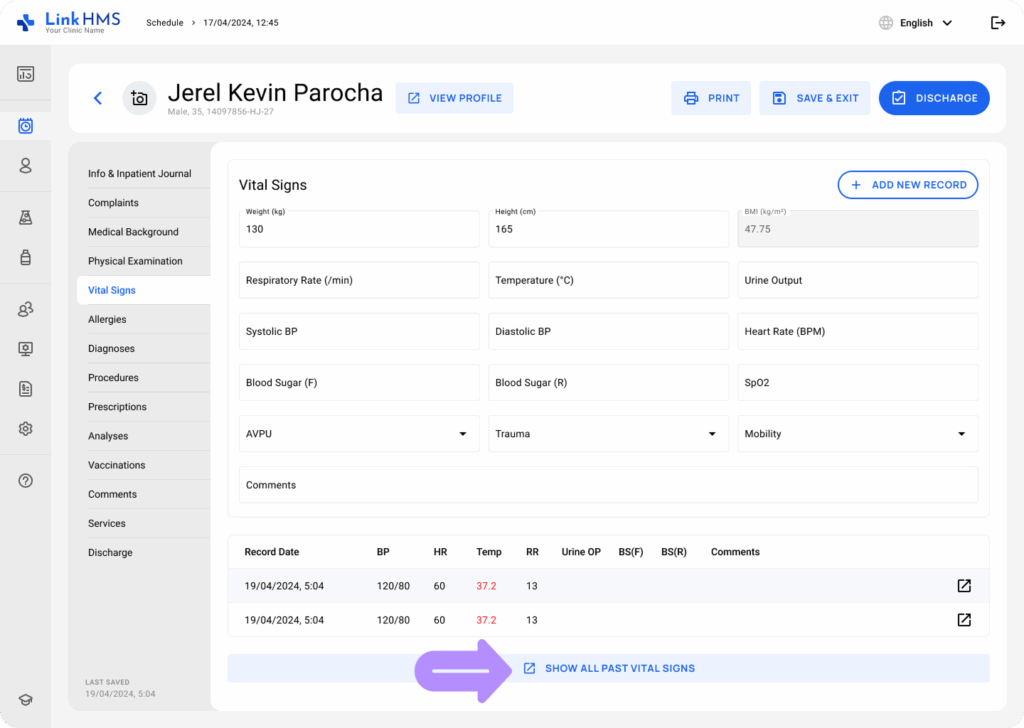
Recording Vital Signs
- Go to the Vital Signs tab.
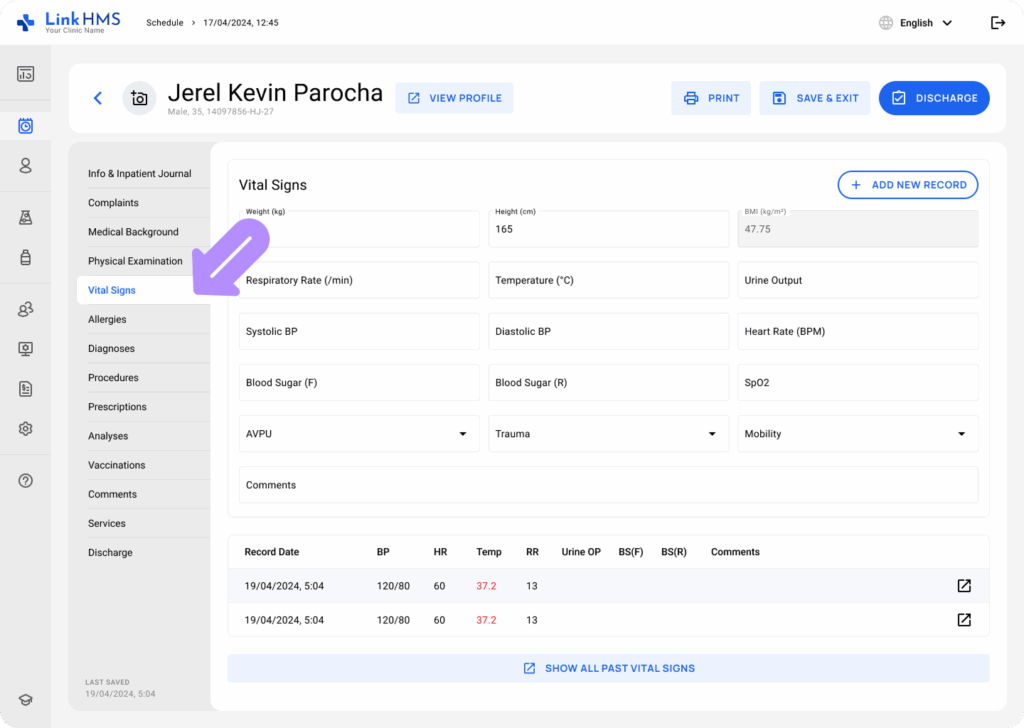
- Measure the following vital signs: Weight (kg), Height (cm), BMI (kg/m²) (automatically counted by the system), Respiratory Rate (/min), Temperature (°C), Urine Output, Systolic BP, Diastolic BP, Heart Rate (BPM), Blood Sugar (F), Blood Sugar (R), SpO2, AVPU (Awake, Verbal, Pain, Unresponsive), Mobility (Yes, No, Partly), Trauma (choose from the dropdown menu).
- Once the data is filled in, click the + Add New Record button to save it.
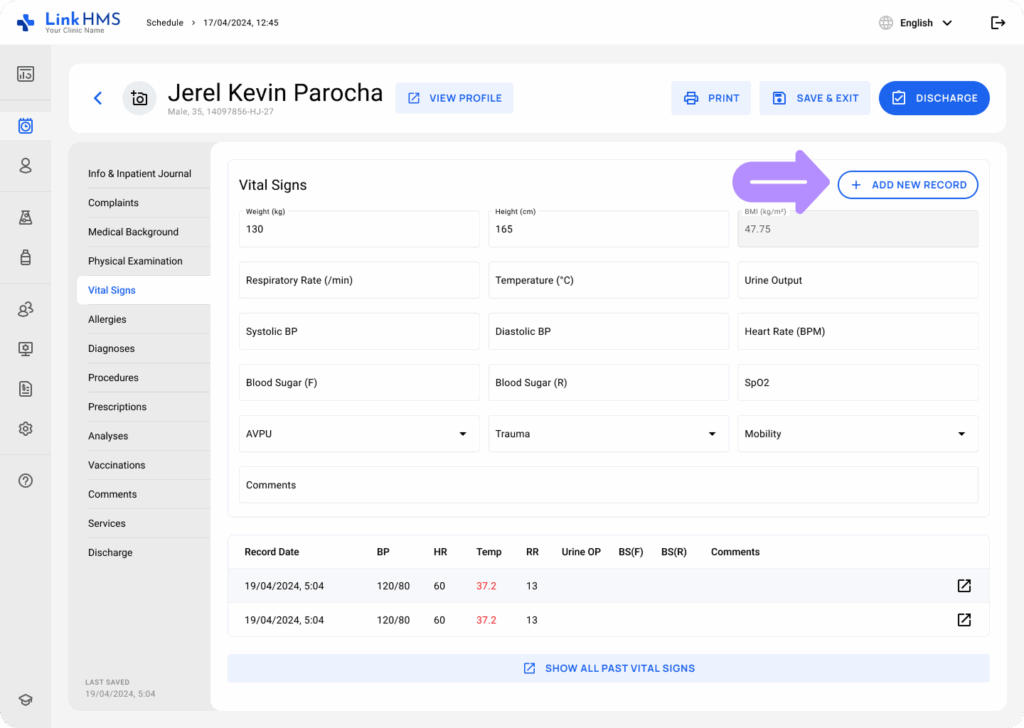
- Review the latest vital signs below, or use the Show All Past Vital Signs button to track the others.
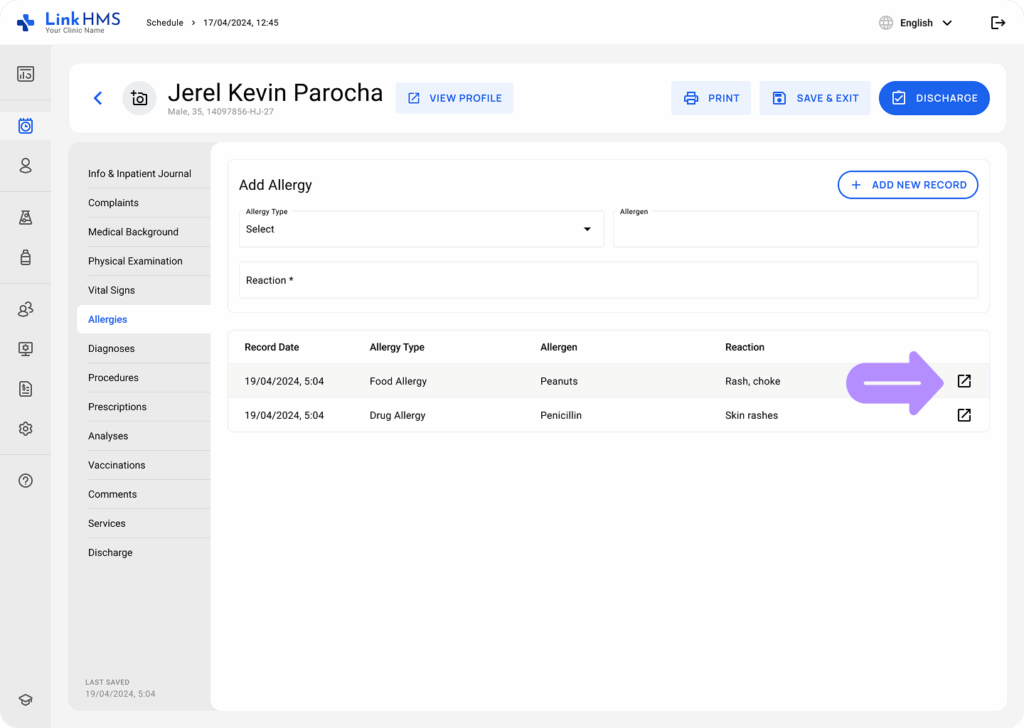
Reporting Allergies
- Navigate to the Allergies tab.
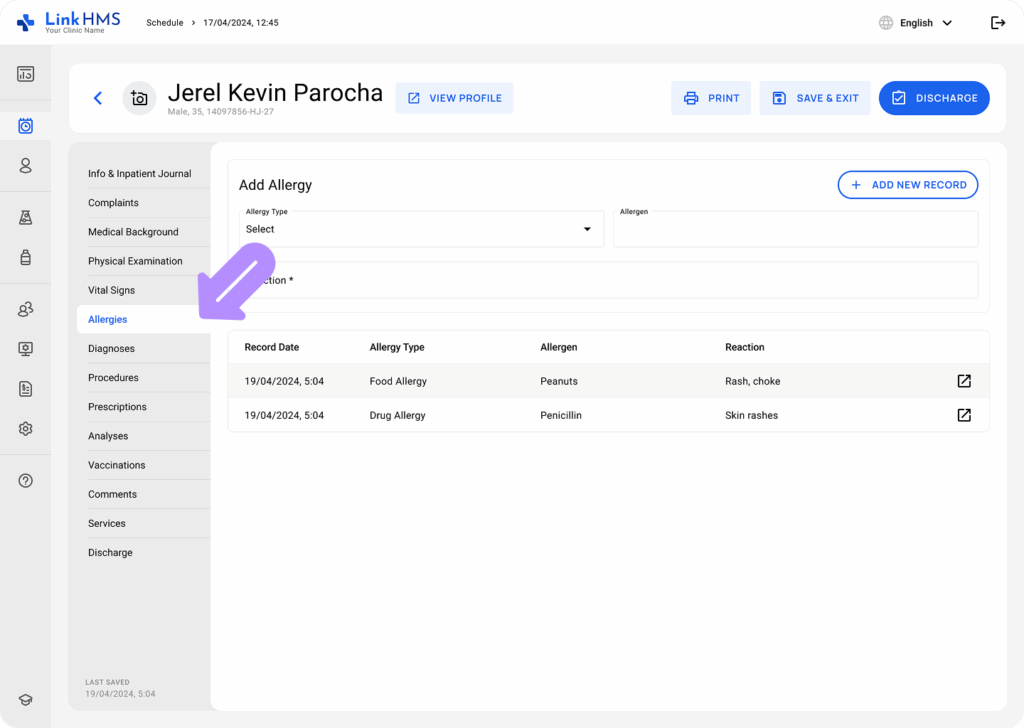
- Record the patient’s allergies (select from the dropdown menu) and specify the allergen and reaction. Click the + Add New Record button to save the information.
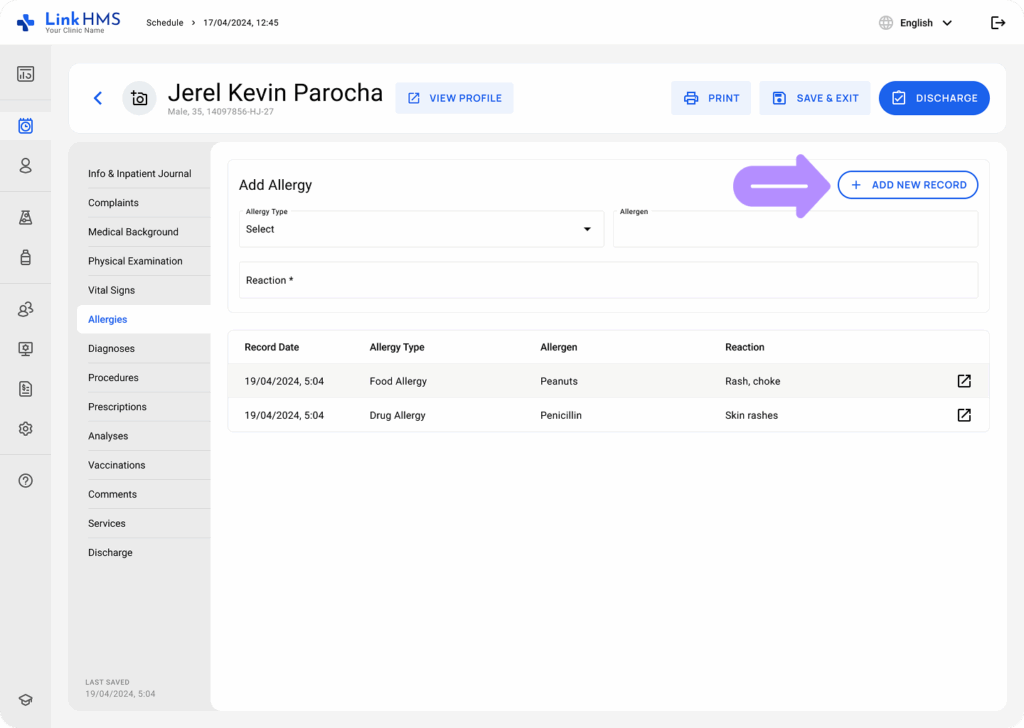
- Review the complete list of allergies below and use the navigation arrow to open the specific allergy record.
Adding Diagnoses
- Open the Diagnoses tab.
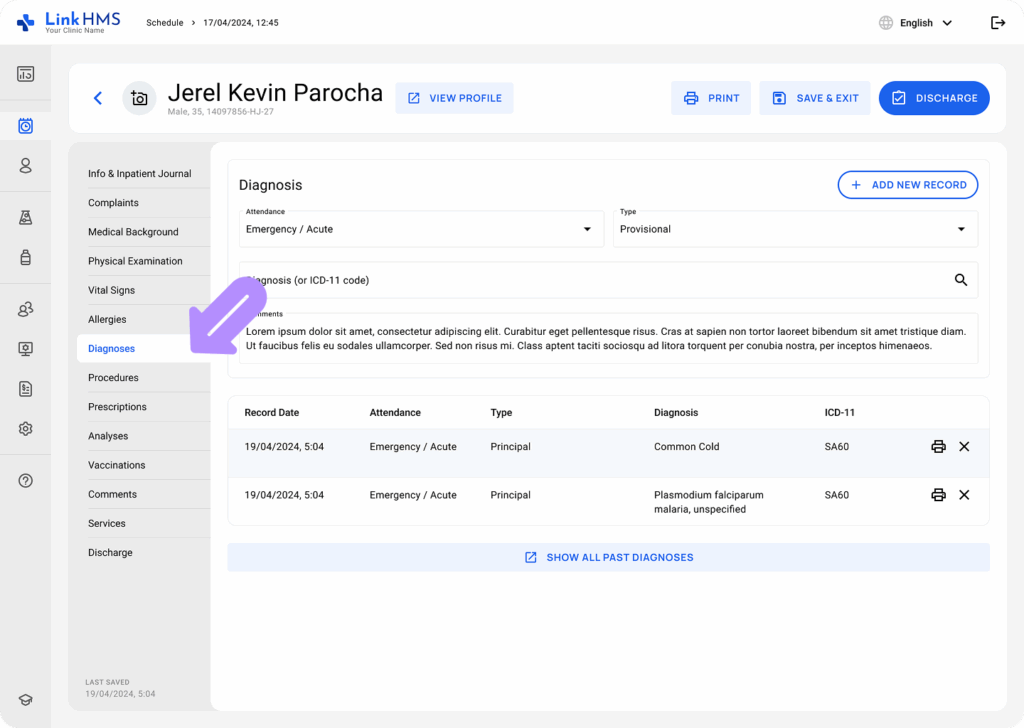
- Record the current diagnosis by adding attendance (select from the dropdown menu) and type (Empty, Provisional, Histopathological, Final). You can also enter an ICD-11 code or start typing to choose from the list. If required, add comments and use the + Add New Record button to save the patient’s diagnosis.
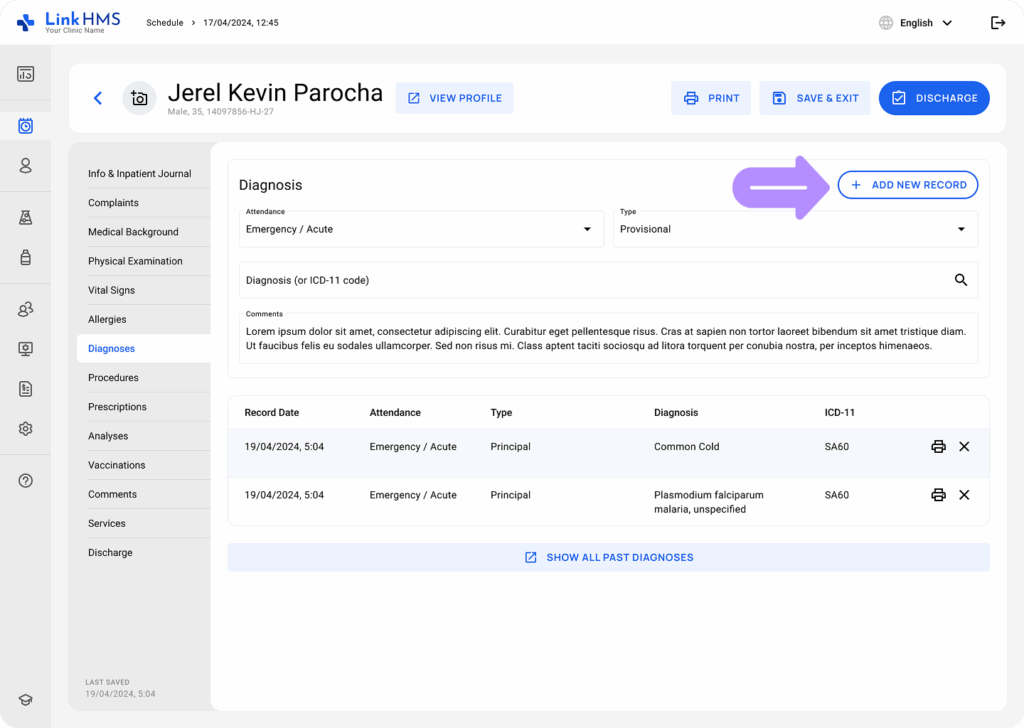
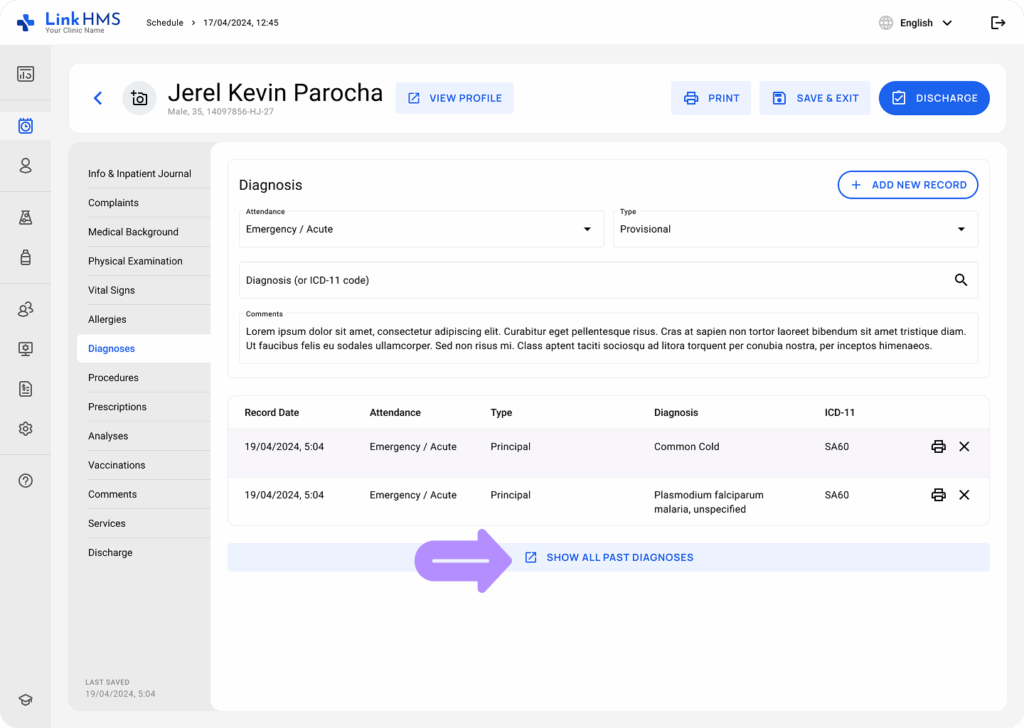
- Check the list of recently added diagnoses in the same tab, or click the Show All Past Diagnoses for the complete diagnoses history.
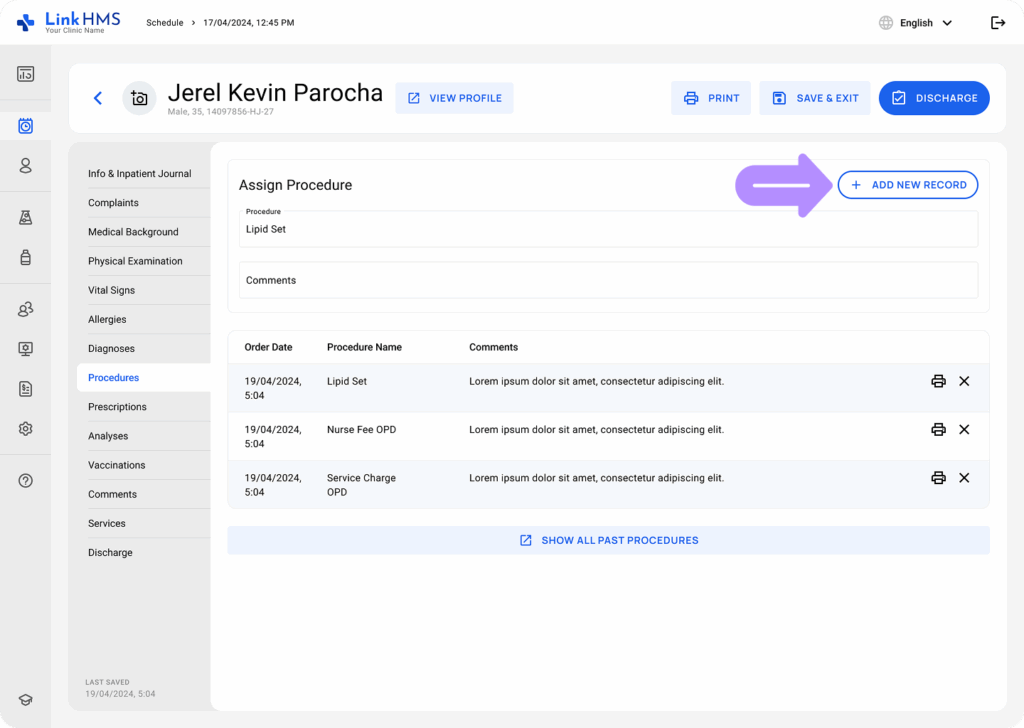
Assigning Procedures
- Go to the Procedure tab.
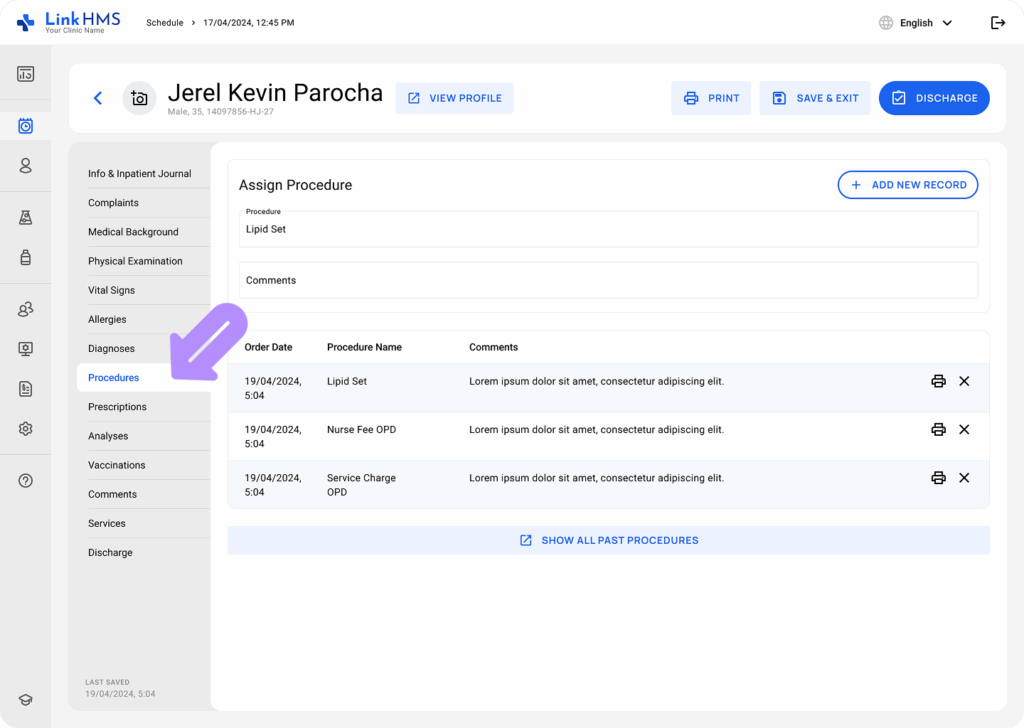
- Request the necessary procedure and leave optional comments. To save the procedure assignment, use the + Add New Record button.
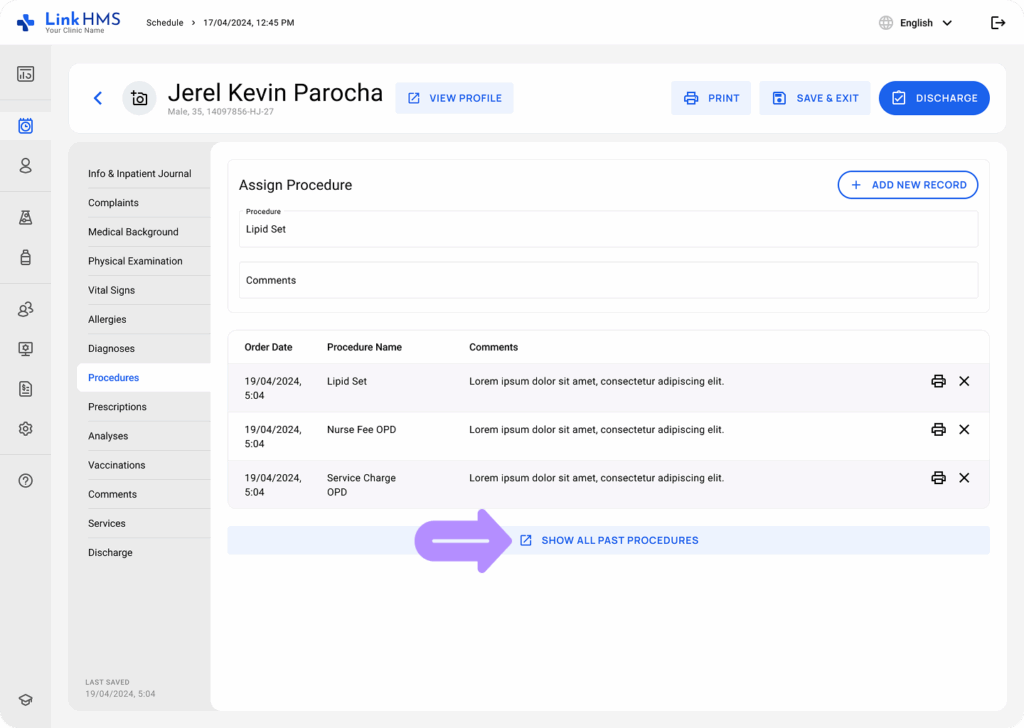
- Review the assigned procedures recorded by date or choose Show All Past Procedures for the full overview.
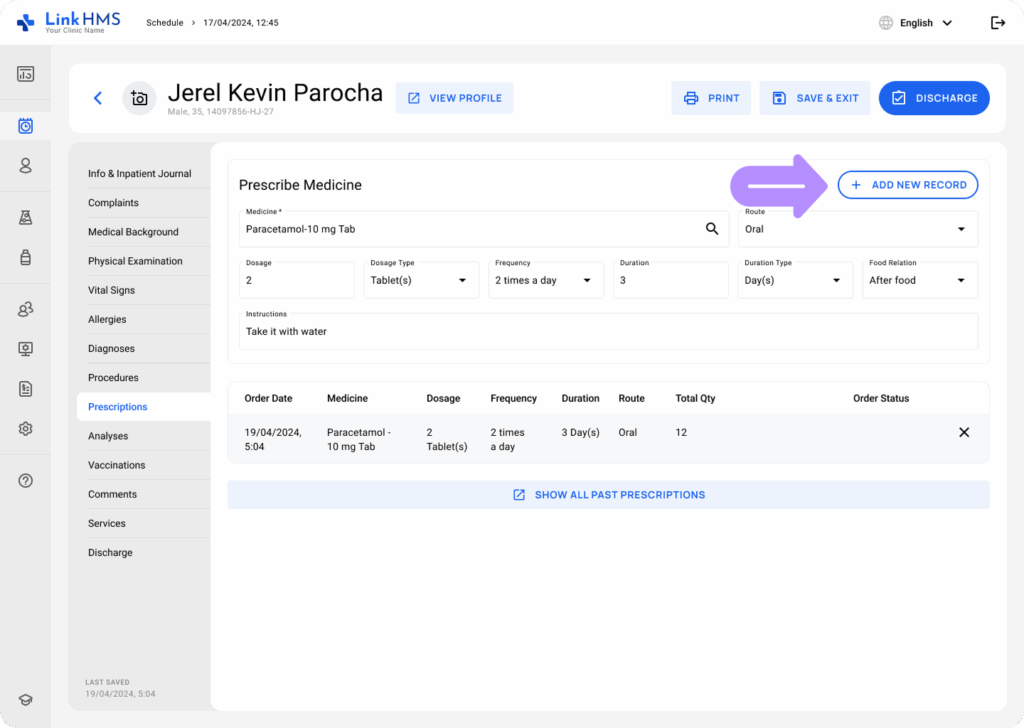
Prescribing Medicine
- Open the Prescriptions tab.
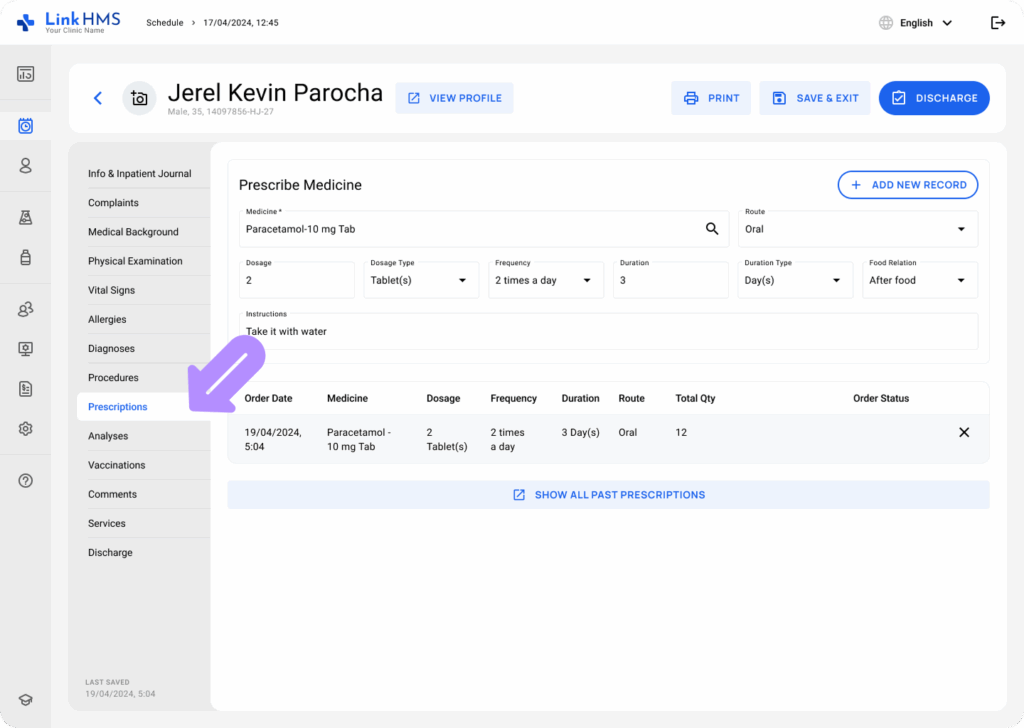
- Select the medicine from the dropdown menu, which displays Item Name, Stock Availability, and Unit Price. Then, complete the prescription details, including Route, Dosage, Dosage Type, Frequency, Duration, Food Relation, and any optional comments. After filling in the necessary fields, click the + Add New Record button to place the prescription order.
💡Notes
Every medication should be added as a separate entry. To prescribe other medicines, simply continue adding new records. All prescription orders are automatically shared within the Pharmacy module for further processing by Pharmacists.
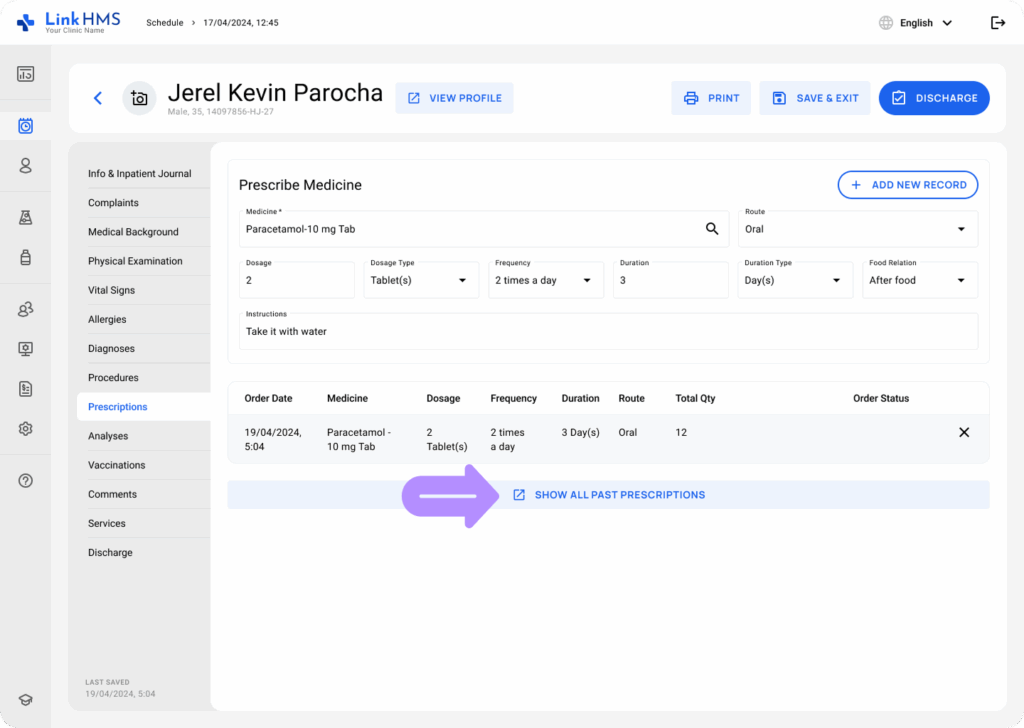
- Find the medicine orders listed below, along with current order statuses, or open the detailed view using the Show All Past Prescriptions button.
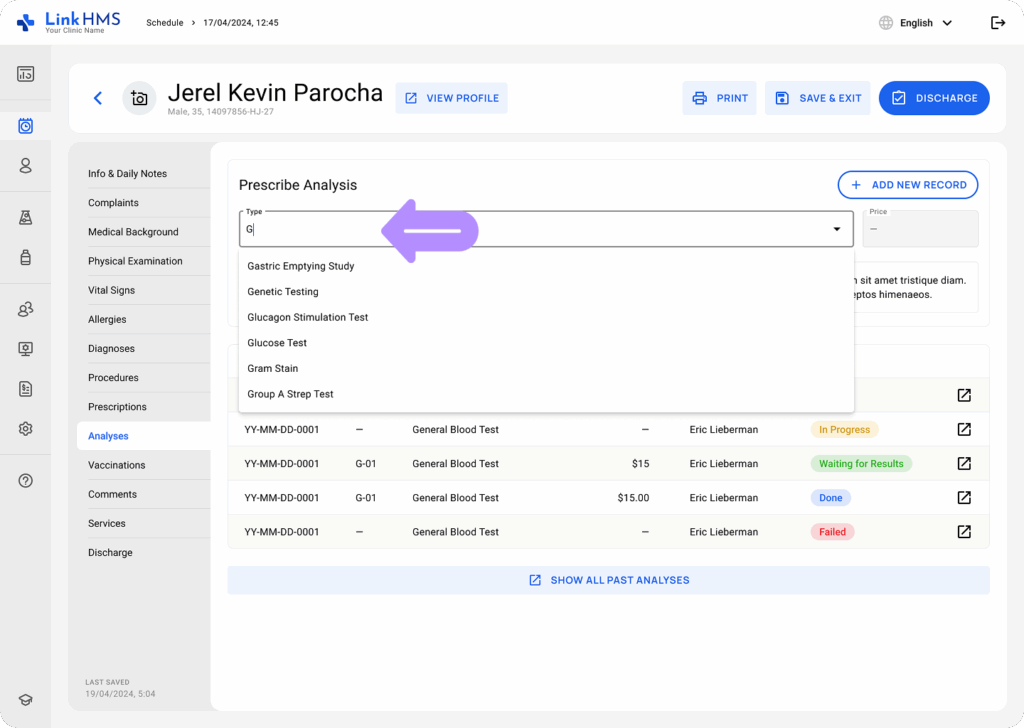
Prescribing Analyses
- Navigate to the Analyses tab.

- Choose the analysis type and add optional comments.
💡Notes
The price is automatically added by the system based on the service price list added in the Administration module.
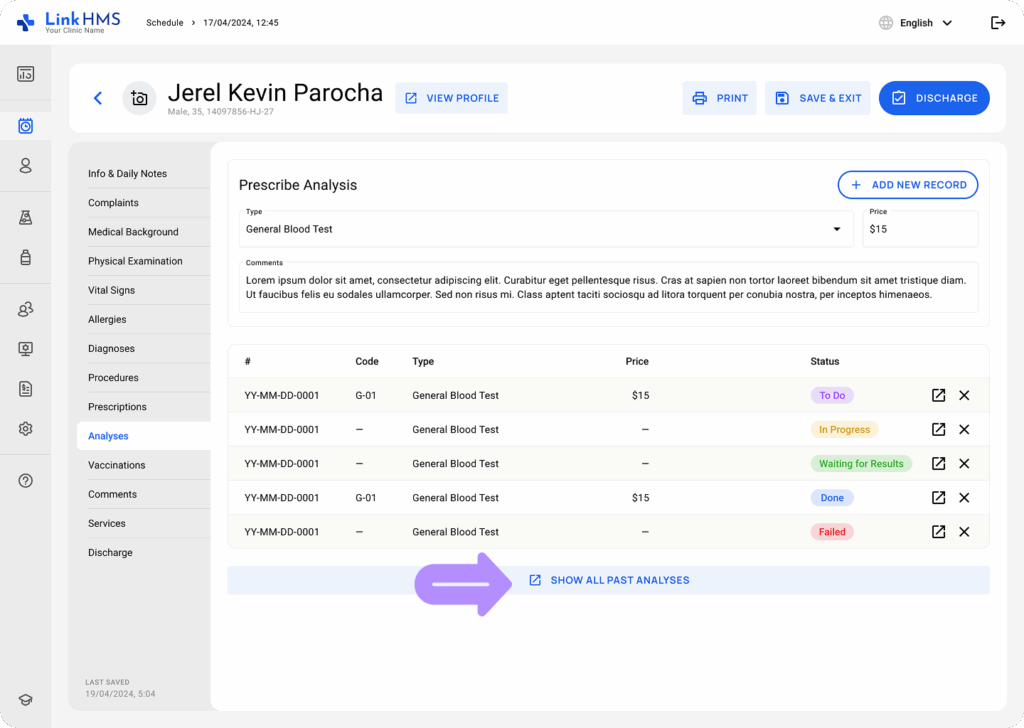
- Click the + Add New Record button to prescribe the chosen analysis.

- Review the assigned lab tests during admission. If required, check other analysis assignments by clicking on the Show All Past Analyses.
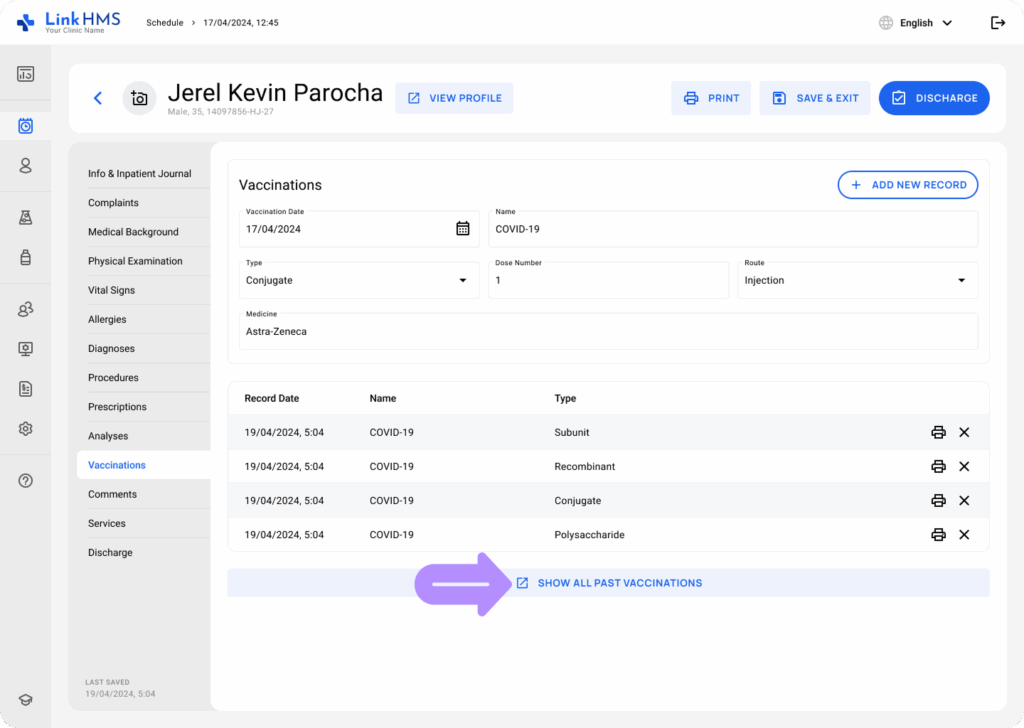
Updating the Vaccination Record
- Open the Vaccinations tab.
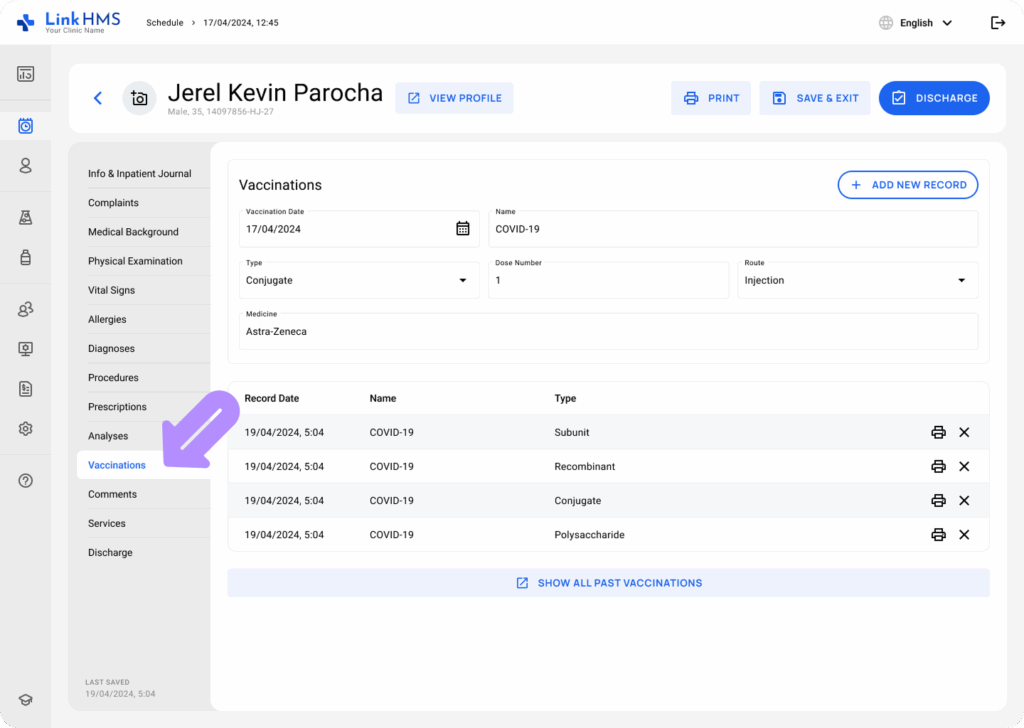
- Select the Vaccination Date, specify the Name, Type (choose from the dropdown menu), Route (Intramuscular, Subcutaneous, Intradermal, Oral, Nasal, and Medicine. Click the + Add New Record button to save the vaccination received during the inpatient’s stay.

- Use the Show All Past Vaccinations button to review previously received ones.
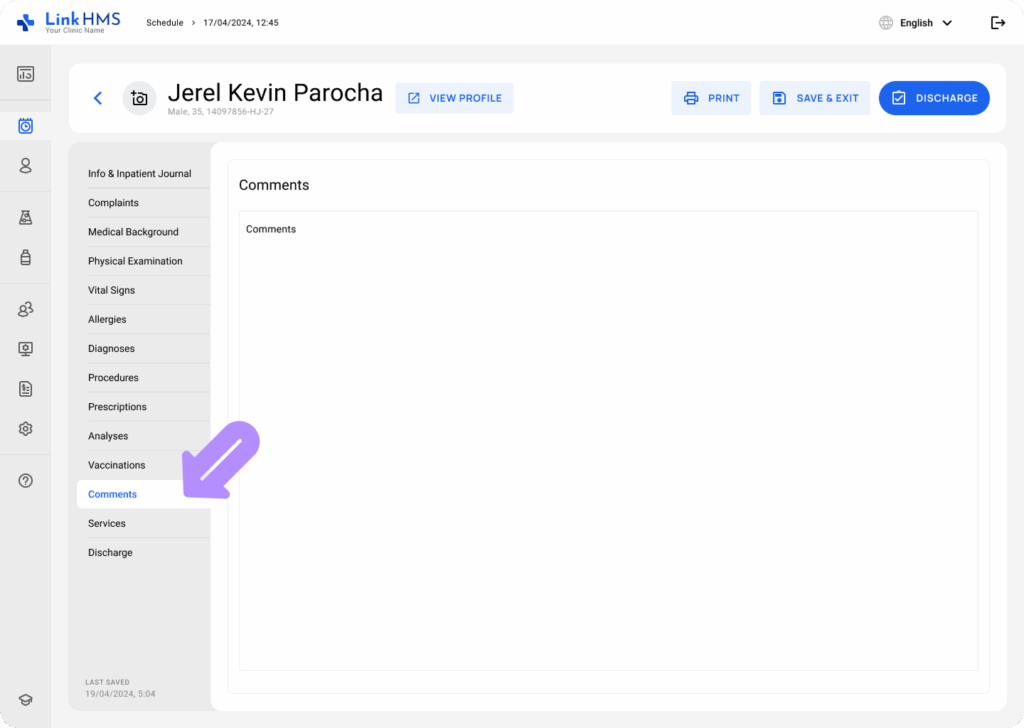
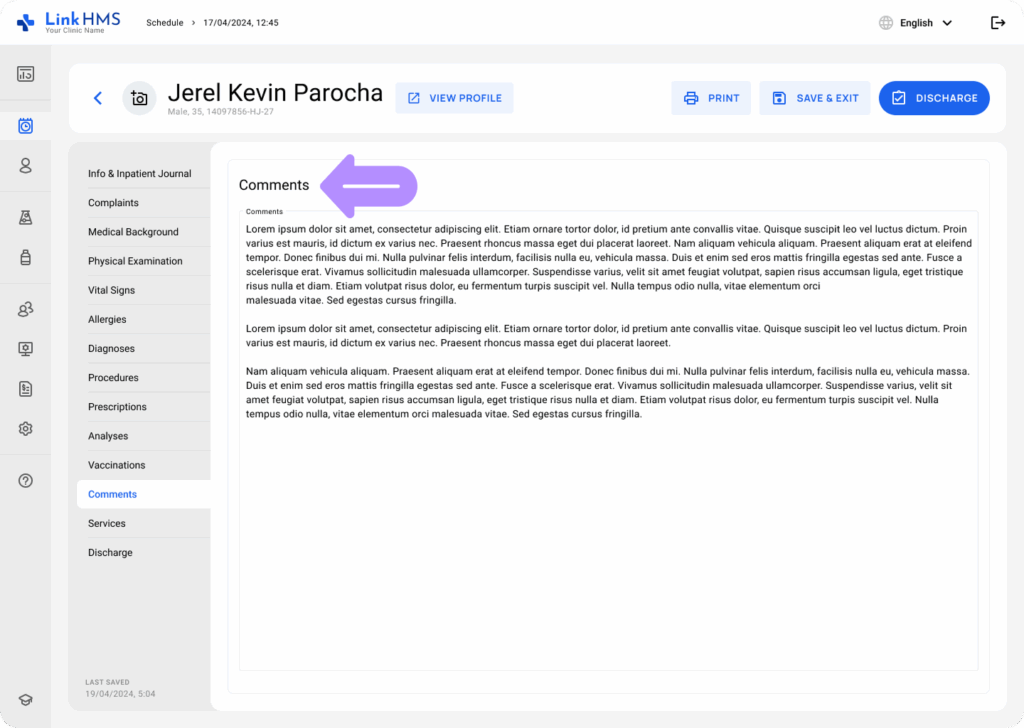
Adding Comments
- Choose the Comments tab.
- Leave comments on the patient’s conditions, diagnoses, responses to treatment, or other admission-related activities.
Recording Provided Services
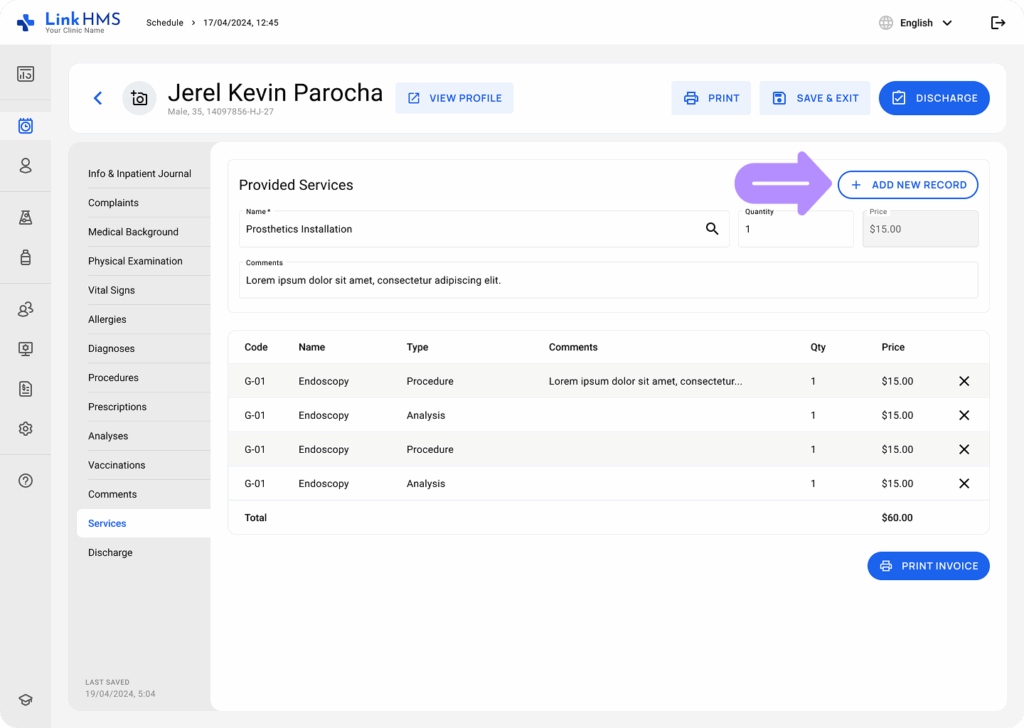
- Select the Services tab.
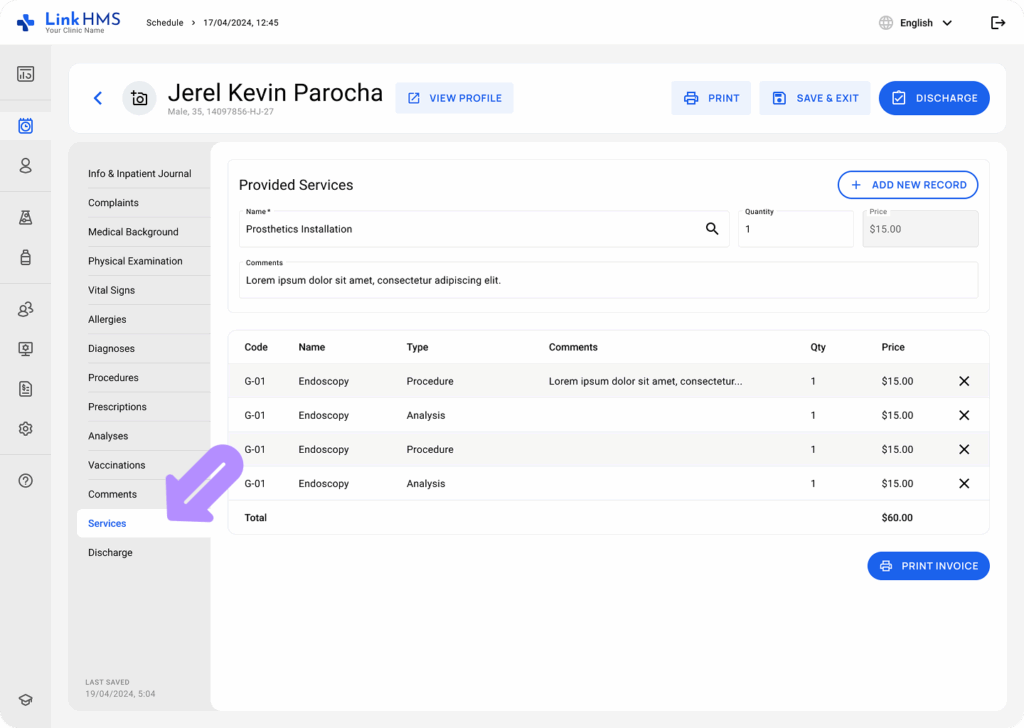
- Add services provided during the admission so they are included in the patient’s invoice. Start typing the service name to choose it from the dropdown menu, specify the quantity, and leave some comments if required. Then click the + Add New Record button to list the chosen service.
💡Notes
The price is automatically added by the system based on the set service charges in the Administration module. Every service appears as a separate record, so you just continue adding more to the patient’s admission invoice within the same tab. For more detailed information, check the guide on How to create inpatient invoices.
- Review the list of all provided services below and edit it by adding as many services as required following the steps above, or remove some by clicking X before the discharge.
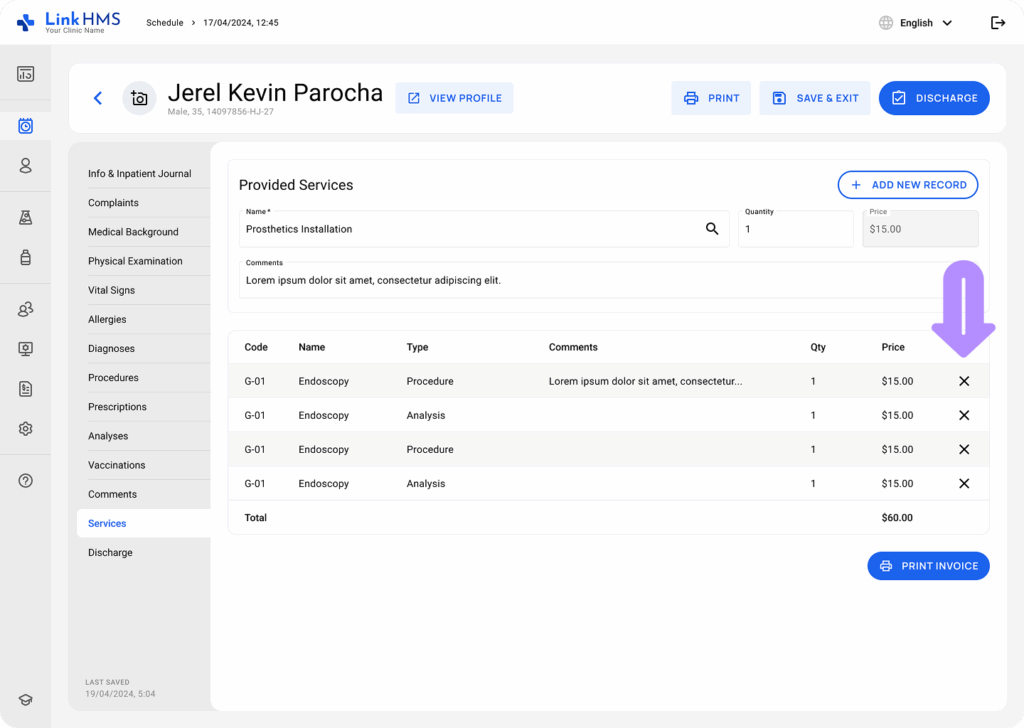
- Also, use the Print Invoice button to preview the PDF invoice to print or download the file.

💡Notes
The system allows you to charge the admission services with a single invoice that can be edited and finalized in the Invoices tab before the discharge.
Completing the Discharge
💡Notes
Perform the discharge at any time once the inpatient treatment is complete and all required records are finalized. View the complete guide on How to discharge the inpatient.
- Navigate to the Discharge tab.
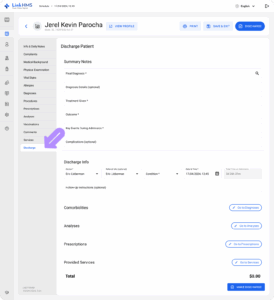
- Alternatively, you can click the Discharge button at the top right of any admission tab to open the Discharge tab.

- Fill in the summary notes and discharge information, review the listed comorbidities, analyses, prescriptions, and services. If you are ready to complete the inpatient admission, click the Make Discharge button.

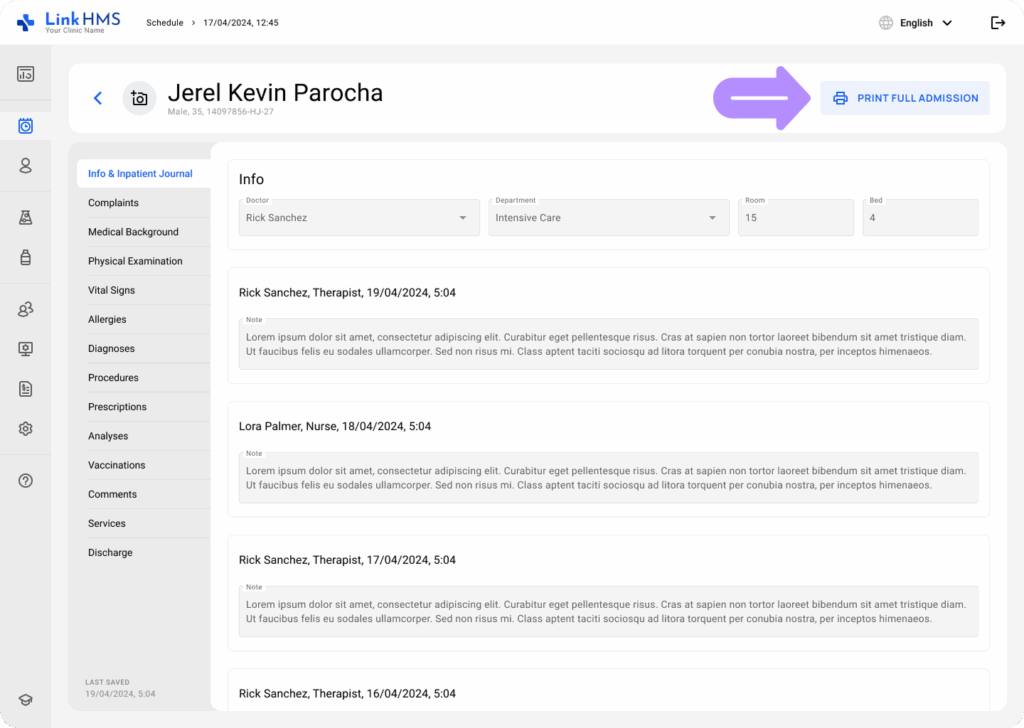
Review the Completed Admission
- Return to the Patient’s Profile and select the Admissions tab.
- Find the required admission and click it to open.
- Switch between the tabs to review all the recorded information.
- Use the Print Full Admission Button to print the discharge summary and the inpatient invoice.