Once the lab test is listed among the clinic services, it becomes available for lab orders added during the visits, admission, or from the patient’s EMR. Every time a lab test is requested, the service charges are automatically included for further invoicing. Besides, the receptionists and the clinic admins also have the extended functionality to create lab tests from Billing.
How to Create the Lab Test and Invoice for It From Reception Without the Doctor’s Prescription
💡Notes
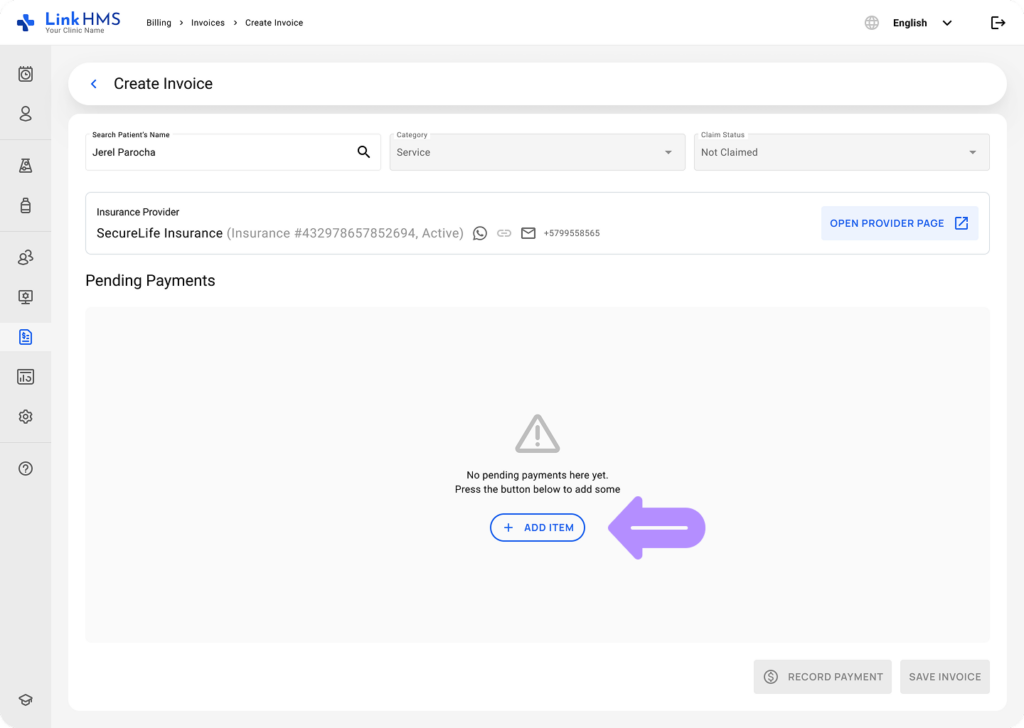
When a patient comes to the clinic and wants to undergo a quick test without visiting a doctor, a receptionist or clinic administrator can create a lab test order from Billing, which the lab technician can then use to see and complete the test.
- Click the + New Invoice button from the upper-right side of the Billing tab.
- Finds the patient by name and date of birth.

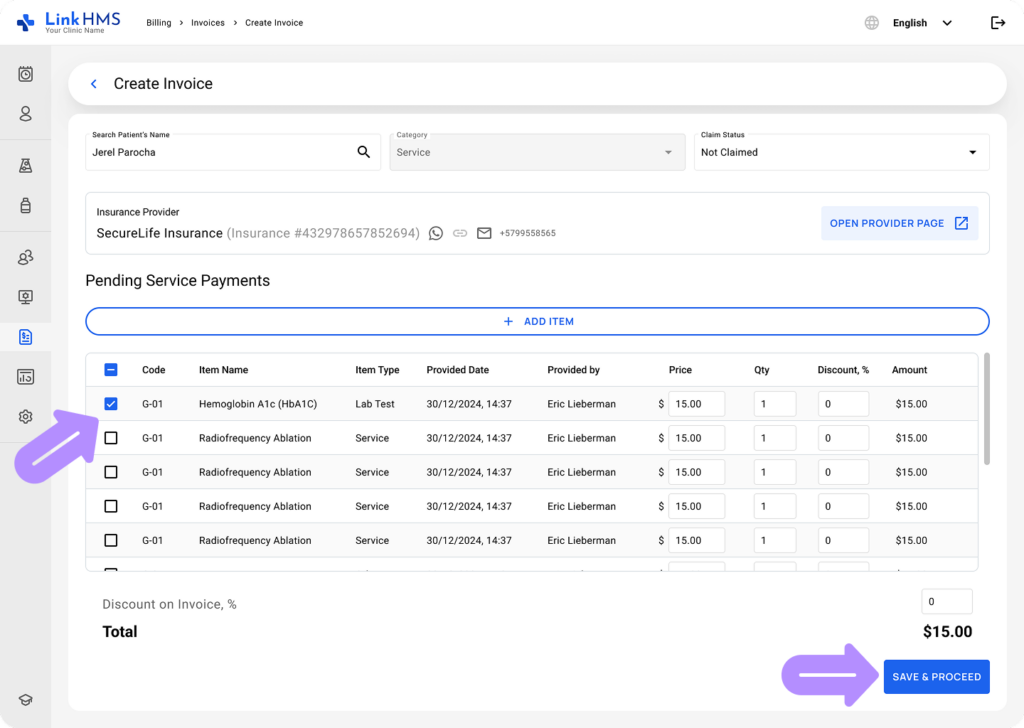
- Open the patient profile and click the Add Item button.
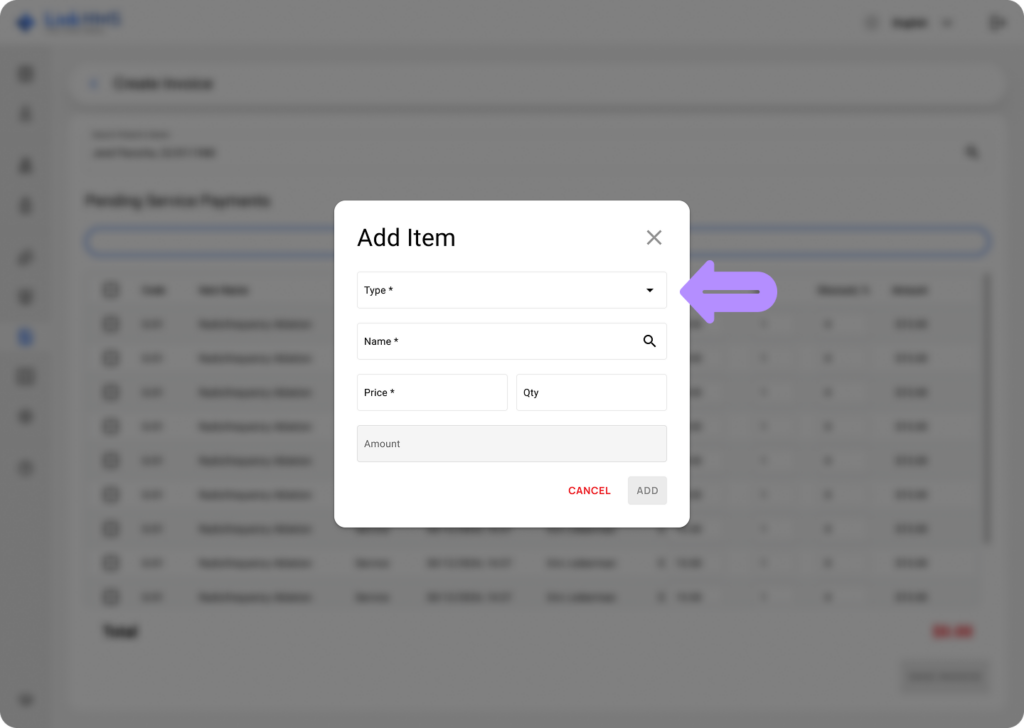
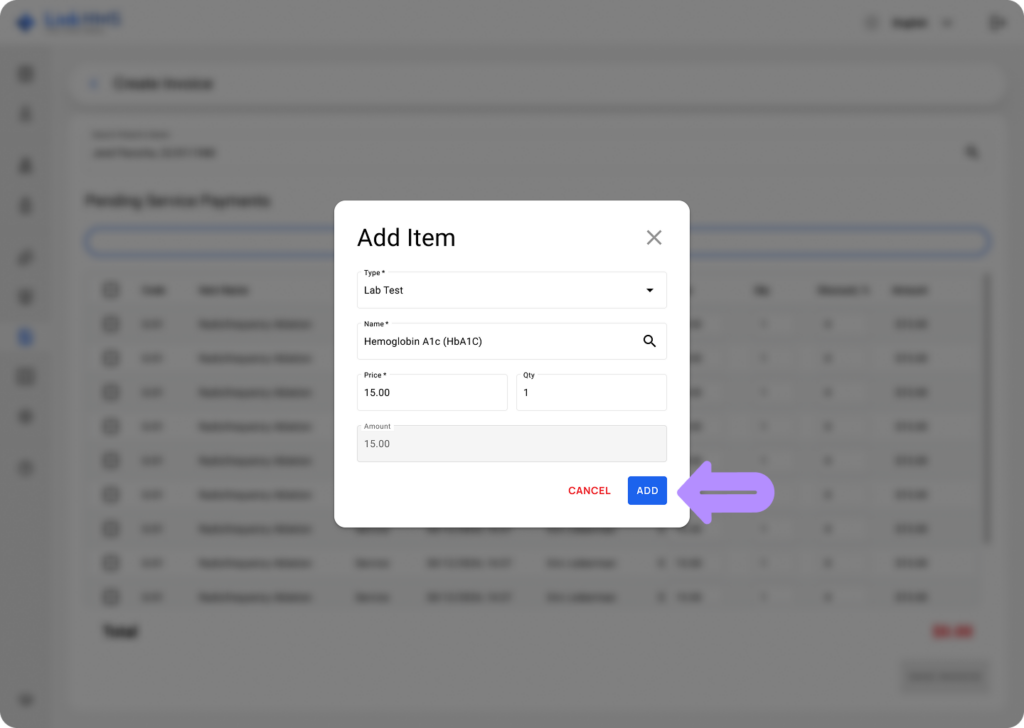
- Select the service type – Lab Test, and then start entering the name of the requested analysis. The system will suggest the tests available in LinkHMS standard templates or from the list of custom templates created by your lab scientist. Enter the quantity, and the price will be applied automatically.
- Click the Add button to add the lab test charge to the patient’s invoice.
- Once you’ve added the lab test to the list of services provided to the patient, select it from the list and click the Save & Proceed button to create an invoice for that lab test service and send a request/work order to the laboratory module.
- Now, the lab test order has been sent to the laboratory module, and an invoice has been created in Billing. Test status and results can be viewed and printed directly from the patient’s EMR record in their profile.
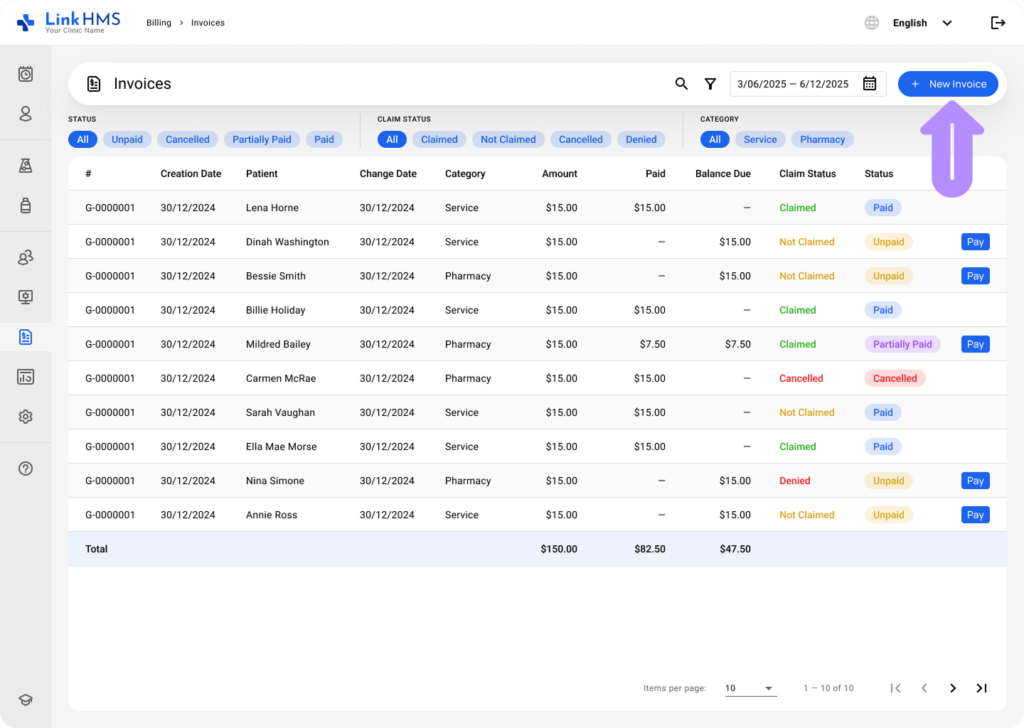
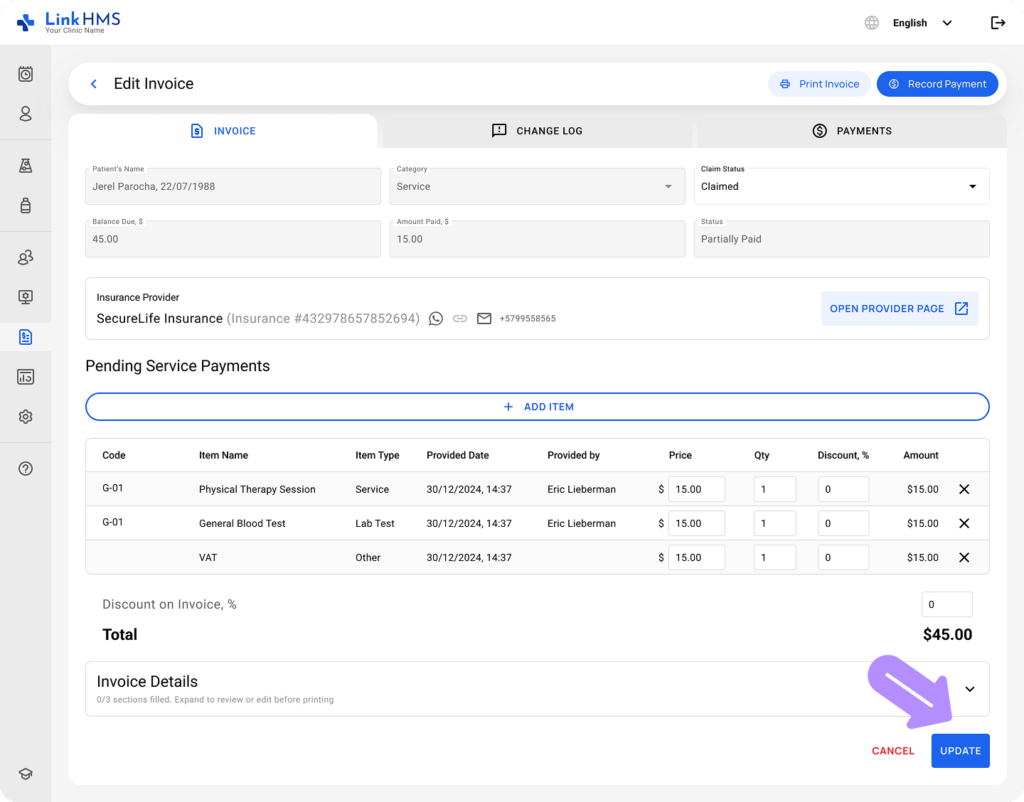
Managing Lab Test Charges in Patient Invoices
💡Notes
Charges for any lab test requested by doctors also appear in Billing under the name of the patient to whom it is provided, and the receptionist or clinic administrator can complete the next updates.
- Open the Billing tab from the left side menu.
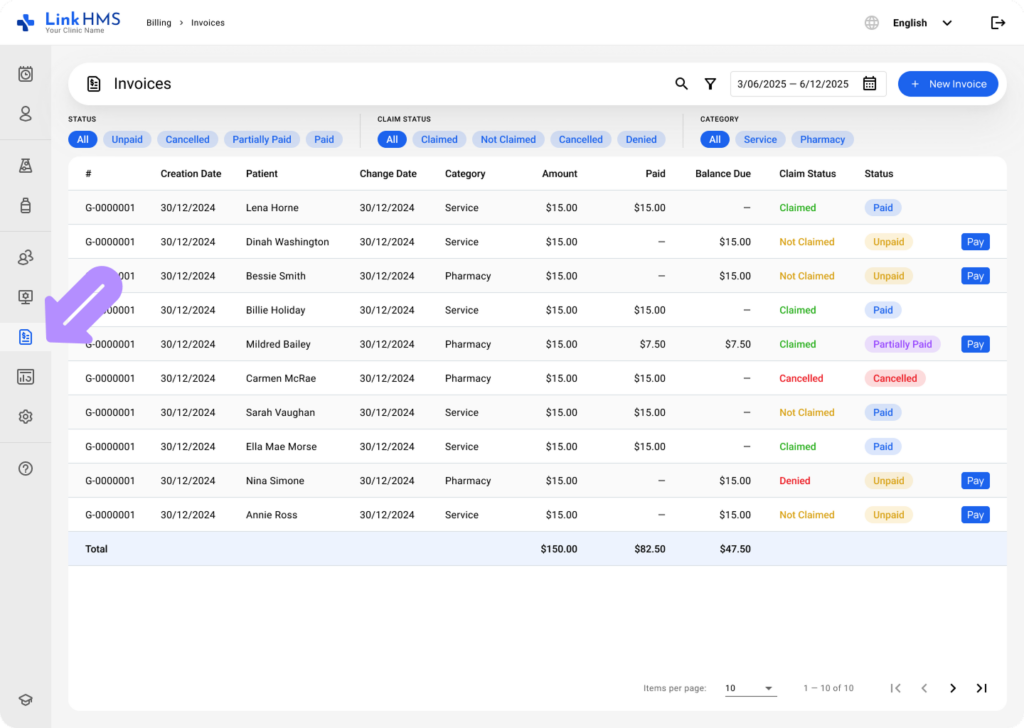
- Click the necessary patient to open the detailed invoice record.

- Charges for lab tests requested during visits or admissions are included in the list of pending service payments for that specific visit or admission.
- If the lab test is requested directly from the patient’s EMR, it can be invoiced through a separate invoice.
💡Notes
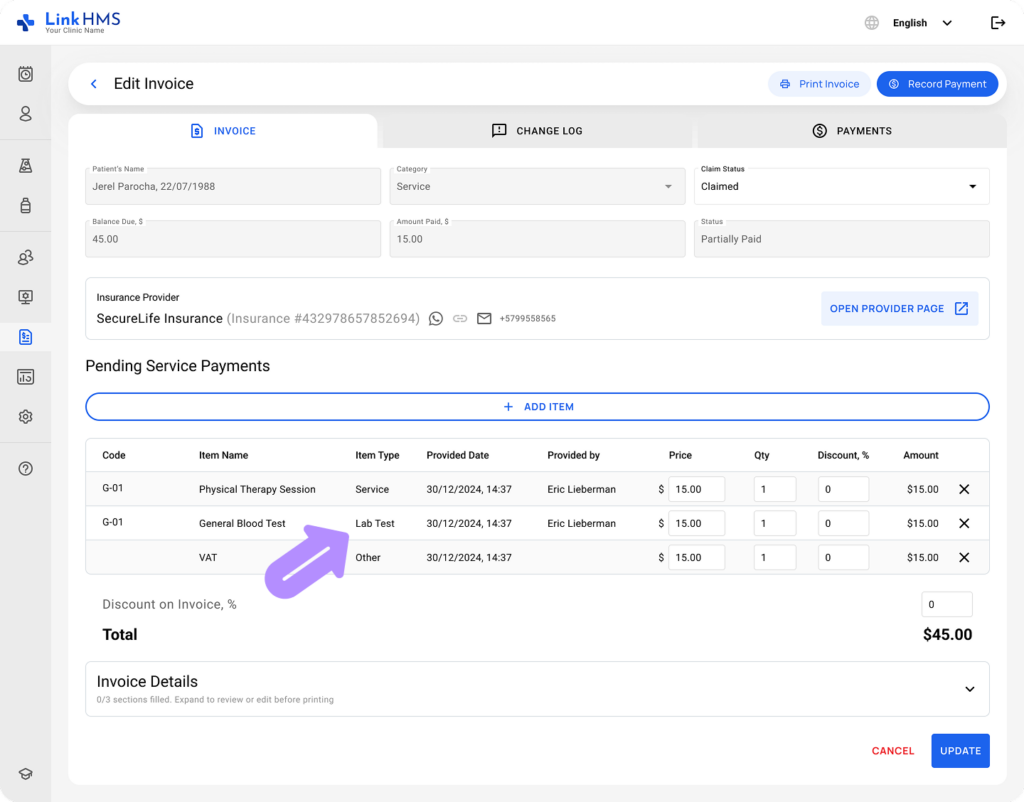
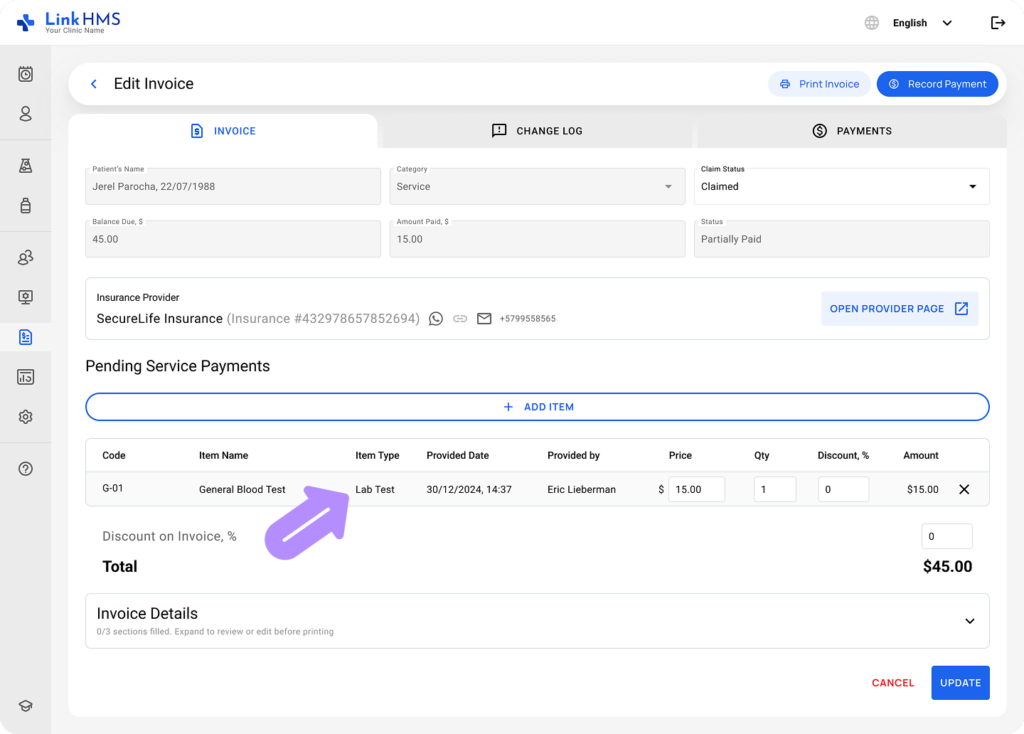
You can manage invoices with lab test charges the same way as others — add items, delete services, adjust quantities, apply discounts, etc. Refer to the complete guide on how to manage and edit invoices.
- After making the required changes, click Update to save the changes.
- When all changes are complete and verified, complete the invoicing process. For step-by-step instructions, refer to the detailed guide on how to finalize an invoice.