Accessing the Schedule Tab
- Navigate to the Schedule tab from the LinkHMS main menu.
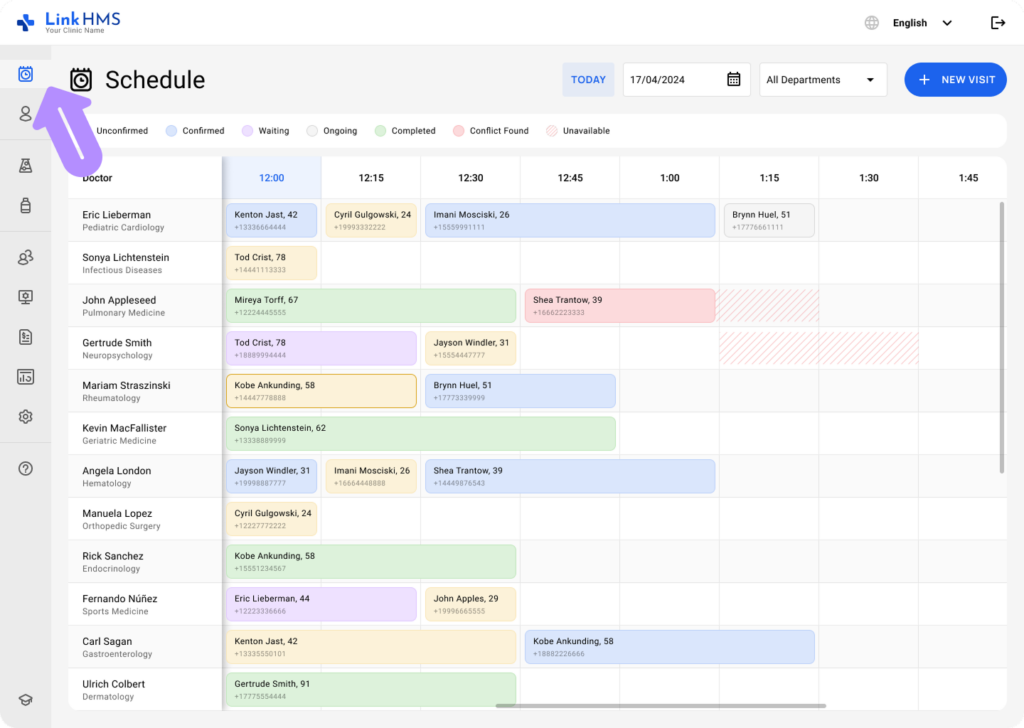
- The schedule displays the available doctors and their time slots for the day.
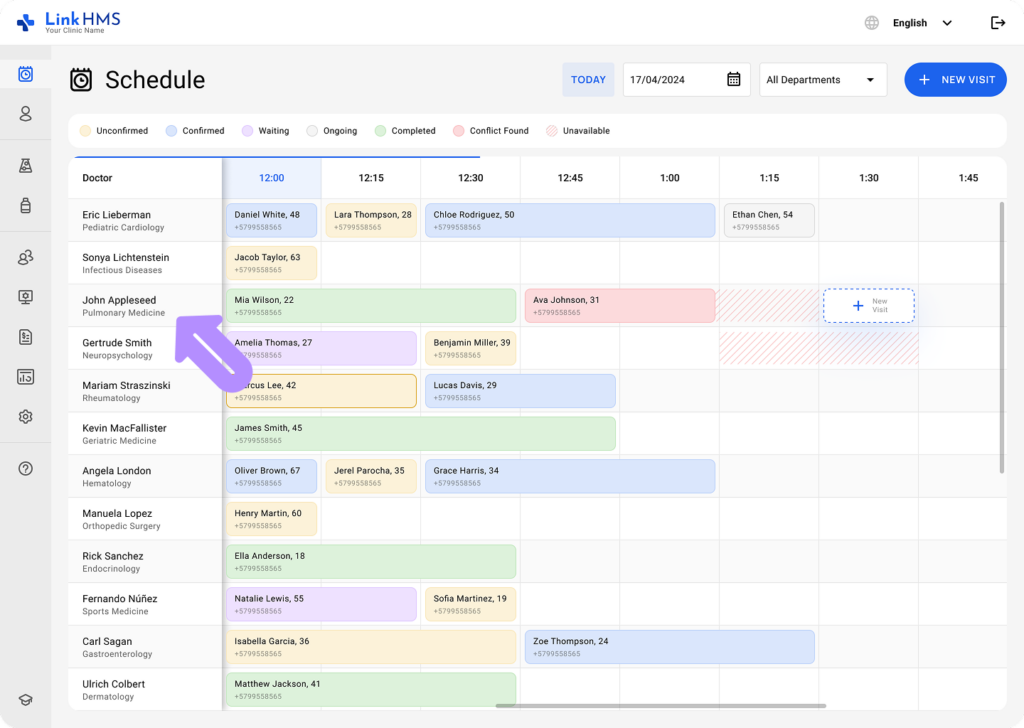
Selecting a Doctor
- From the list of doctors on the left side of the schedule, click on the doctor’s name for whom you want to create a visit (e.g., Rick Sanchez, John Appleseed).
-
This will bring up the doctor’s specific schedule for the selected time range.
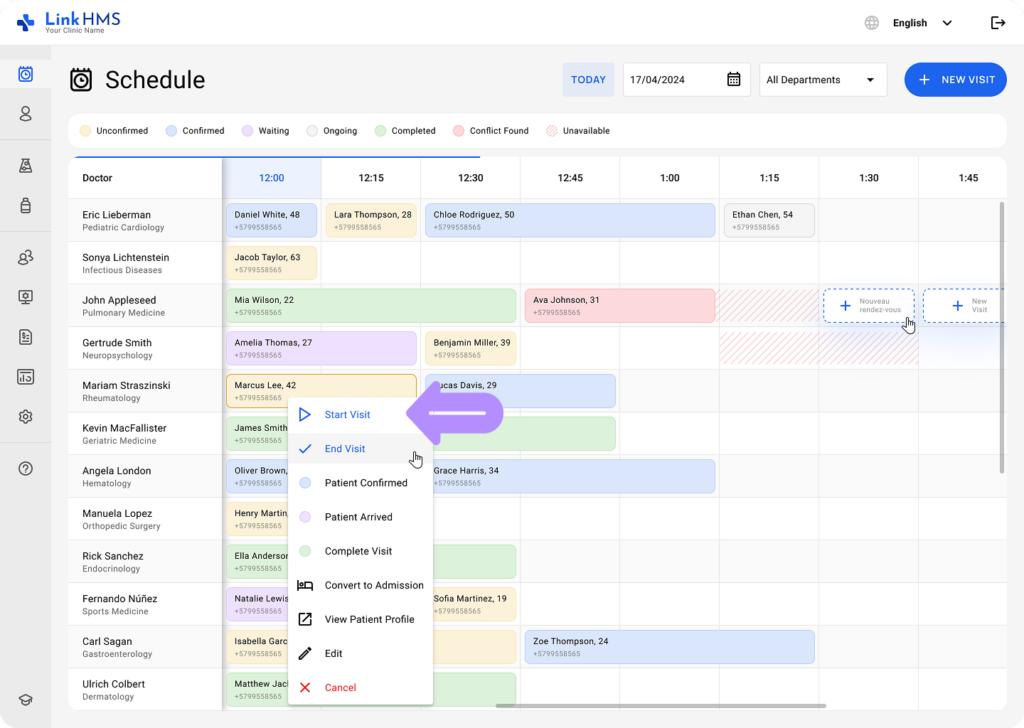
Initiating a New Visit
-
Click on any available time slot (indicated by the blank or unbooked cells) in the doctor’s schedule and use the + New Visit button to book an appointment.

- The Choose an Action window appears. Click Outpatient Visit to open the visit creation form.

- The New Visit form opens to enter the required appointment details.
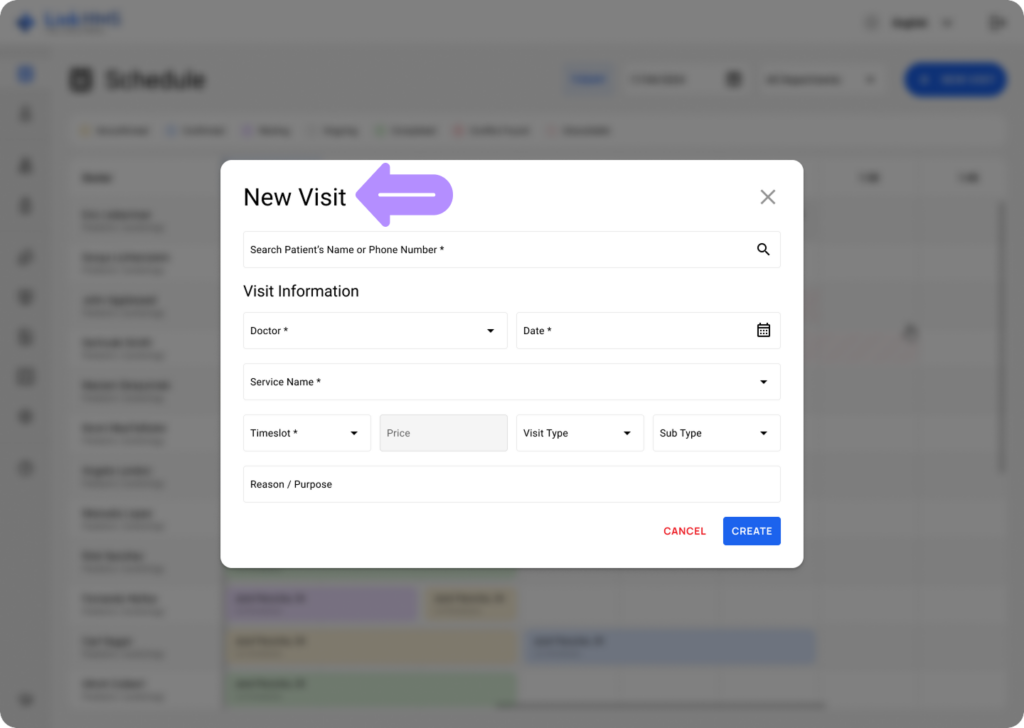
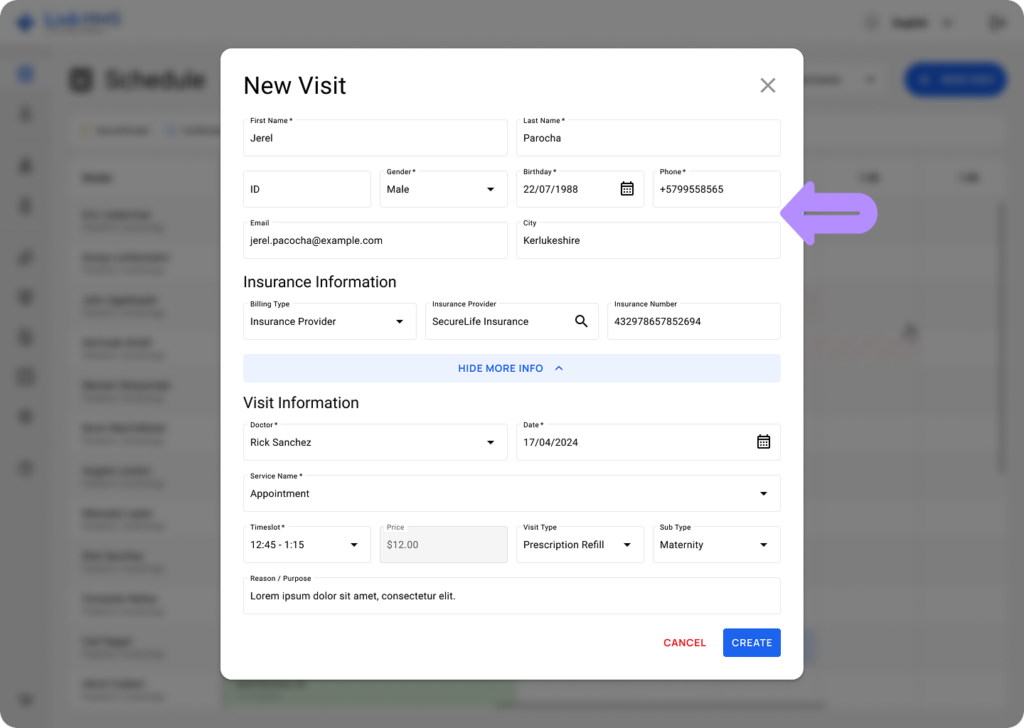
Filling in Patient Information
-
In the New Visit form, fill in all the required patient details: first name, last name, ID (auto-filled by the system), gender, date of birth, phone number, email, city, billing type, insurance provider, and insurance number.
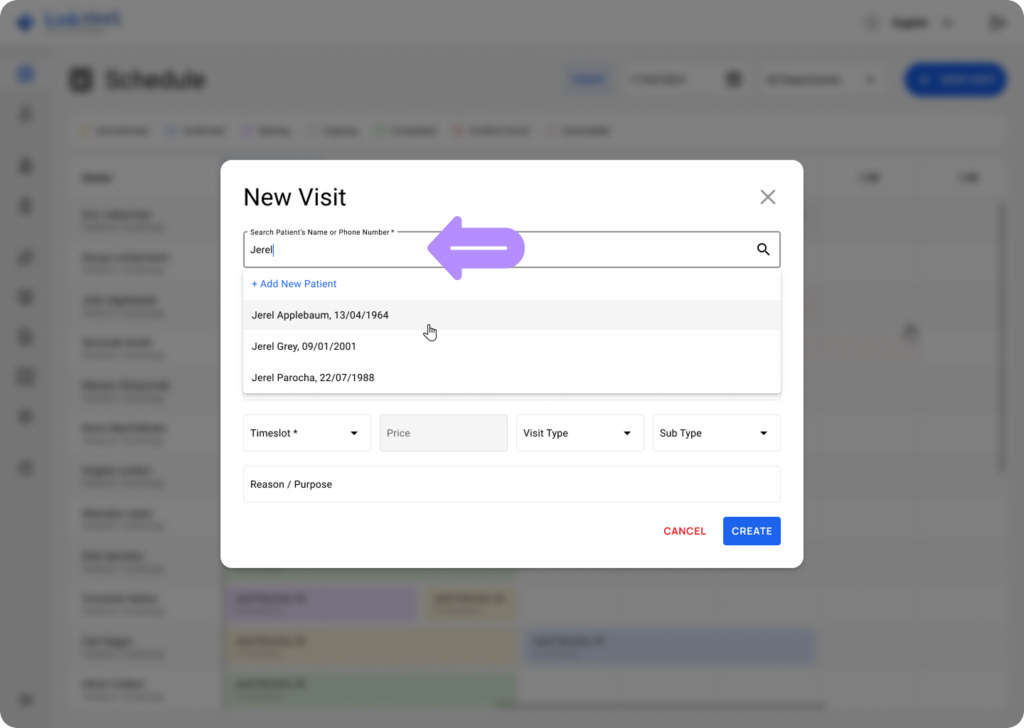
💡Notes
Also, you can use the search for an existing patient by name or phone number, and these details will be filled in automatically. If required, you can update the necessary fields.
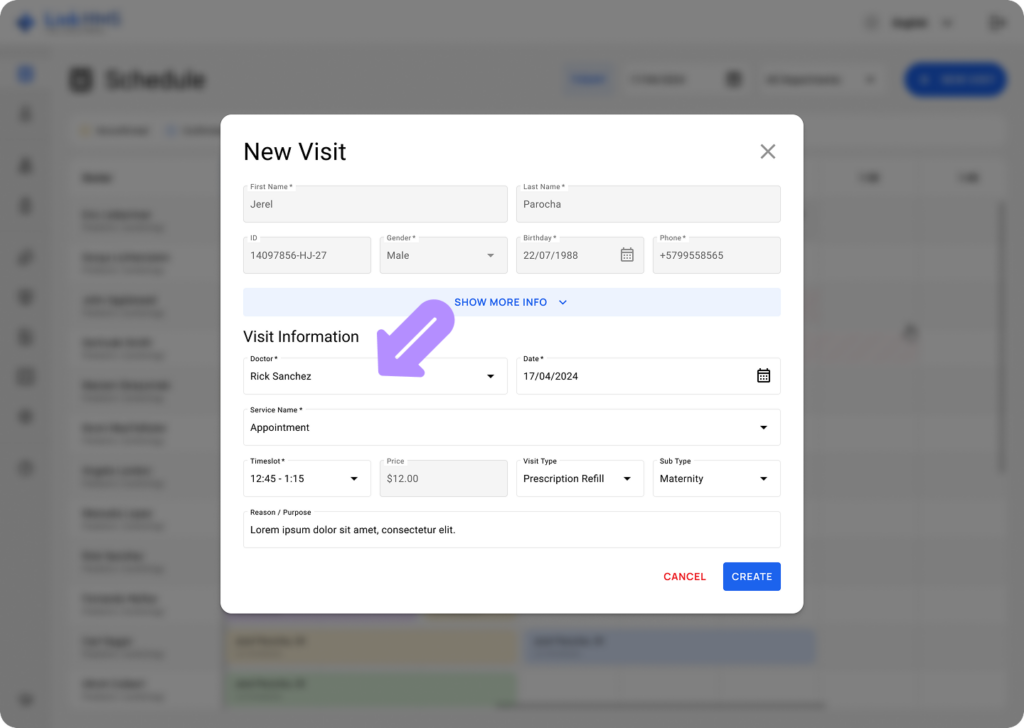
Filling in the Visit Details
- The doctor and date are pre-filled based on the selection in the Schedule tab; you can update them if needed.
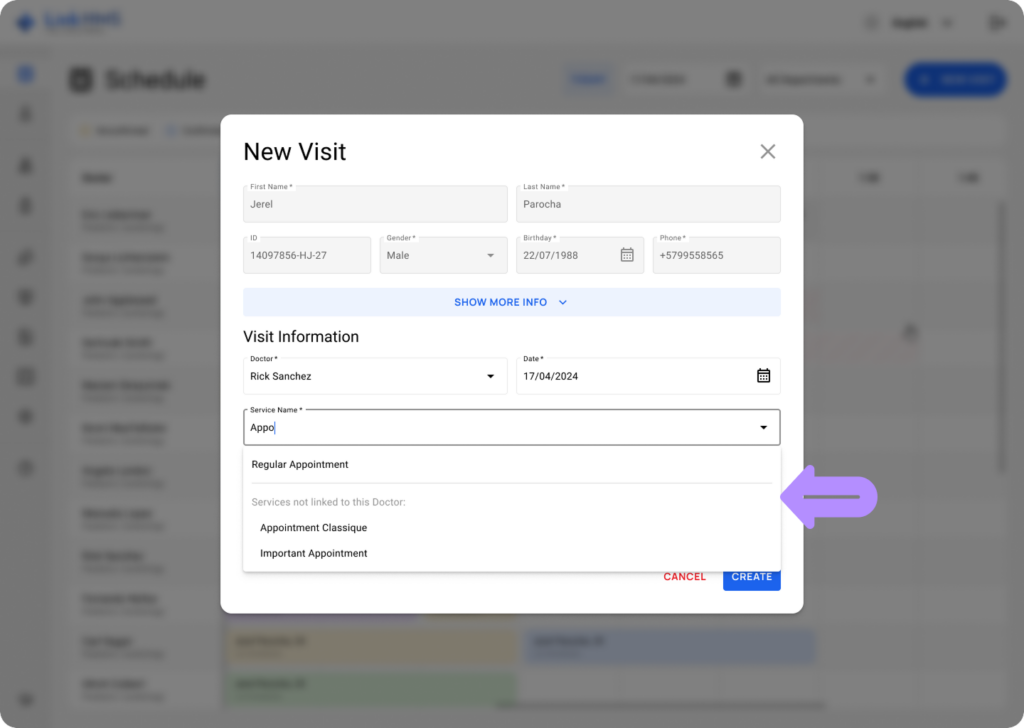
- Choose a service assigned to the selected doctor, or select one that isn’t assigned. Unassigned services are grouped under Services not linked to this Doctor.
💡Notes
The appointment duration is automatically set based on the selected service, and the corresponding time slots will reflect this. The service price is also applied automatically, based on settings configured in the Administration module.
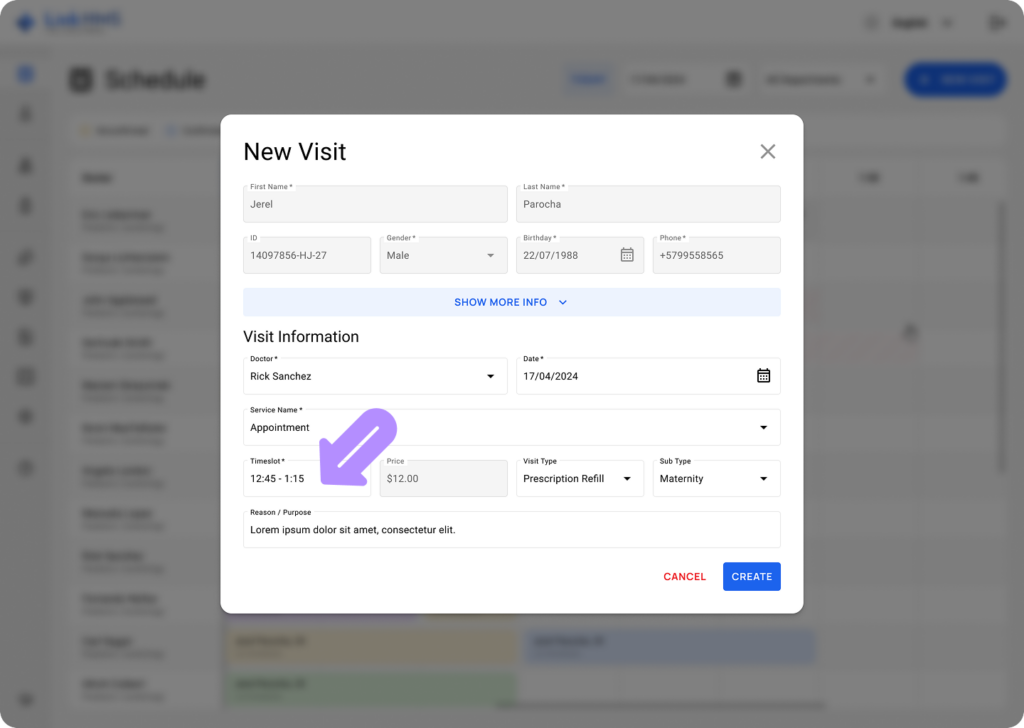
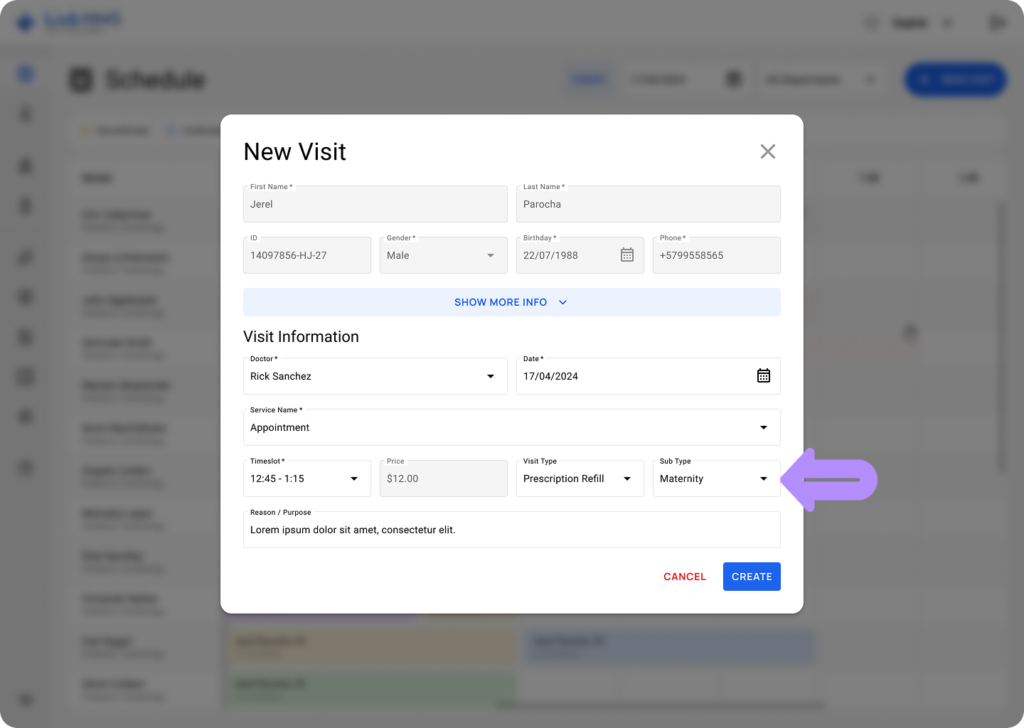
- Select the visit type and sub type from the dropdown menus.
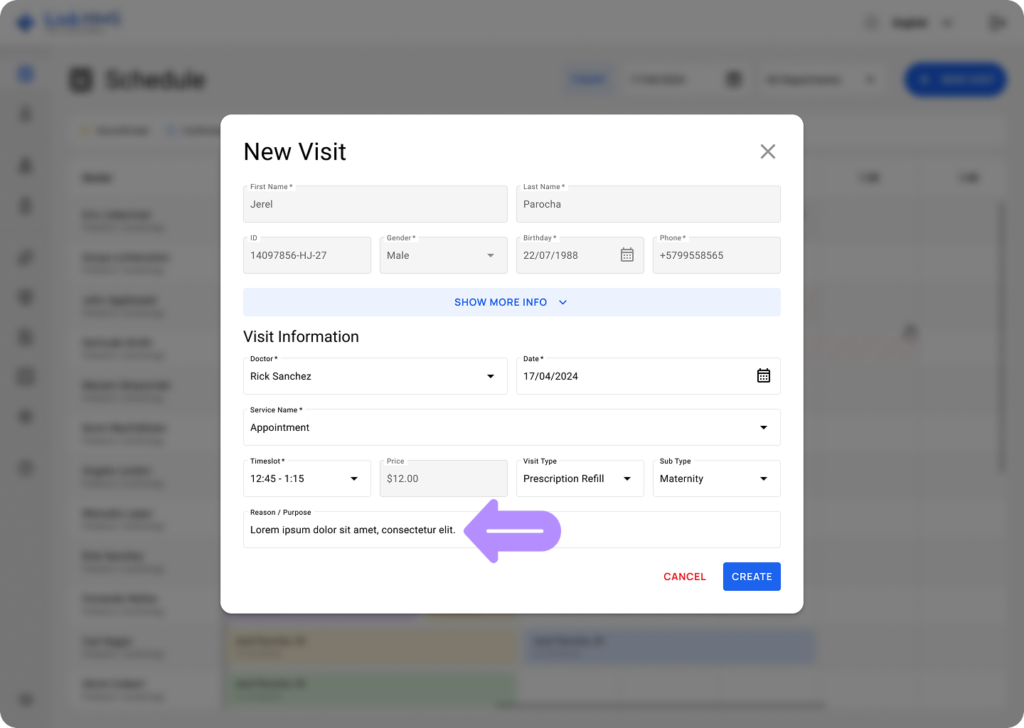
-
Add a reason or purpose for the visit.
Creating a Visit
- Once all the details are filled out, click the Create button to save the visit.
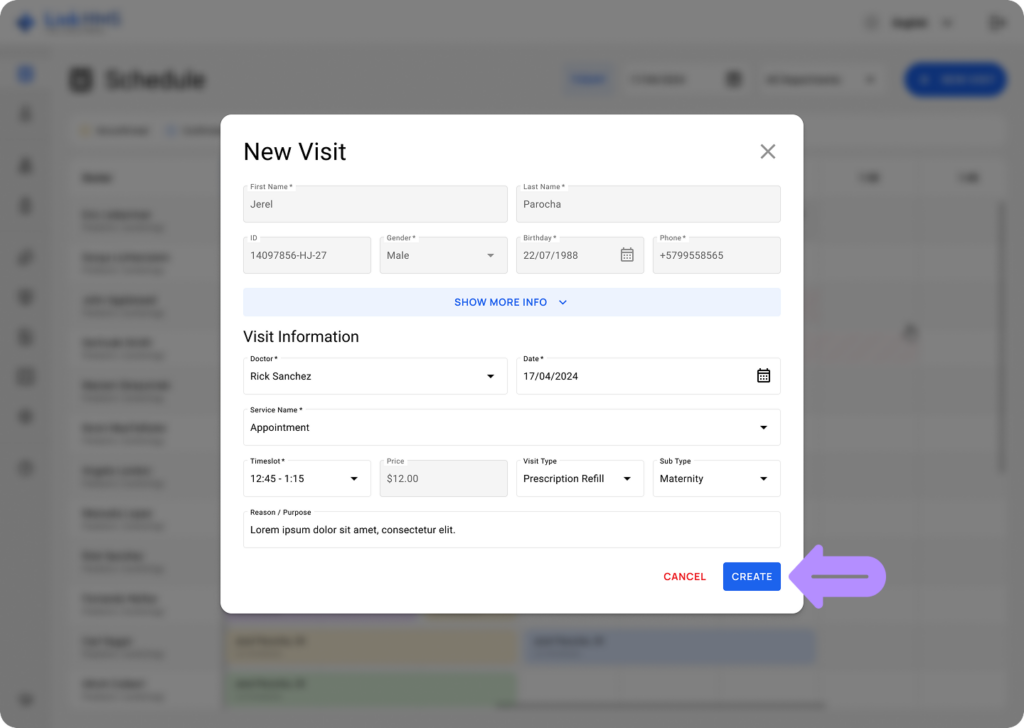
-
The visit will now appear in the doctor’s schedule at the designated time slot.
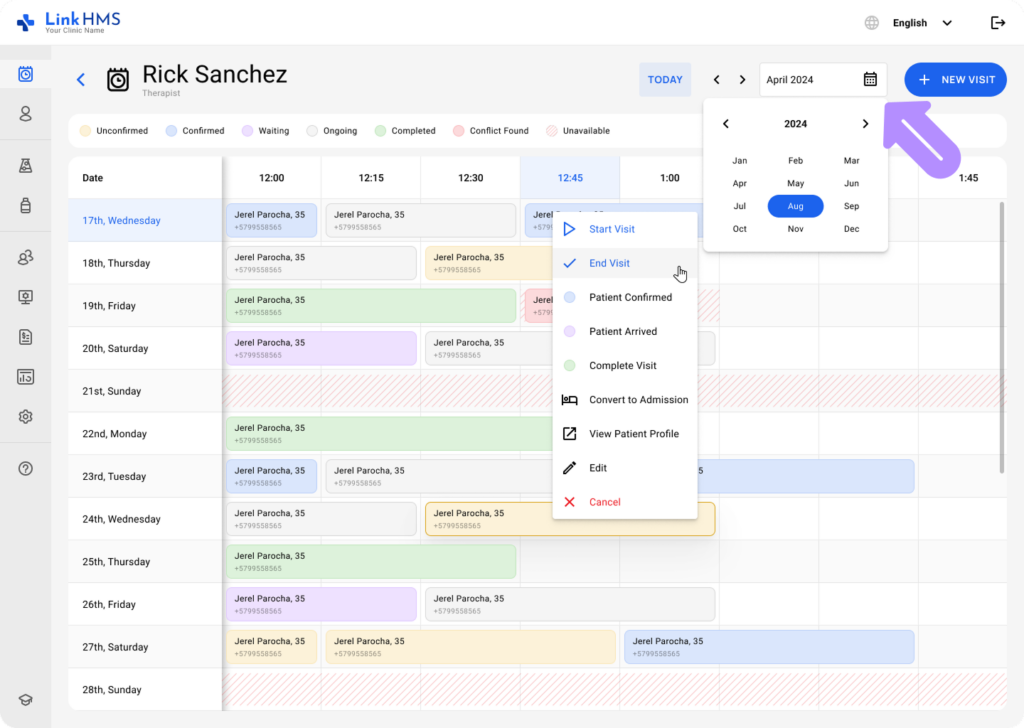
Viewing a Visit
- After creating the visit, it will appear in the selected doctor’s schedule with the patient’s details and can be started at the scheduled time.
💡Notes
- You can modify or cancel visits through the schedule view if necessary. Find the detailed guide on how to edit and cancel visits in the schedule tab.