Steps to Create a New Visit
Accessing the Schedule Tab
- Navigate to the Schedule tab from the main dashboard. You will see a list of doctors and their availability represented in a time grid.
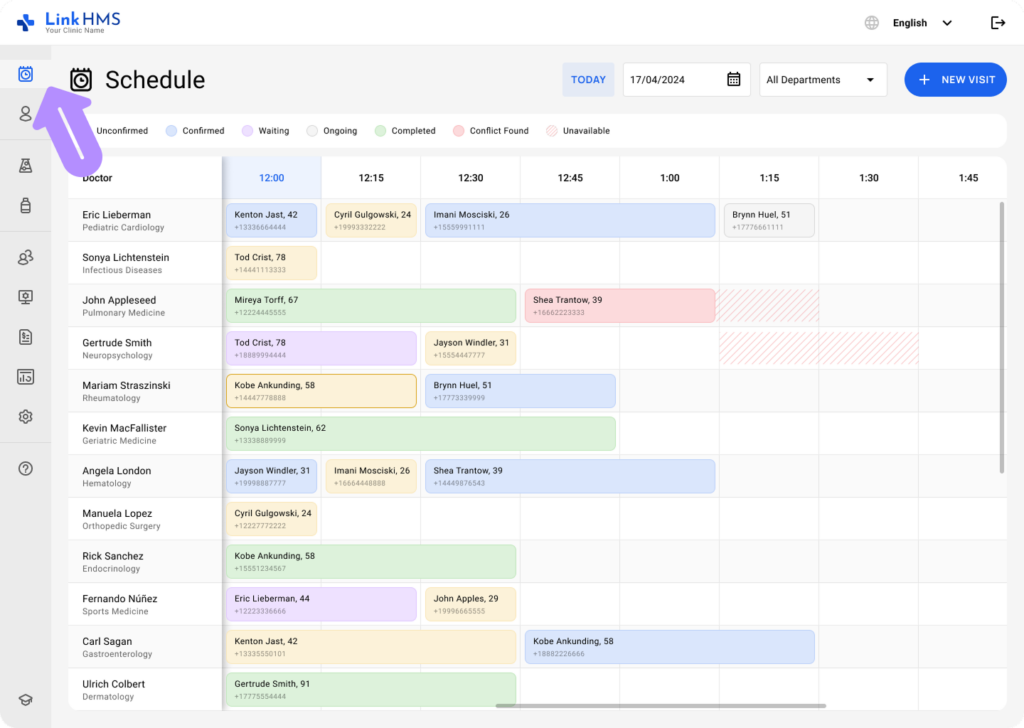
- Choose the Department that you want to work with.
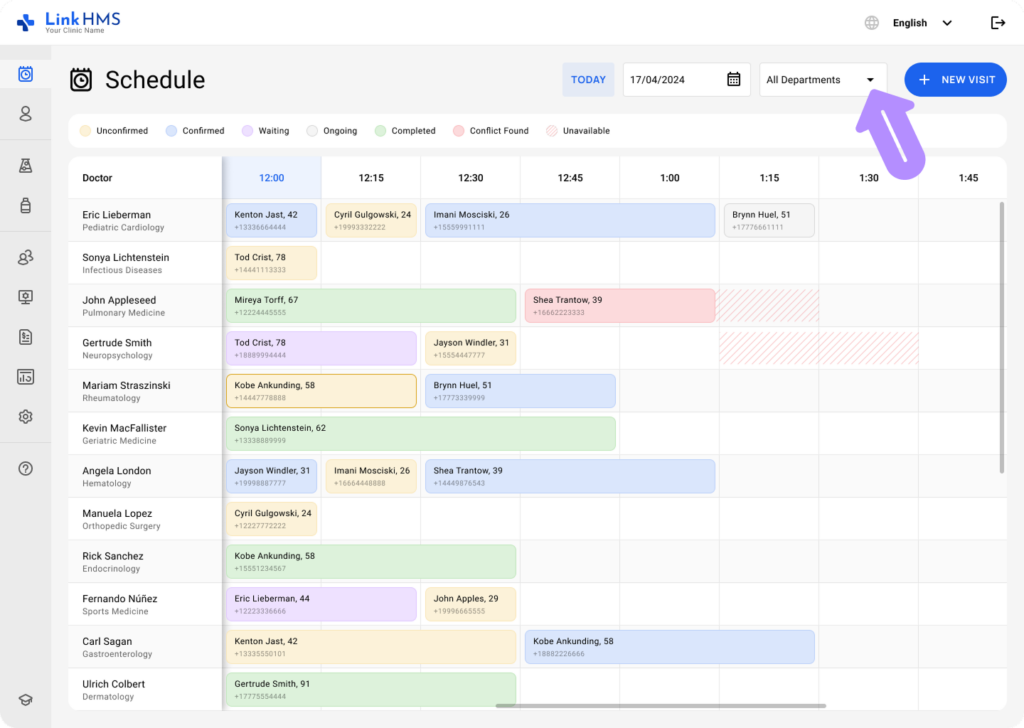
Opening the New Visit Form
- In the top-right corner of the Schedule tab, click the + New Visit button to start creating a new visit.

- Besides, you can select any available time slot in the doctor’s schedule and click the + New Visit button.

- Choose the Outpatient Visit.

- The New Visit form will open to enter the necessary appointment details.
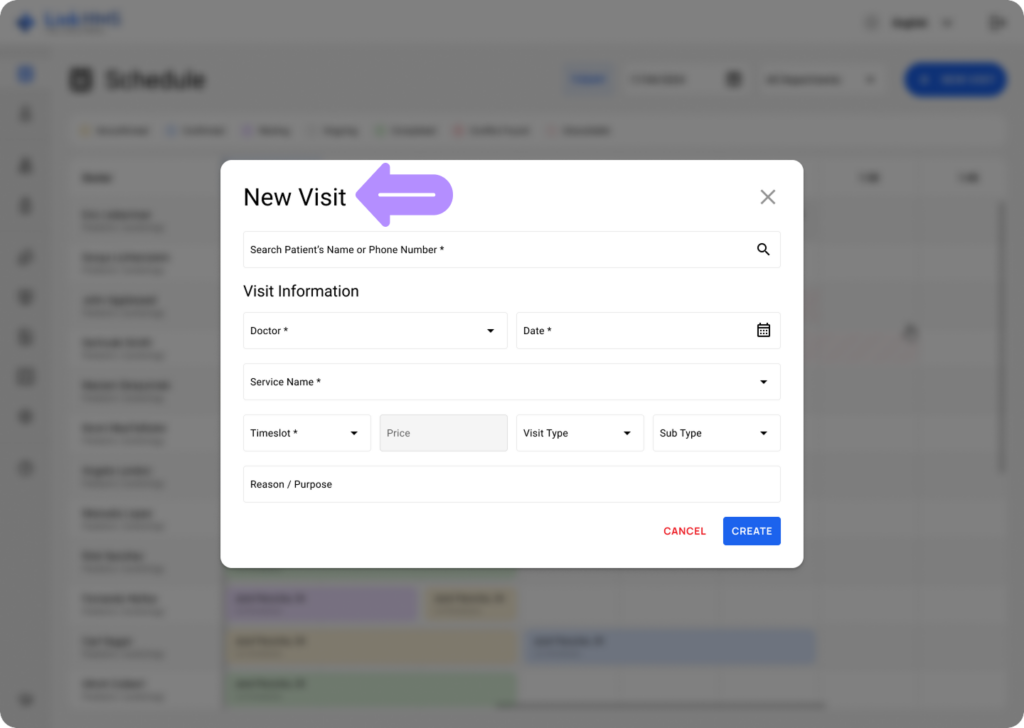
Filling in Patient and Insurance Information
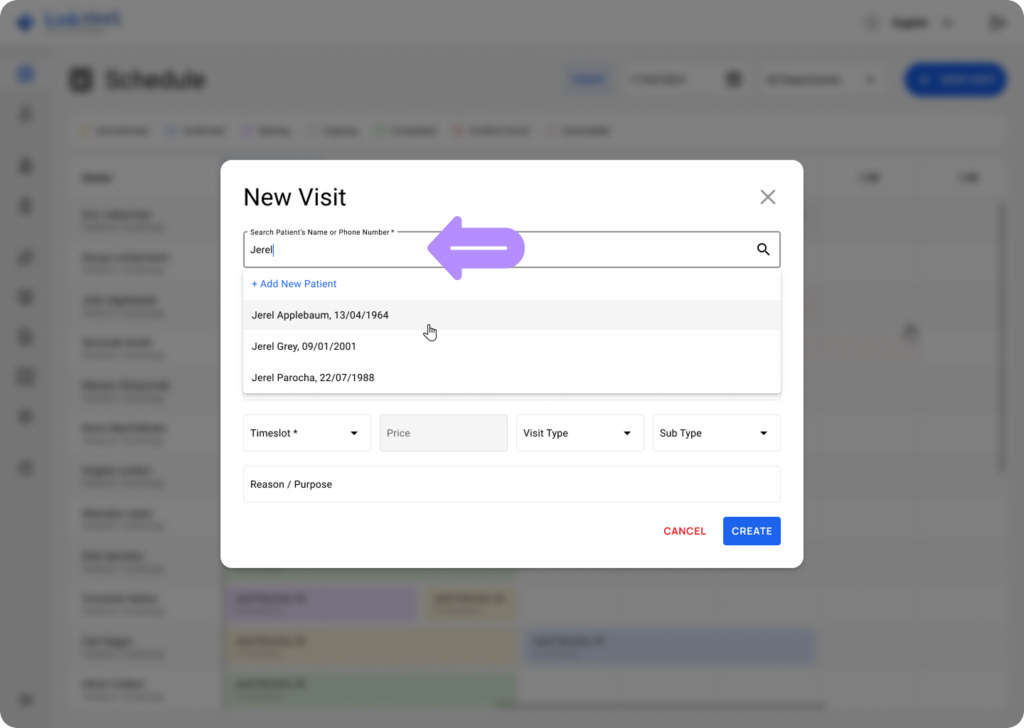
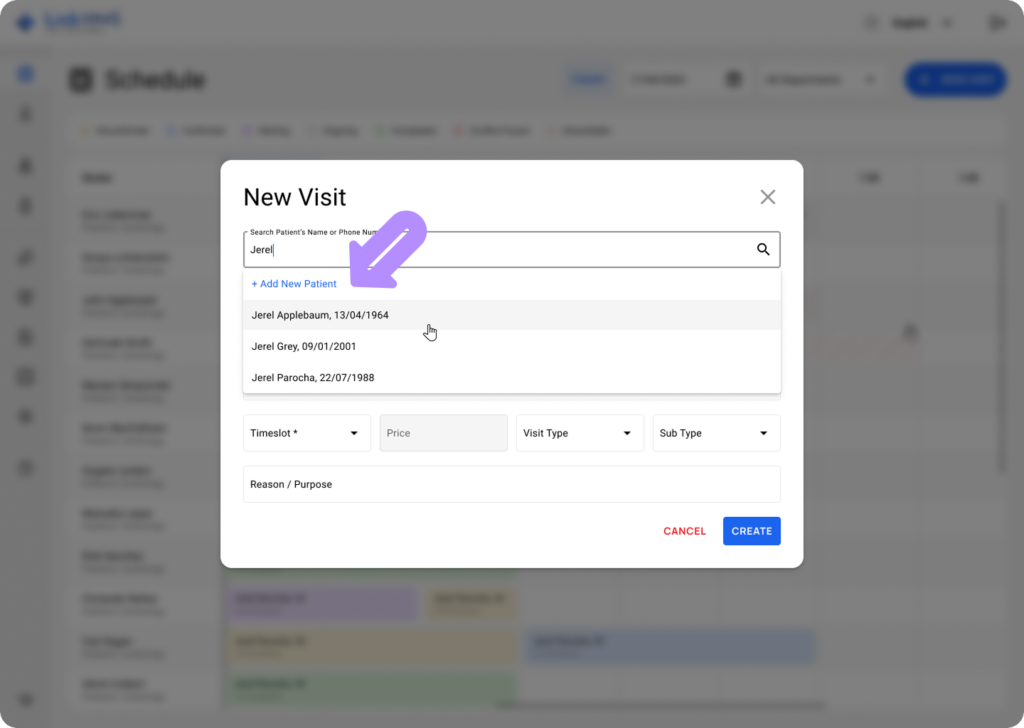
- In the New Visit form, start by entering the patient’s name or phone number to locate the necessary patient.
💡Notes
If the patient has visited before, the info details will be filled in automatically.
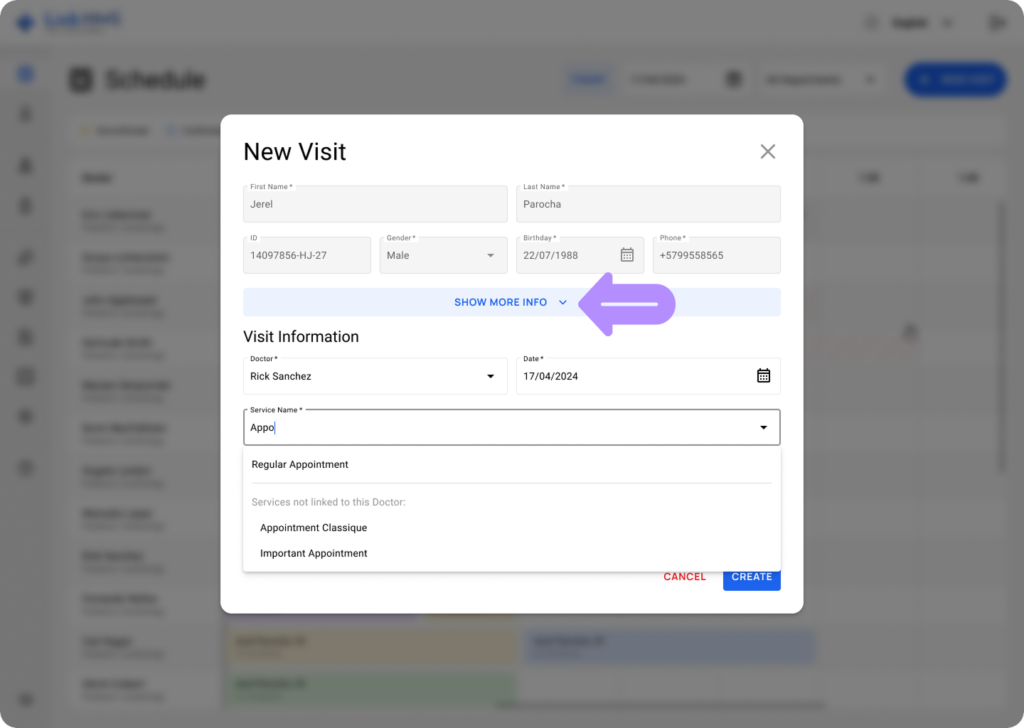
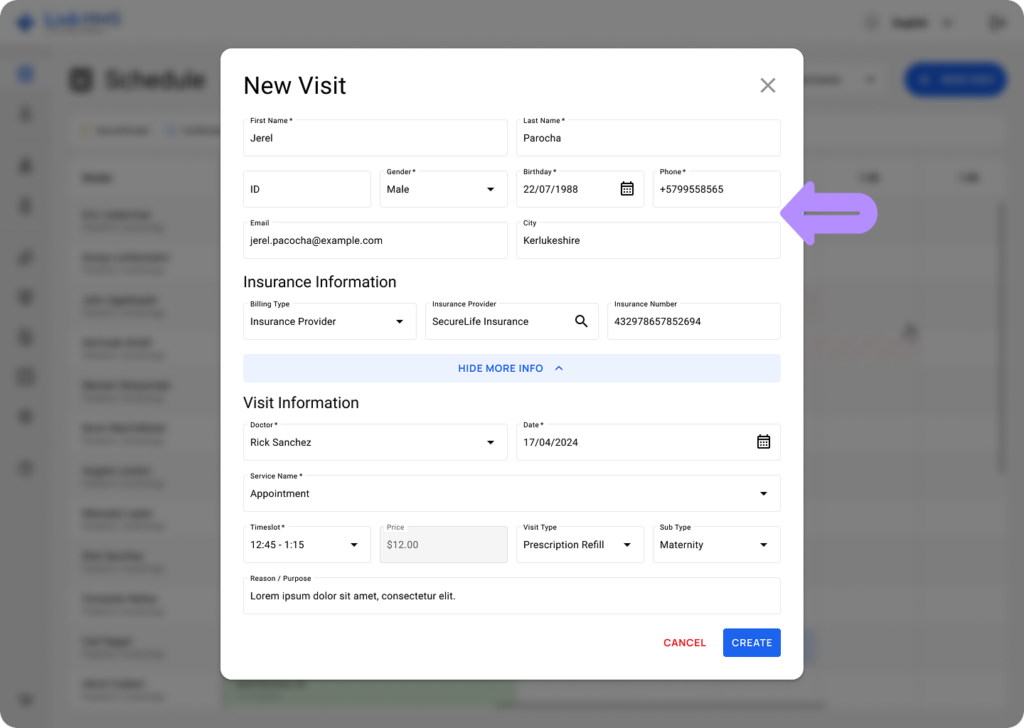
- Click Show More Info to review other details, including email, city, billing type, insurance provider, and insurance number.
💡Notes
If it’s a new patient, you’ll need to enter the required information manually. Choose the + Add New Patient option.
- For a new patient, fill in the following details: first name, last name, ID (auto-filled by the system), gender, date of birth, phone number, email, city, billing type, insurance provider, and insurance number.
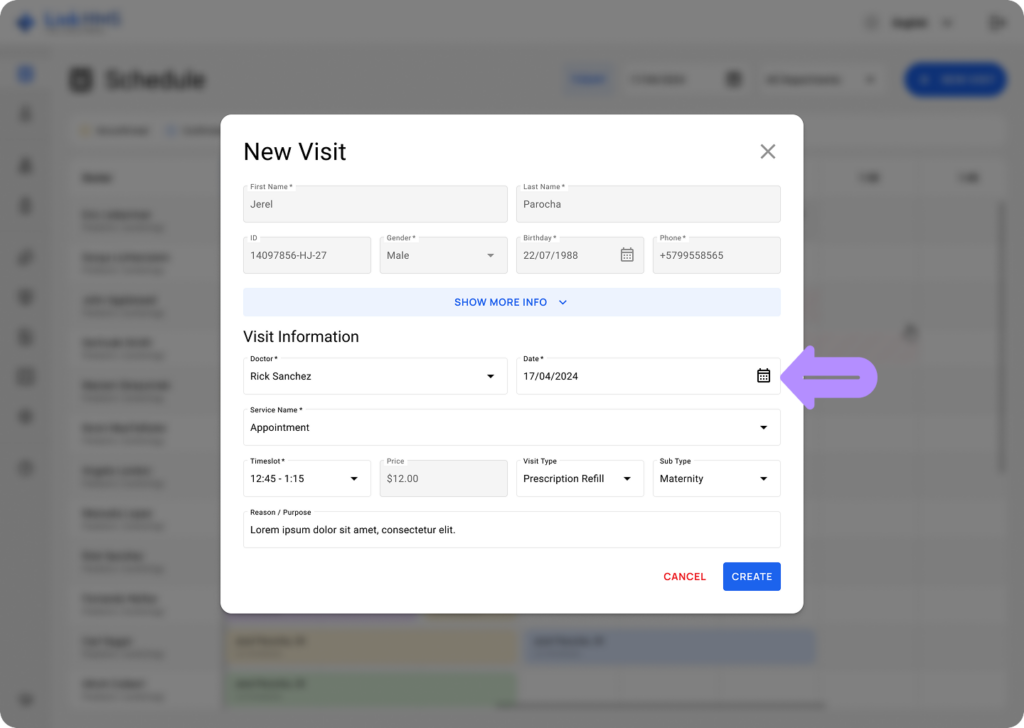
Filing in Visit Information
- Select the doctor from the dropdown list and choose the appropriate date.
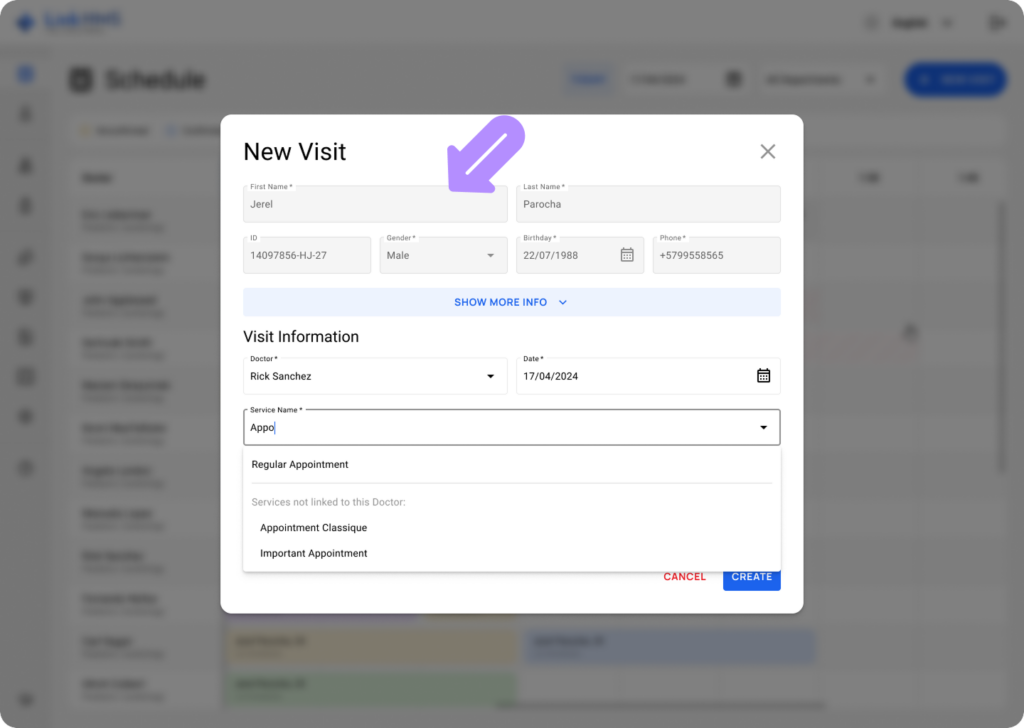
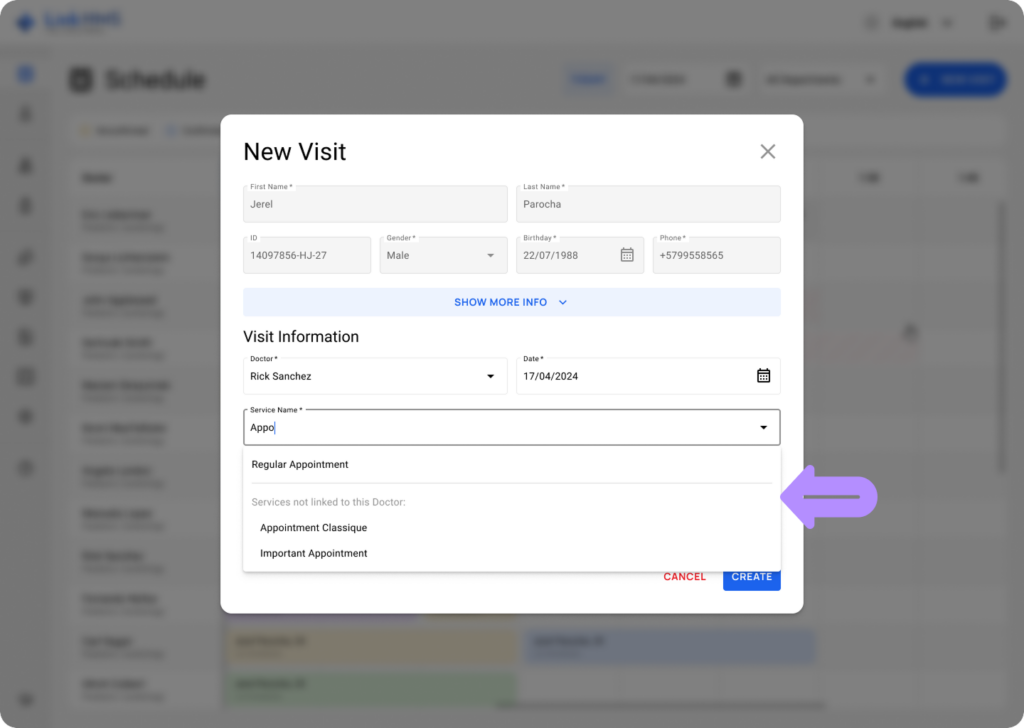
- Then, select a service from those assigned to the specific doctor, or choose one that is not assigned. Unassigned services are listed under Services not linked to this Doctor.
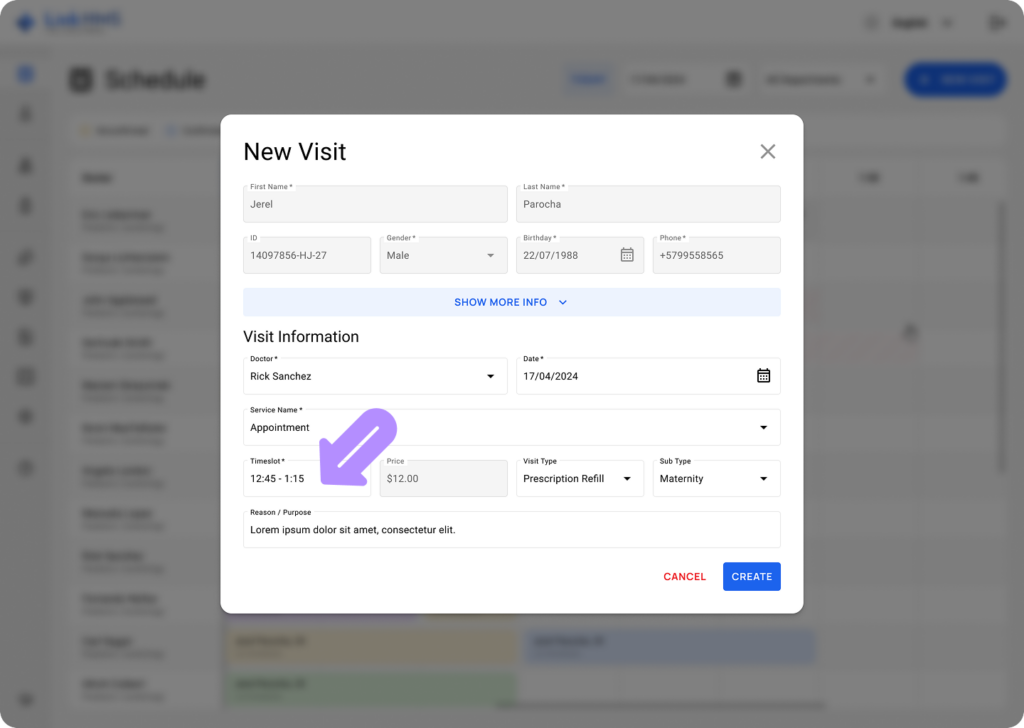
- Select the service, and the system will automatically display the available time slots. Then, choose the time that best suits the patient’s needs.
💡Notes
The appointment duration is determined by the time assigned to the service at the time of creation. This means that if the service includes a 15-minute consultation, the available time slots will reflect that duration.
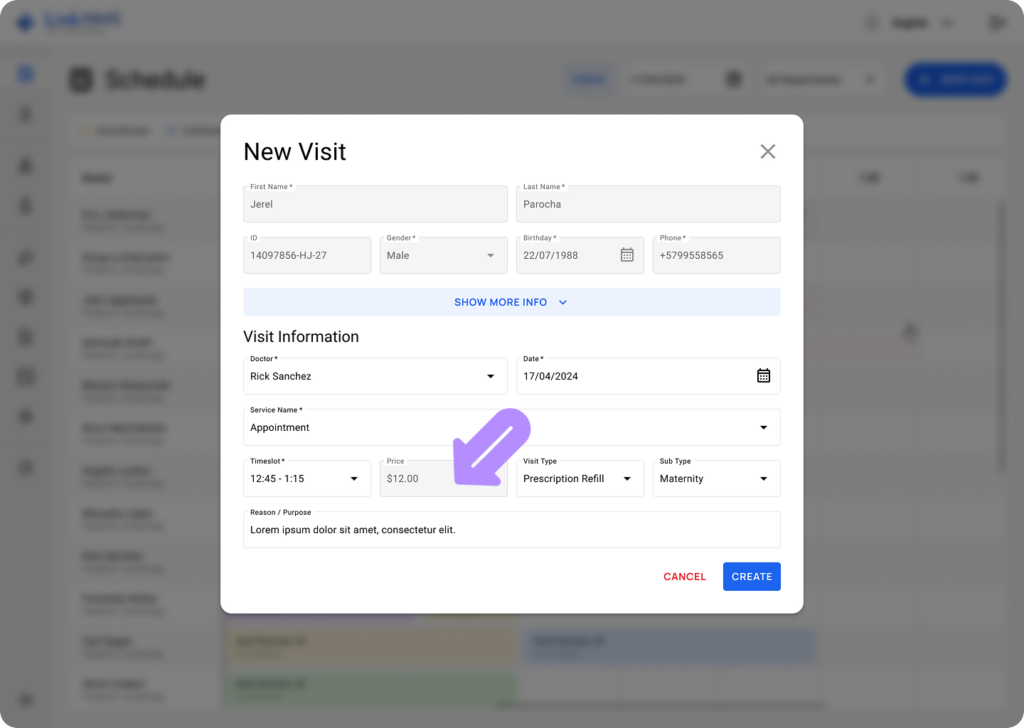
- The service price is automatically applied according to the selected option. Visit fees are initially configured in the Administration module and can be adjusted by Clinic Admins as needed.
- Choose the visit type and sub type from the dropdown menus.
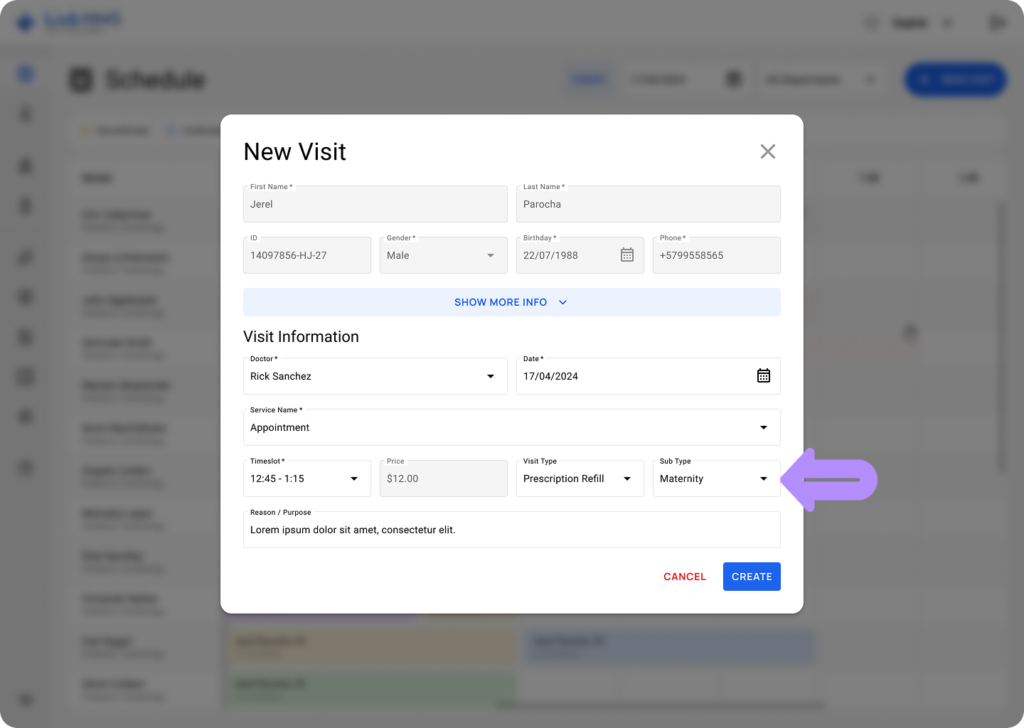
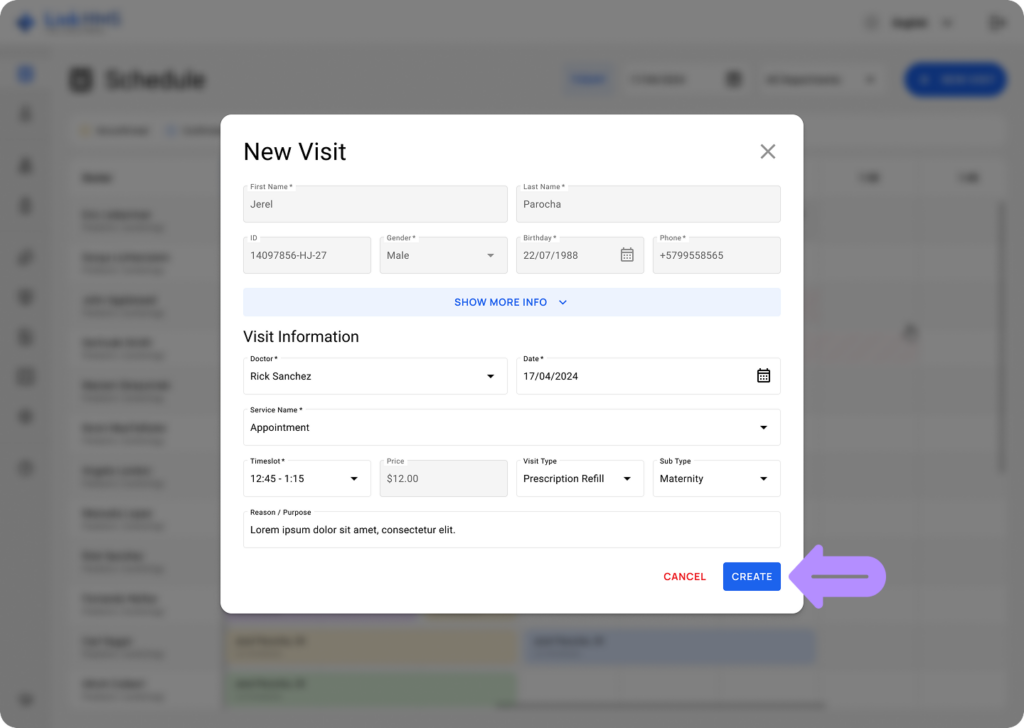
Reviewing and Creating a Visit
- Finalize the visit info entry with additional reasons or purposes, then click the Create button to add the visit.
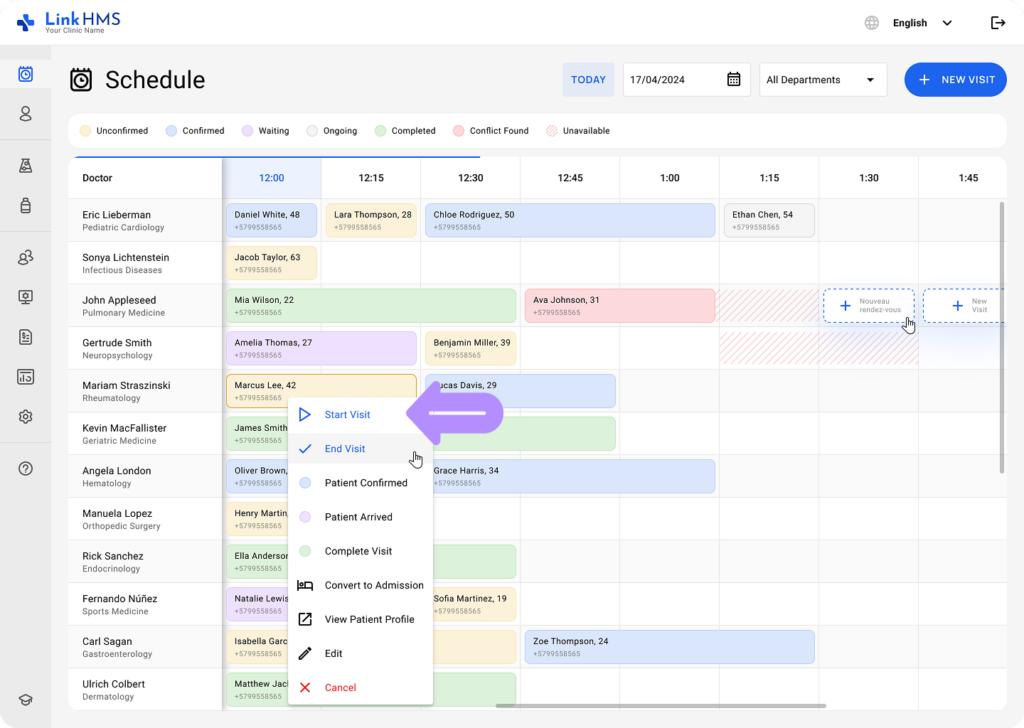
Visit Confirmation
- After creating the visit, it will appear in the schedule with the patient’s details, the time, and the status (e.g., Confirmed, Waiting). The scheduled appointment can be initiated at the assigned time to begin the visit workflow.
💡Notes
- Ensure that you select a timeslot and service that corresponds to the patient’s needs.
- Visit statuses will automatically be updated based on patient confirmation and appointment progress.