The LinkHMS home page is built for everyday use. It’s where your clinic team can land to get straight into work, not just a screen you pass through once during setup. This guide covers what’s on it and how it’s meant to be used day to day.
Quick Actions: access your daily tasks
At the top of the home page, Quick Actions provides shortcuts to the tasks your clinic team uses often. Use Quick Actions as a starting point for routine tasks to select the action you need to open the relevant workflow and continue with your work.
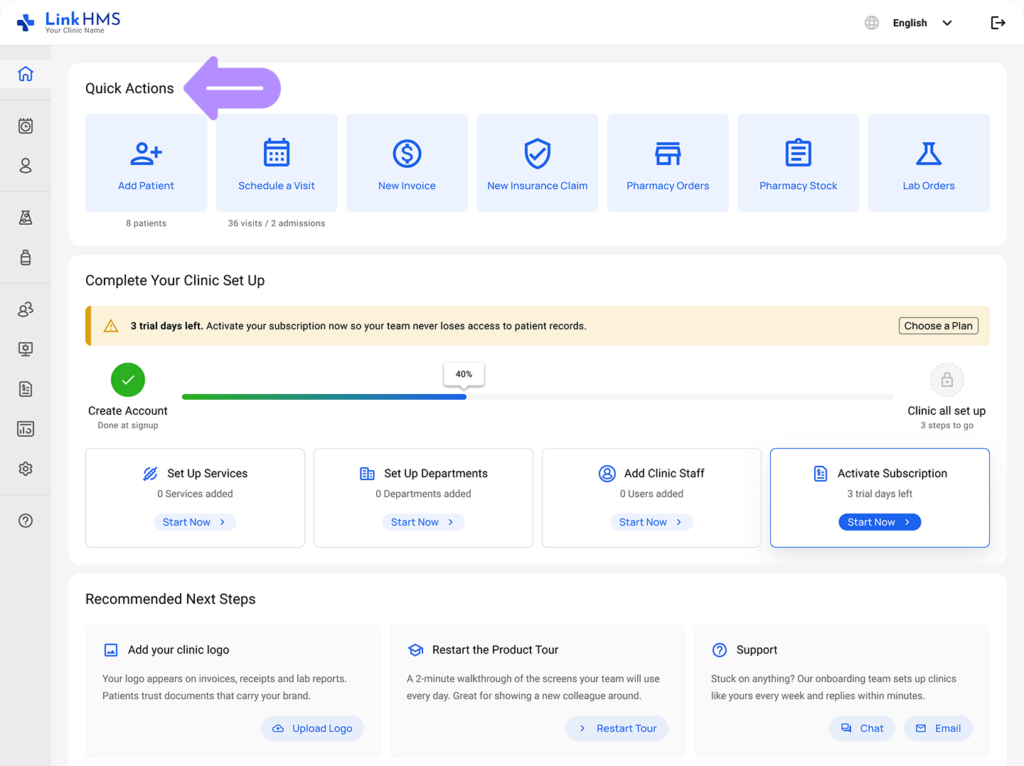
- Add Patient. Opens the Patients tab directly to add a new patient. The tile also shows your current patient count, a quick live total.
- Schedule a Visit. Opens the new visit and admission creation pop-up, so you can start scheduling right away. The tile also displays the total number of visits and admissions for the day, giving you a quick view of current clinic activity.
💡Notes
The patient count, visit totals, and admission numbers shown on these tiles update automatically, so it tells you how the clinic is trending without opening a separate report.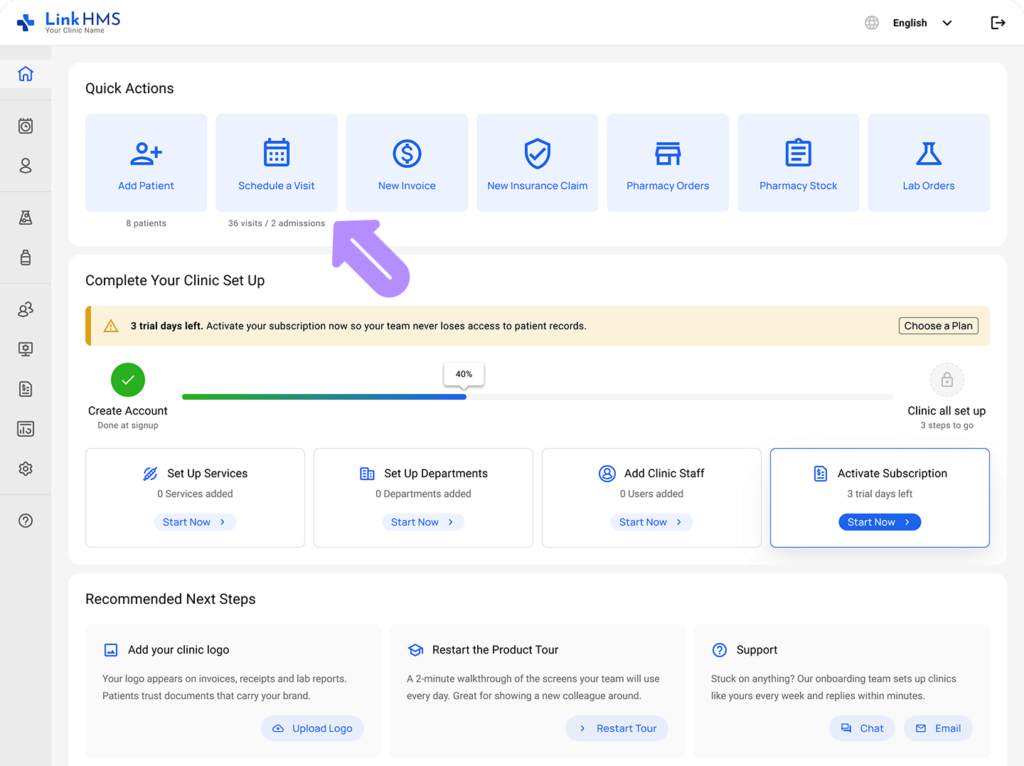
- New Invoice. Starts a new invoice on the spot, without needing to open it from a specific patient or visit first.
- New Insurance Claim. Opens the Claims tab, where you can review existing insurance claims or create and submit a new one.
- Pharmacy Orders. Takes you to the Orders tab in the Pharmacy module, where prescriptions are grouped by patient.
- Pharmacy Stock. Opens the Inventory tab to check or update medication stock levels.
- Lab Orders. Opens the Laboratory module, where you can view current lab orders, check their status, and follow each test from order to completion.
Quick Actions remain available on the home page at all times, providing a consistent point of access to frequently used workflows as part of your team’s day-to-day operations.
Complete Your Clinic Setup section
If you’re still setting up your clinic, this section guides you through the remaining configuration steps. A progress bar shows how much of the setup has been completed and updates as you work through each step.
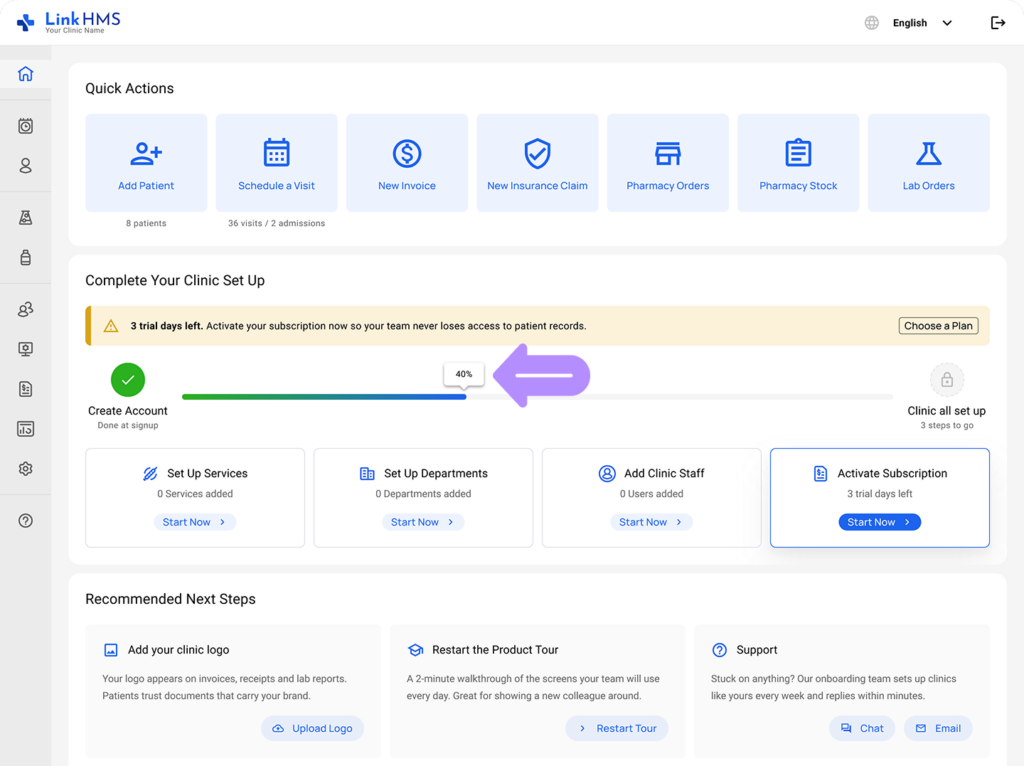
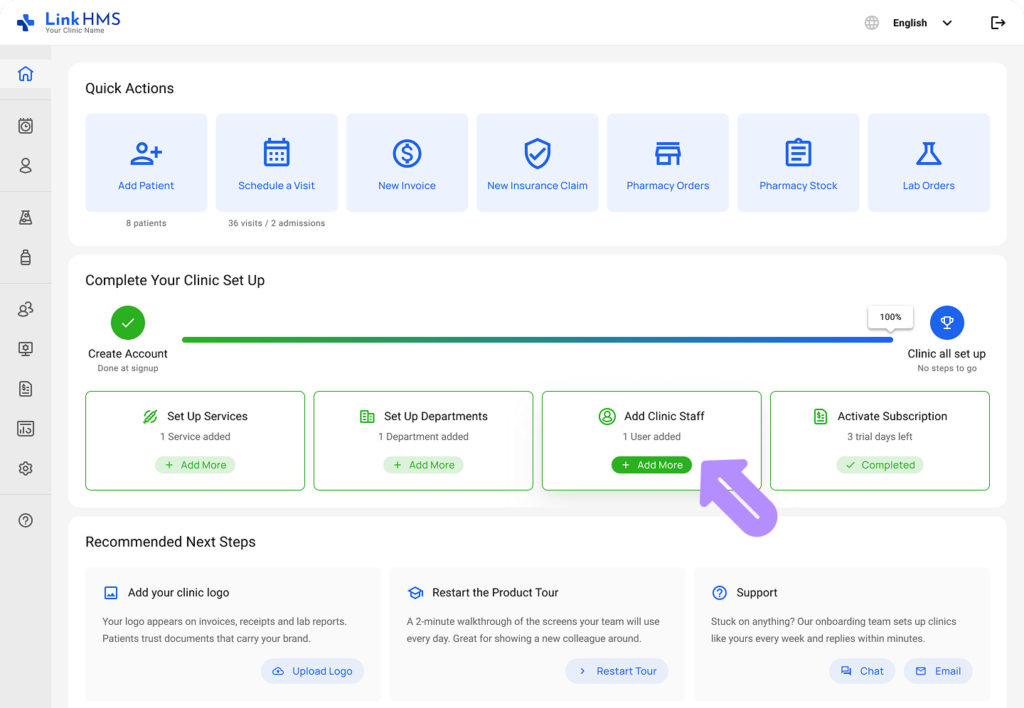
The setup includes four main steps:
- Set Up Services. Add the services your clinic provides and configure the information needed to make them available for visits, appointments, and billing.
- Set Up Departments. Create the departments that reflect how your clinic is organized and help connect services and daily workflows to the appropriate areas.
- Add Clinic Staff. Invite or add staff members who will use LinkHMS and set up their access according to their roles and responsibilities.
- Activate Subscription. Complete subscription activation so your clinic can continue using LinkHMS after the initial setup or trial period.
Use this section as a setup checklist. The progress indicator makes it easy to see which steps are complete and what still needs to be configured before your clinic is fully set up for daily operations.
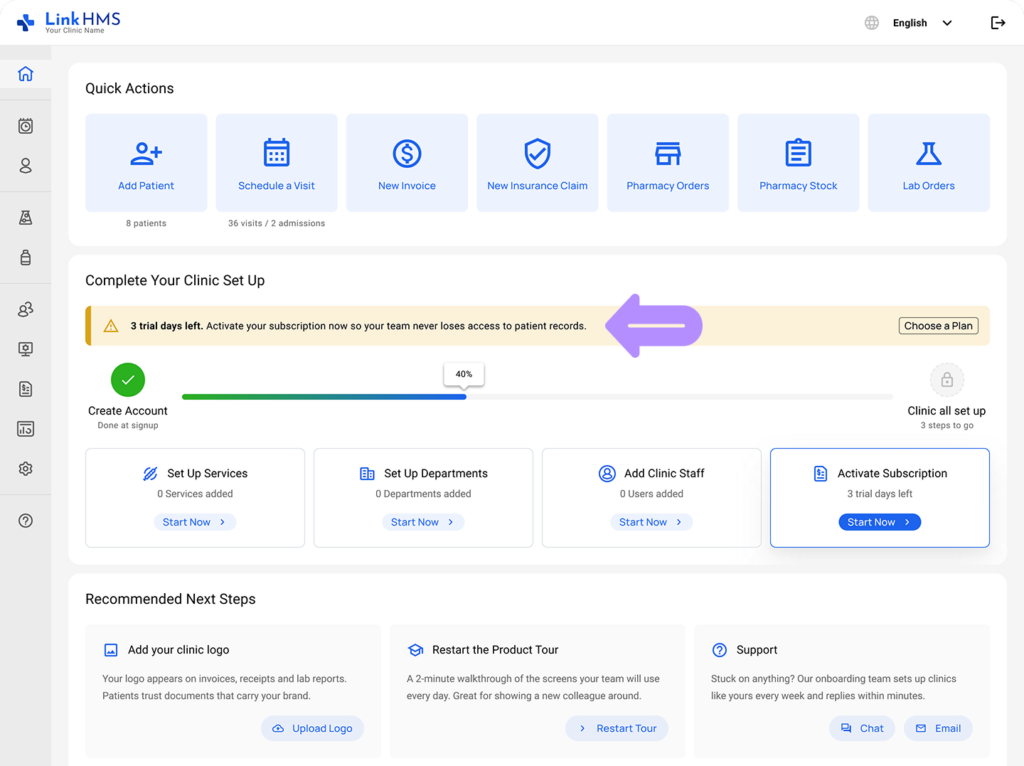
You can also check how many days remain in your free trial, so you can keep track of your trial period and activate your subscription before it ends to maintain uninterrupted access to LinkHMS.
💡Notes
The Complete Your Clinic Setup section is temporary and changes once all four setup steps are complete. At that point, it collapses into a Clinic all set up, no steps to go confirmation, indicating that the initial clinic configuration is finished.
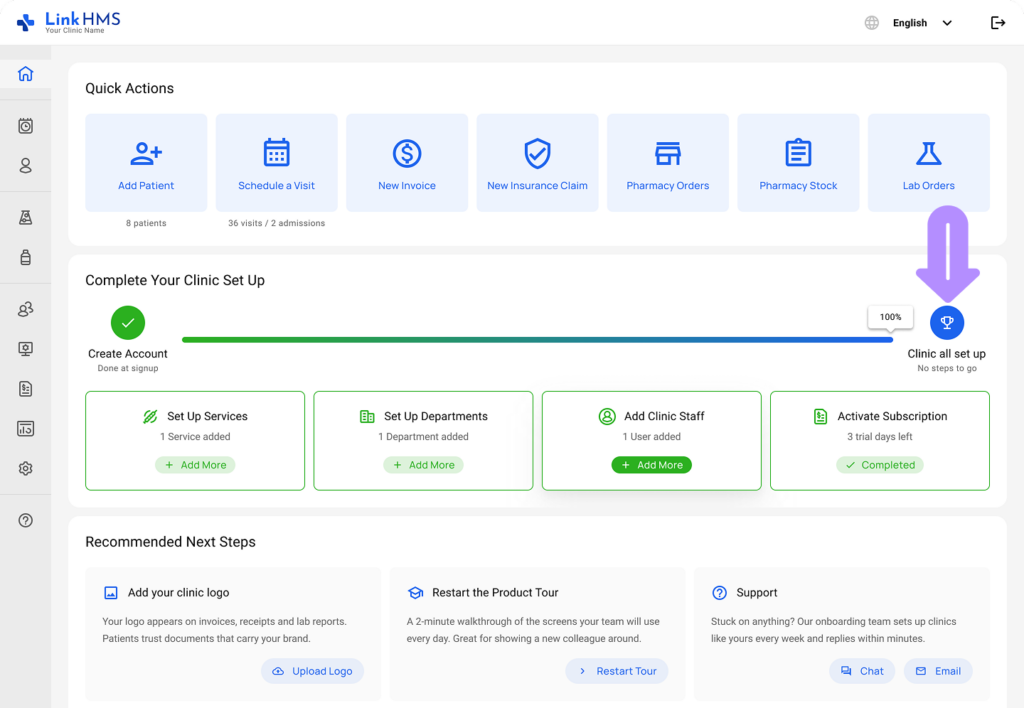
Your home page then focuses on ongoing clinic management, with additional Quick Actions for tasks such as adding more Services, Departments, or Clinic Staff. It keeps the home page relevant after setup, shifting from initial configuration to the actions your team may need as the clinic continues to operate.
Recommended Next Steps section
LinkHMS provides additional options for completing and personalizing your clinic configuration. These steps are not required to complete the main setup, but they can help prepare the platform for your clinic’s day-to-day workflows.
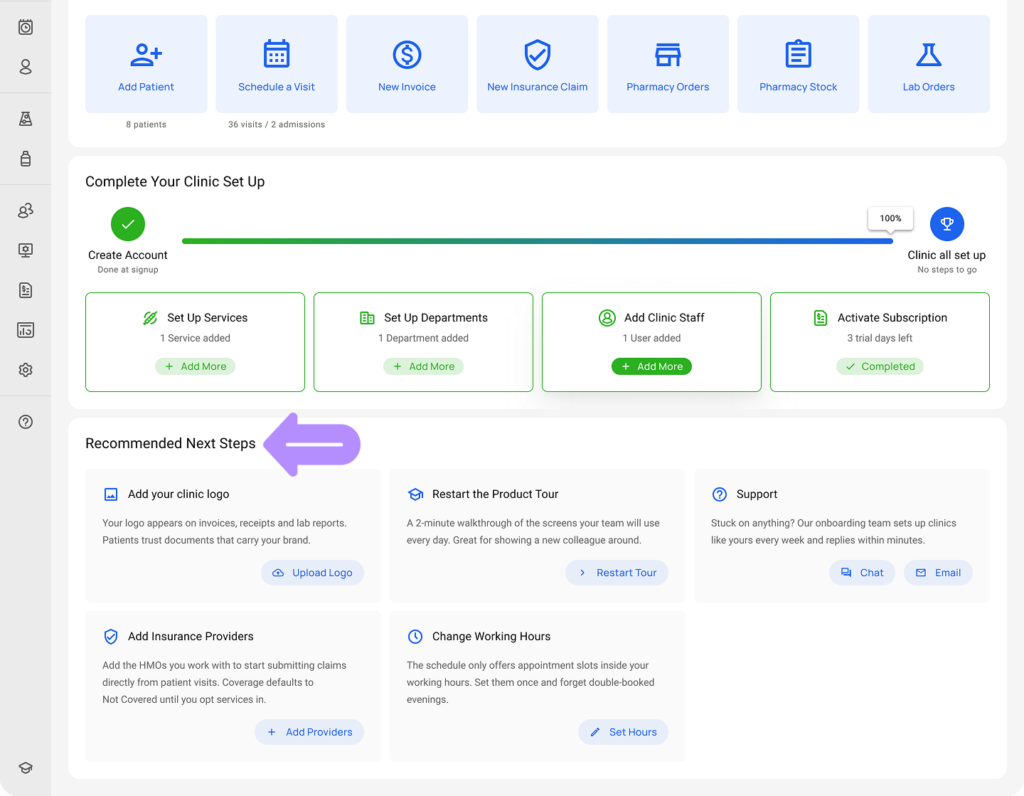
- Add your clinic logo. Upload your clinic logo to personalize your LinkHMS account and use your clinic’s branding.
- Restart the Product Tour. Run the product tour again whenever you need a refresher on the main areas and functionality available in LinkHMS.
- Support. Contact the LinkHMS support team if you need assistance with setup, configuration, or using a particular feature.
- Add Insurance Providers. Add the insurance providers your clinic works with so they are available for patient insurance, billing, and claims workflows.
- Change Working Hours. Define your clinic’s regular operating hours to reflect when your facility is available for appointments and other scheduled activities.
You can return to Recommended Next Steps at any time to complete additional configuration or update information you have already provided. As your clinic’s needs change, use this section to keep details such as working hours, insurance providers, clinic branding, and other settings up to date.