💡Notes
The Ultrasound subtab is used to document ultrasound findings during an active pregnancy. It supports the following record management:
- Mother’s ultrasound records
- Fetal ultrasound records for each fetus
It allows clinicians to record ultrasound findings consistently, especially in multiple pregnancies, while keeping a clear history for later review.
Accessing the Ultrasound Subtab
- Open the Pregnancies tab.
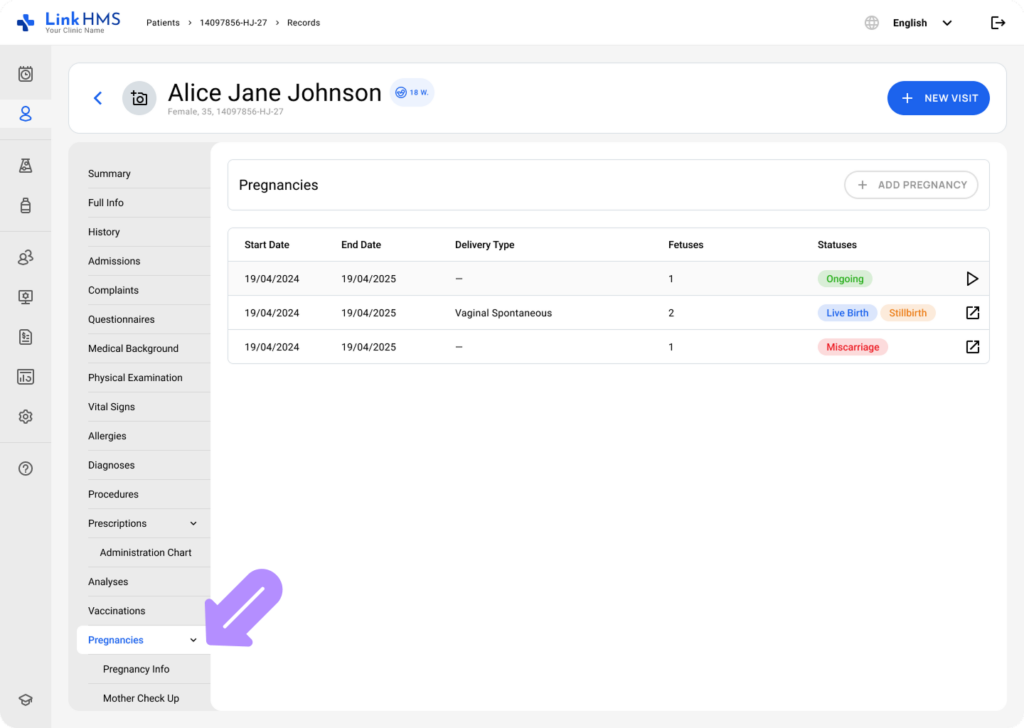
💡Notes
The system expands subtabs once a pregnancy is marked as ongoing. If there is no active pregnancy, the Ultrasound subtab will not be available.
- Select Ultrasound from the pregnancy subtabs.
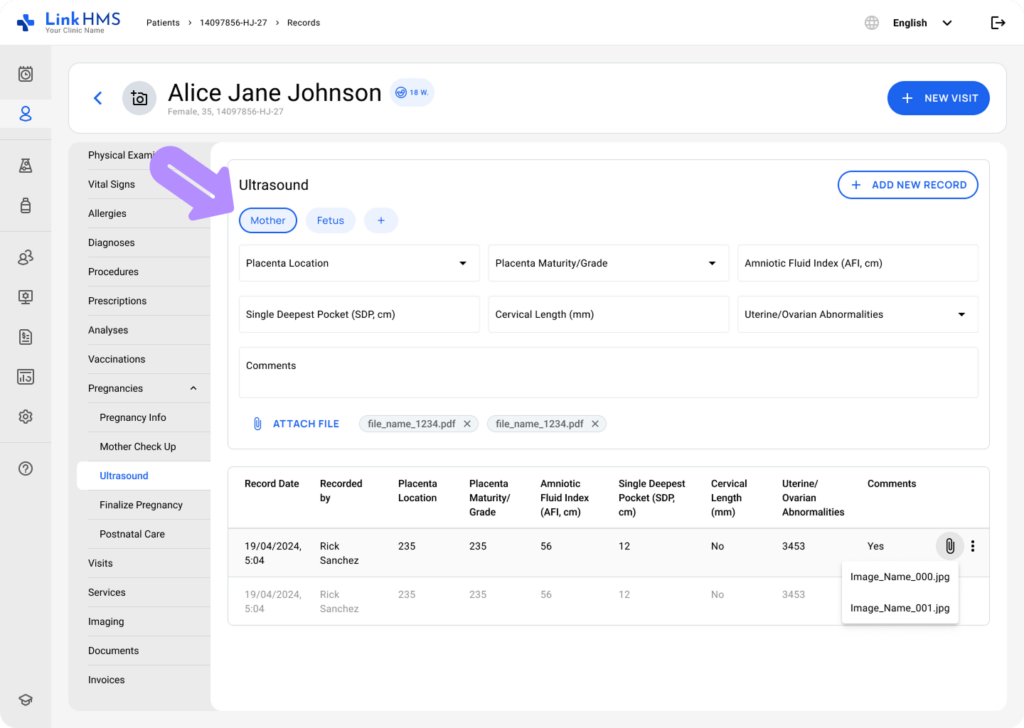
Switching between Mother and Fetus Ultrasound Views
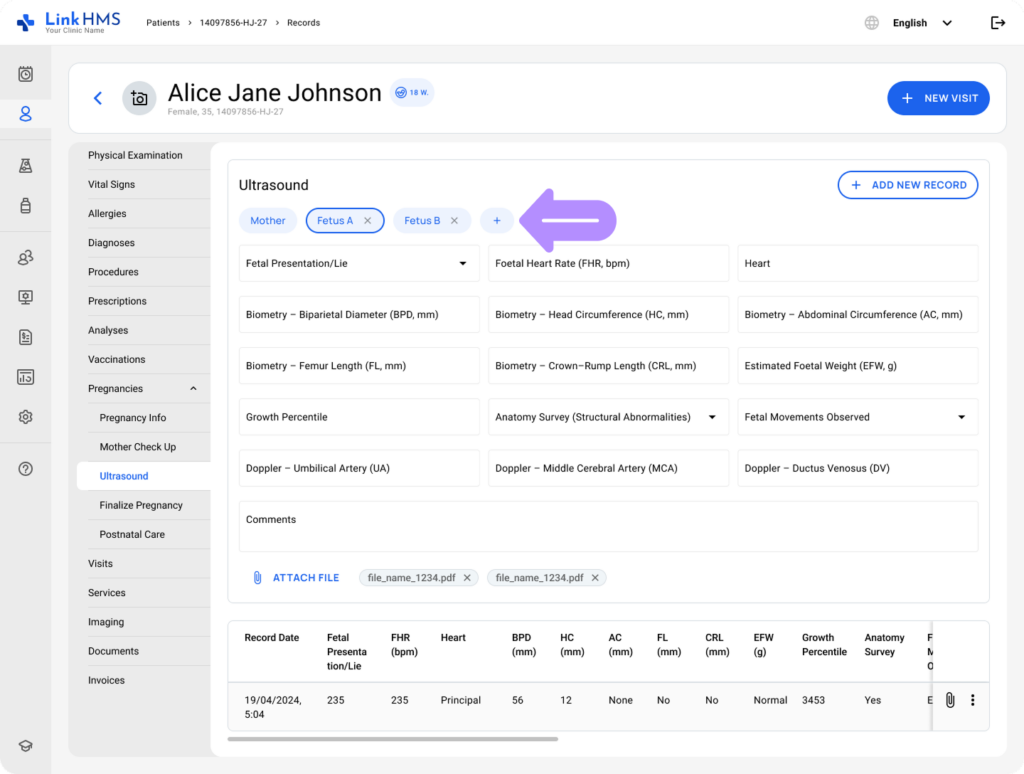
- At the top of the Ultrasound subtab, find the selection buttons to switch between different views:
- Mother
- Fetus A, Fetus B, Fetus C, and so on (depending on the pregnancy).
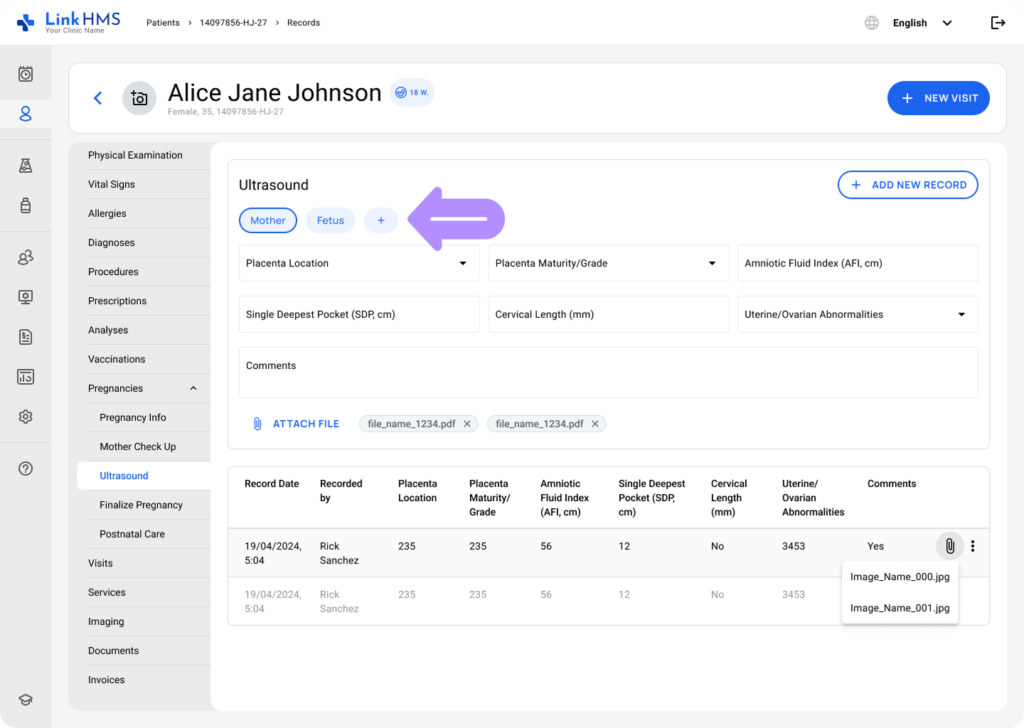
- Select a necessary button to switch the form to the corresponding data set.
💡Notes
Each view represents a separate record, so Mother and each fetus have separate records and histories. Make sure the correct view is selected before entering or reviewing information.
Managing Mother Ultrasound Records
💡Notes
When the Mother view is selected, it allows you to document maternal ultrasound findings. You can save a record when at least one field has been entered.
Adding the Mother Ultrasound Record with File Attachments
- Filling in all fields is optional, so you can choose between the necessary fields, including:
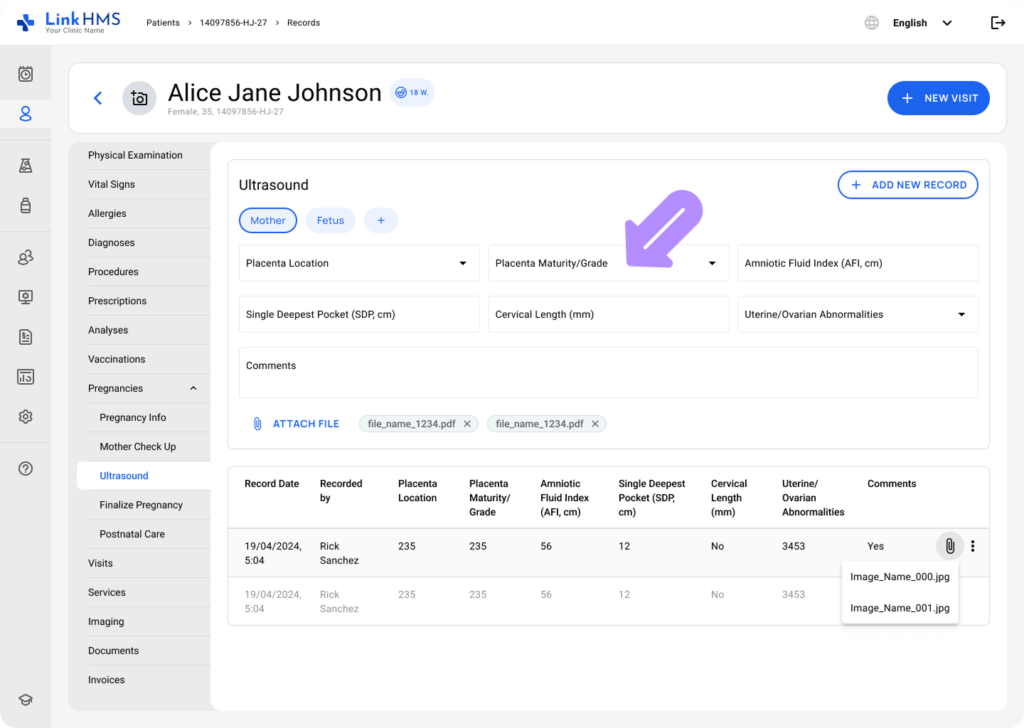
- Placenta Location – Select the placenta location from the available options. (Anterior, Posterior, Fundal, Low-lying, Previa, Other)
- Placenta Maturity/Grade – Specify the placenta maturity or grade. (Grade 0, Grade I, Grade II, Grade III)
- Amniotic Fluid Index (AFI, cm) – Enter the AFI value in centimeters.
- Single Deepest Pocket (SDP, cm) – Specify the SDP measurement in centimeters.
- Cervical Length (mm) – Record the cervical length in millimeters.
- Uterine/Ovarian Abnormalities – Indicate uterine or ovarian abnormalities. (None, Present)
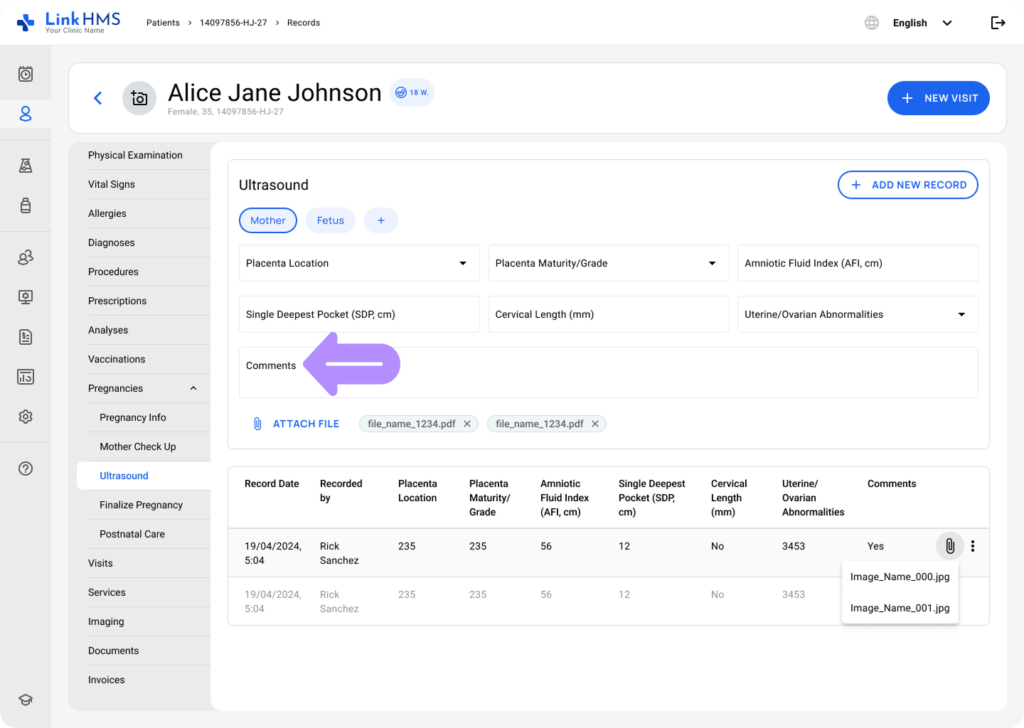
- Comments – Add notes if needed.
💡Notes
Ultrasound records often require supporting files such as images, PDF reports, or scans. These files can be uploaded and attached directly within each added ultrasound record.
- If you need to attach a file to this ultrasound record, click Attach File.
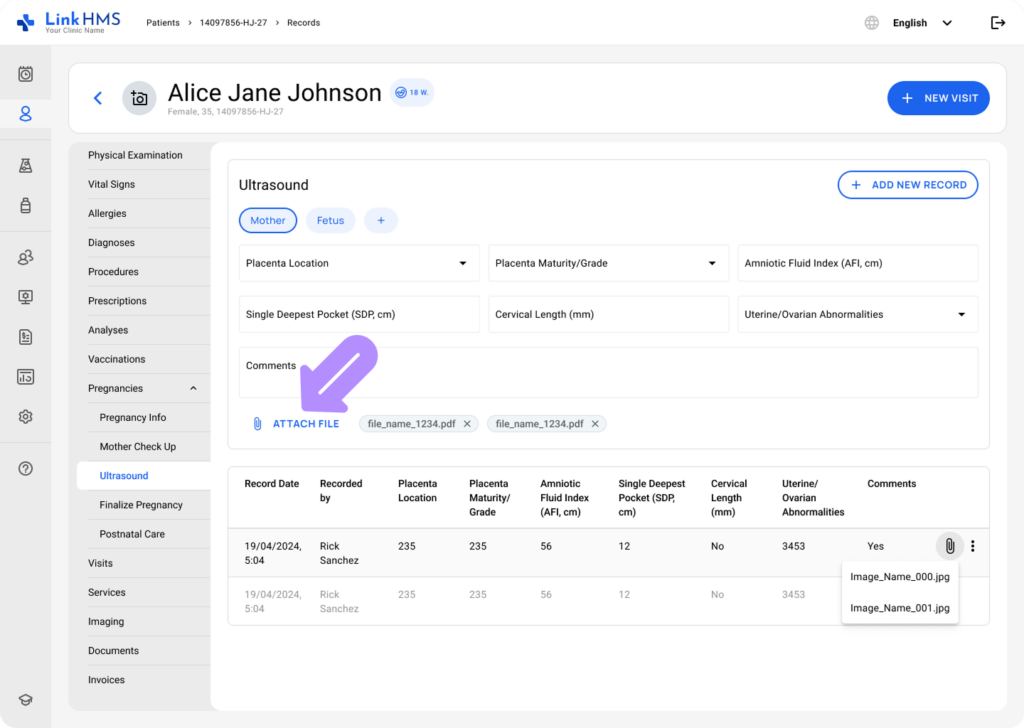
- The Attach File pop-up appears.
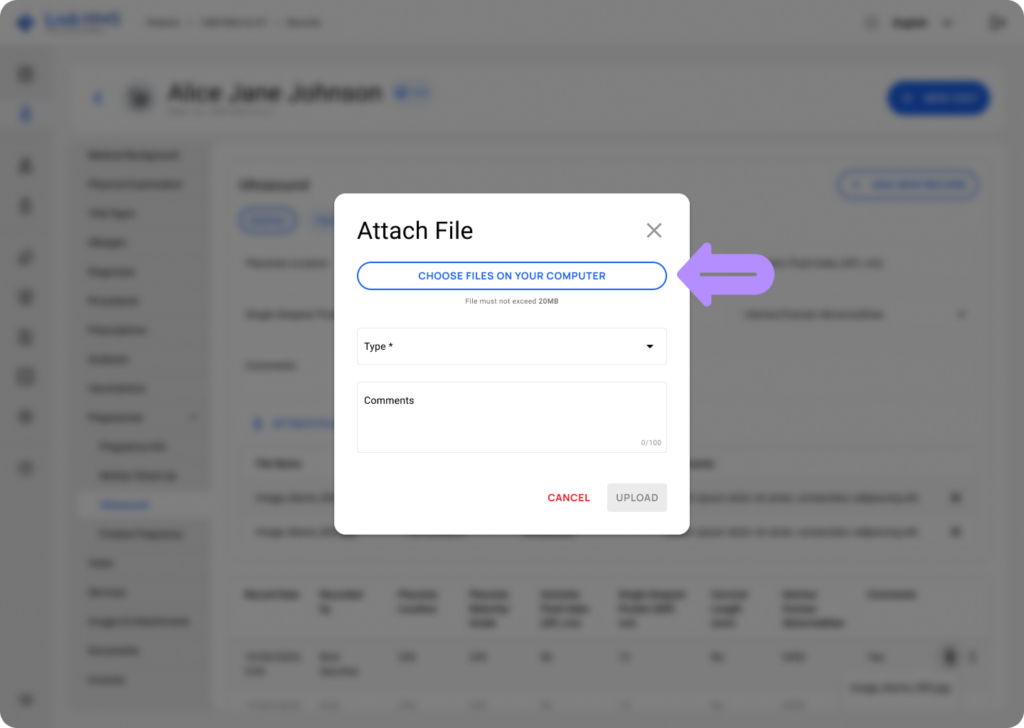
- Click the Choose Files on Your Computer button to select the required files.
- The uploaded file must follow the supported formats and size limitations.
- Formats: PDF, JPG, PNG.
- Size: max 20 MB
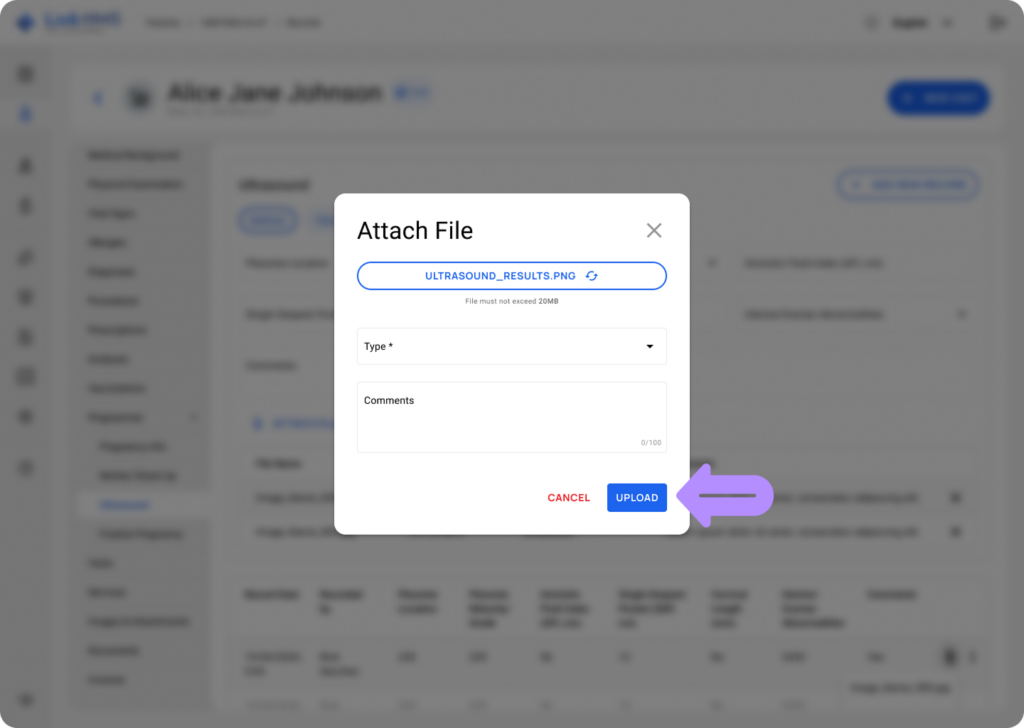
- Select the appropriate file type (Ultrasound image, Report, Other)
- Add optional comments (up to 100 characters)
- Click the Upload button to attach the file.
💡Notes
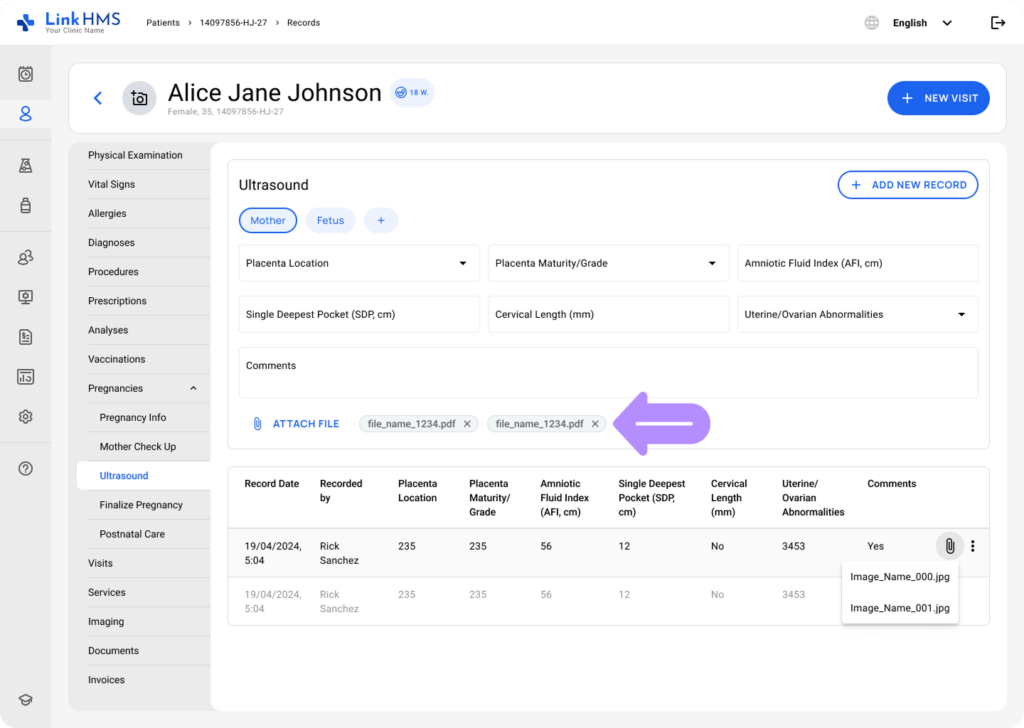
Uploaded files appear inline in the Attachments area under the record’s comments section. Each file appears as a chip with its file name and an X icon for deletion, if required, before saving.
- Once you click the + Add New Record button, the record and its linked attachments will be saved.

- The record is added to the mother’s ultrasound history table, and attachments remain visible in history, including after pregnancy finalization.
💡Notes
Ultrasound attachments are also duplicated to the patient’s Imaging tab for easier access.
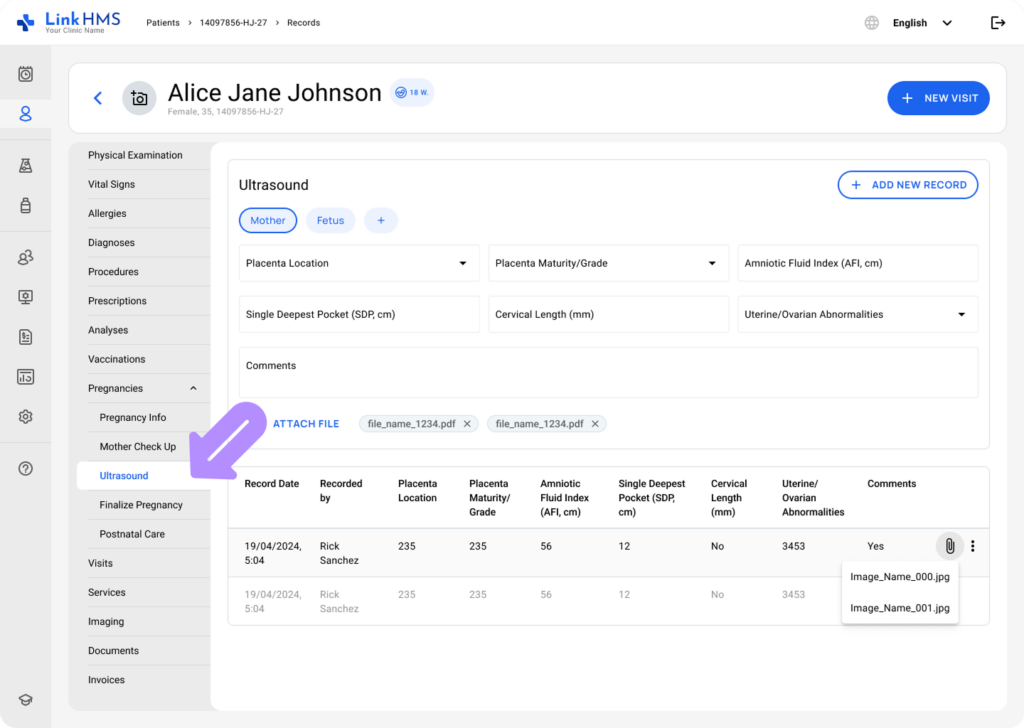
Reviewing the Mother Ultrasound Records and Attachments
💡Notes
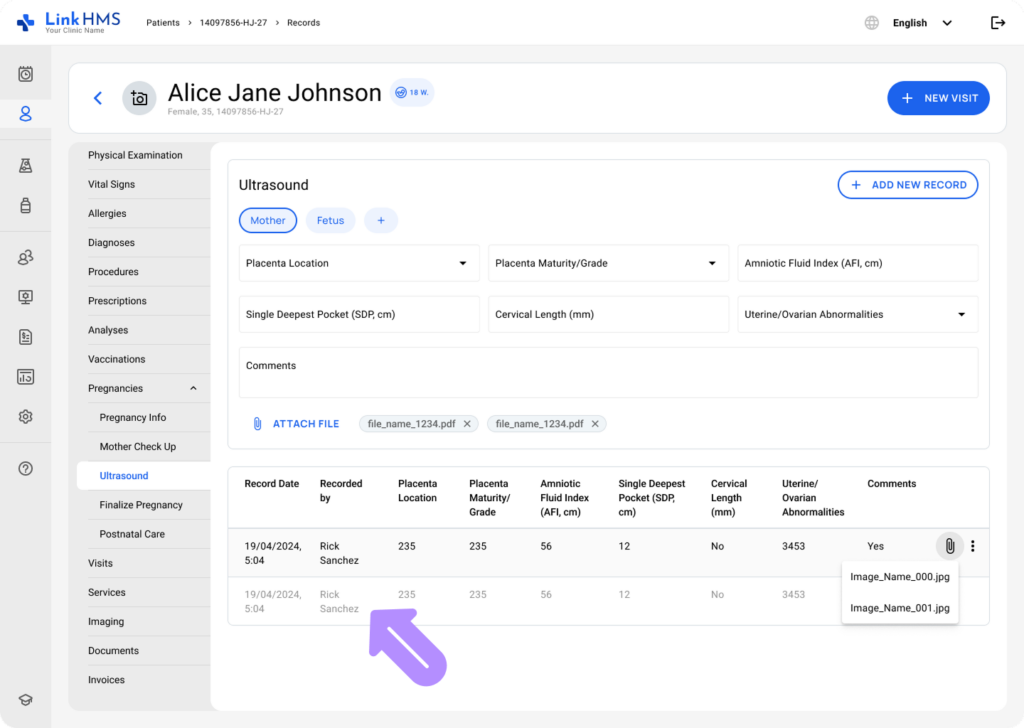
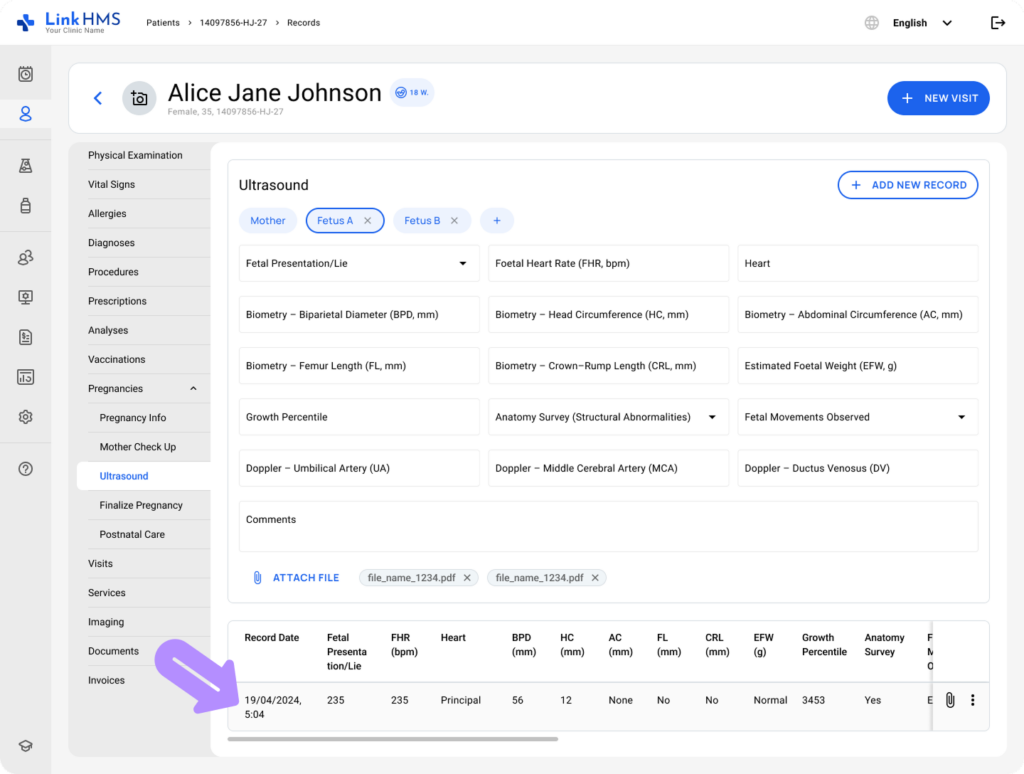
All saved mother ultrasound entries appear in a table that supports horizontal and vertical scrolling.
- Each row shows the recorded findings, the entry date, the recorder, and any attached files.
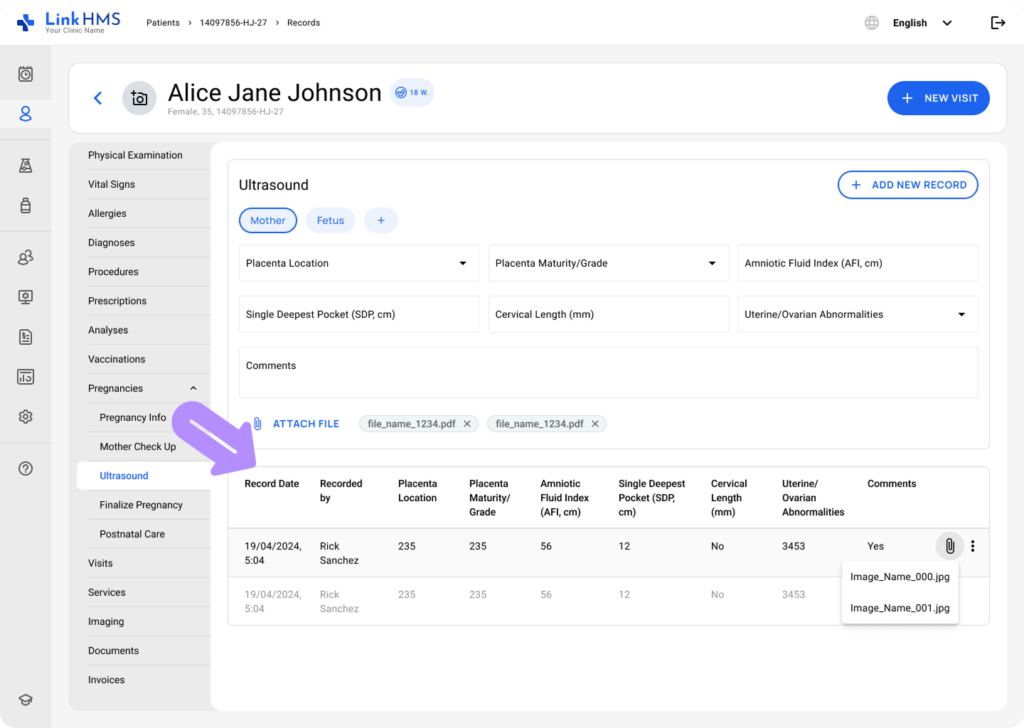
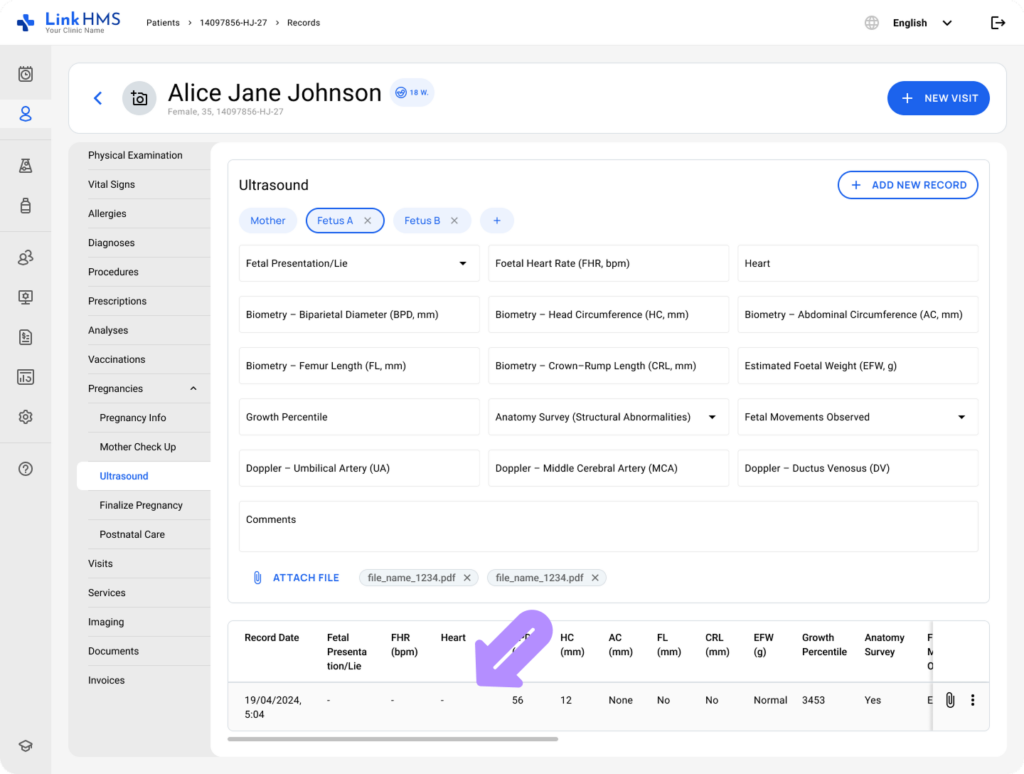
- Any field without filled data is shown as a dash to indicate that no value was entered.

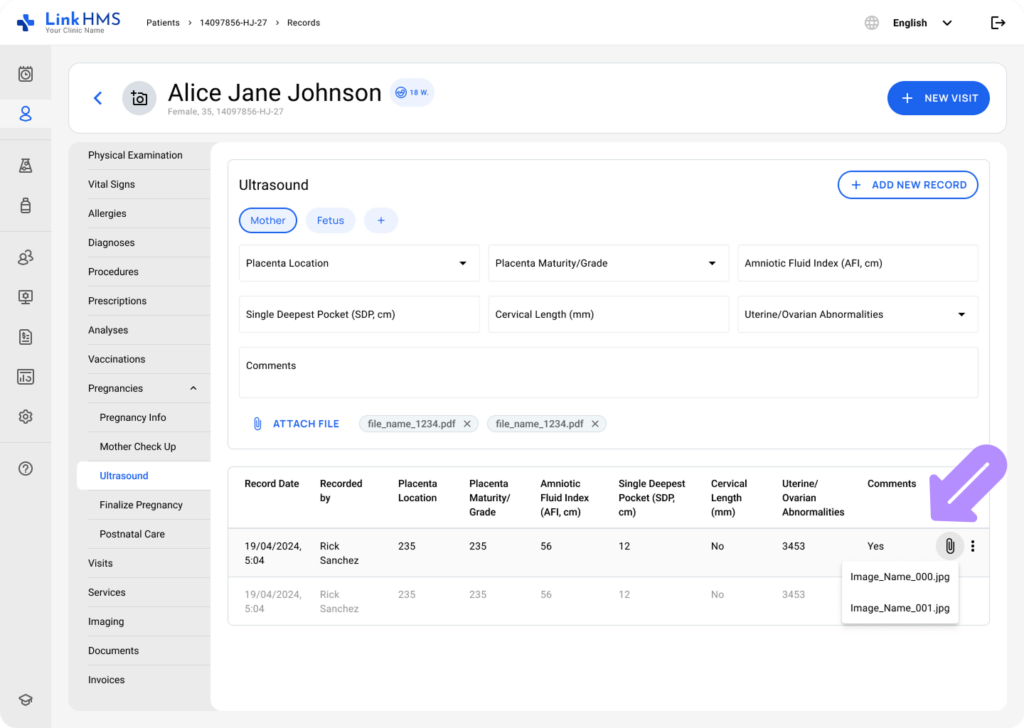
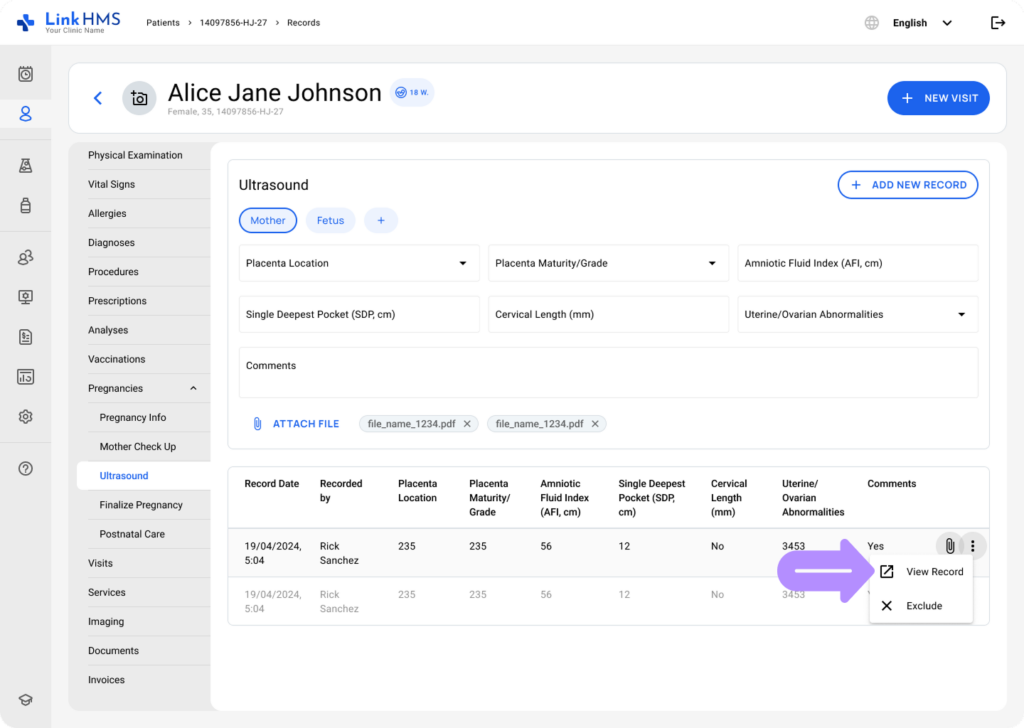
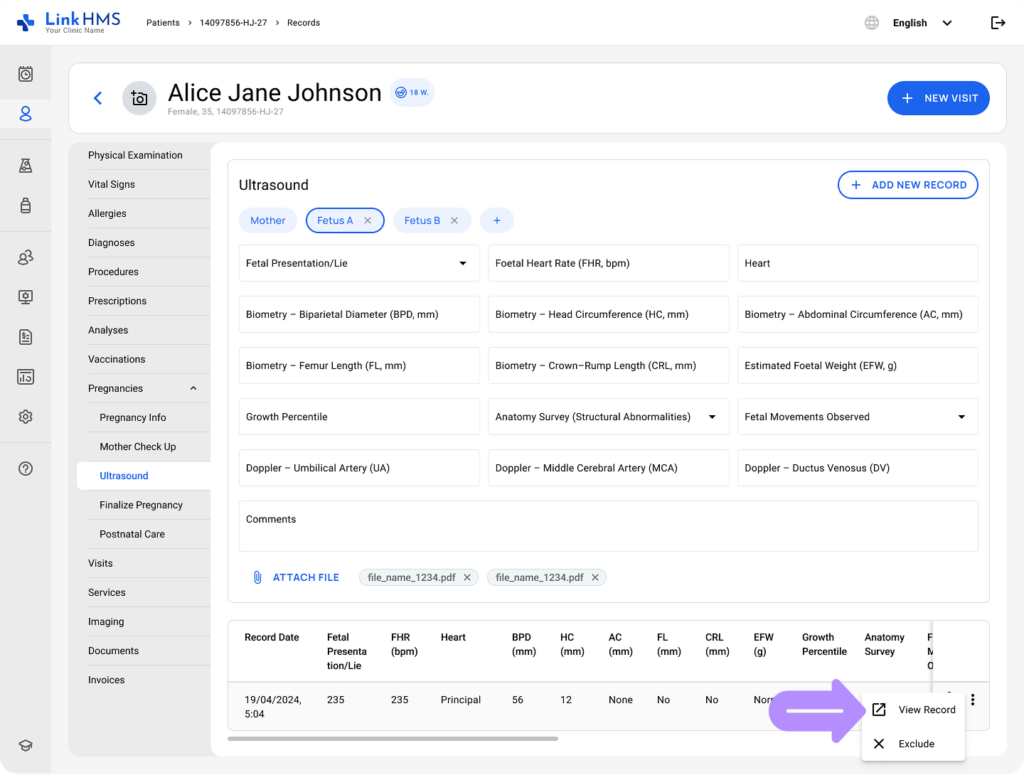
- Open the three-dot menu and select Review to view the ultrasound record in full detail.
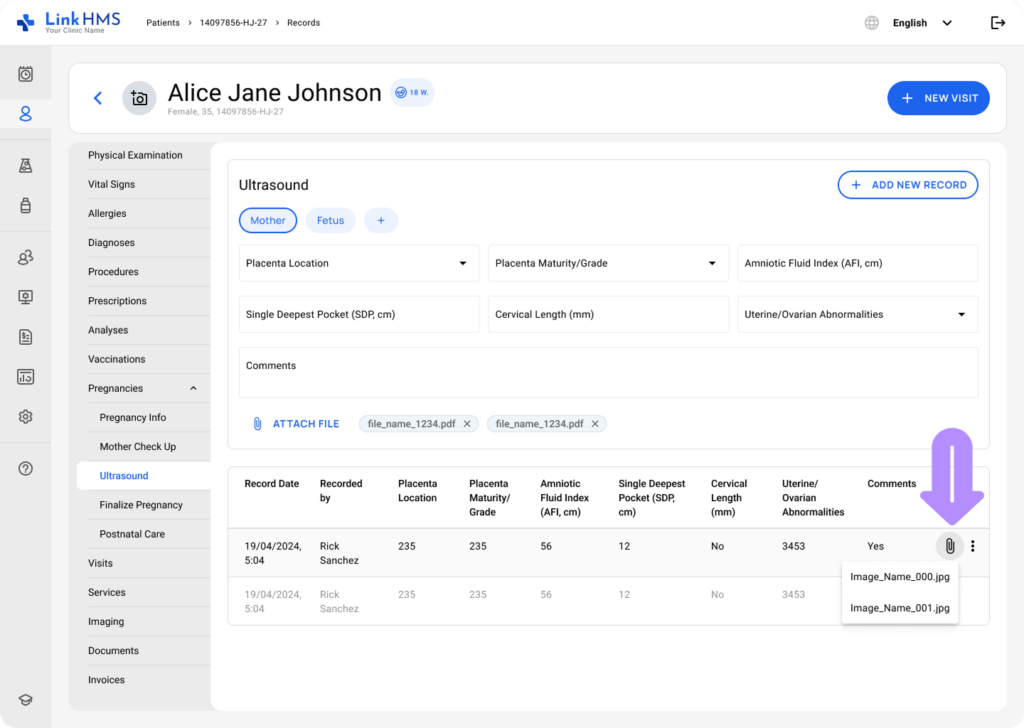
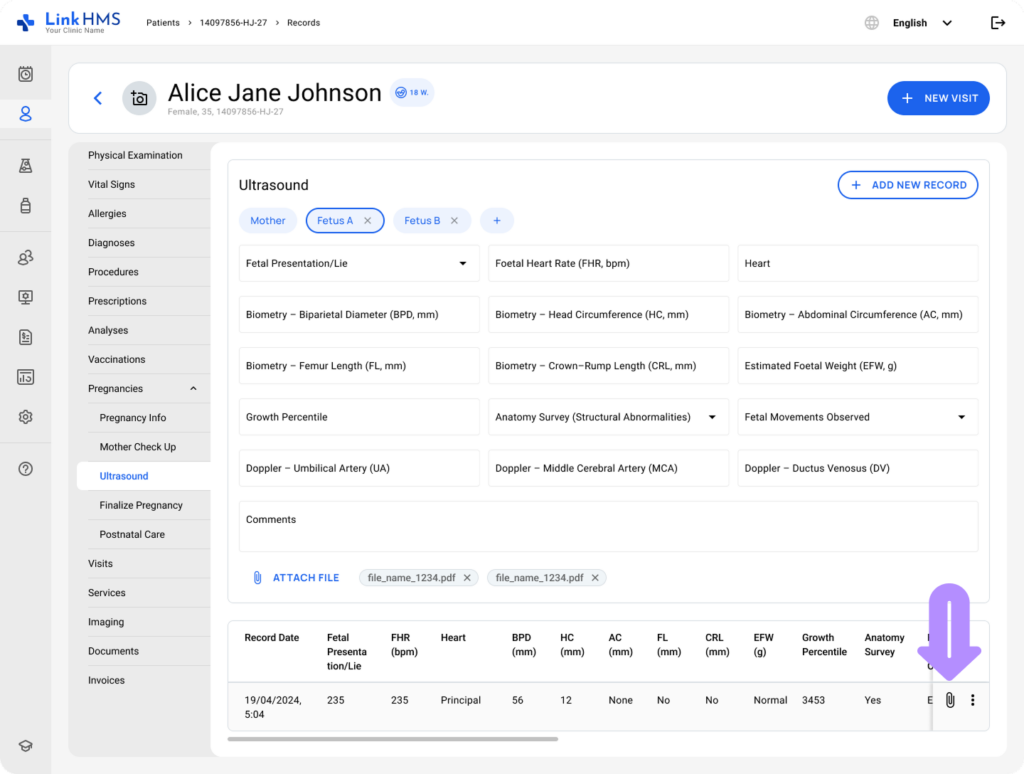
- Click the attachment icon in the table to download and review the file linked to the selected record.
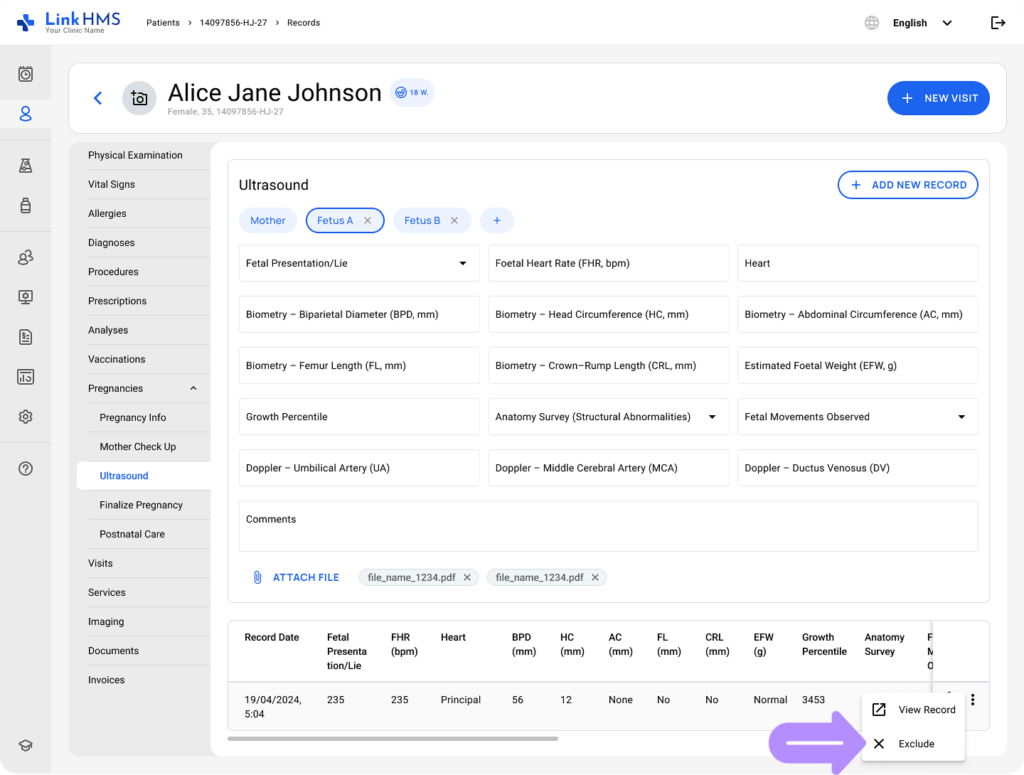
Excluding the Mother Ultrasound Records
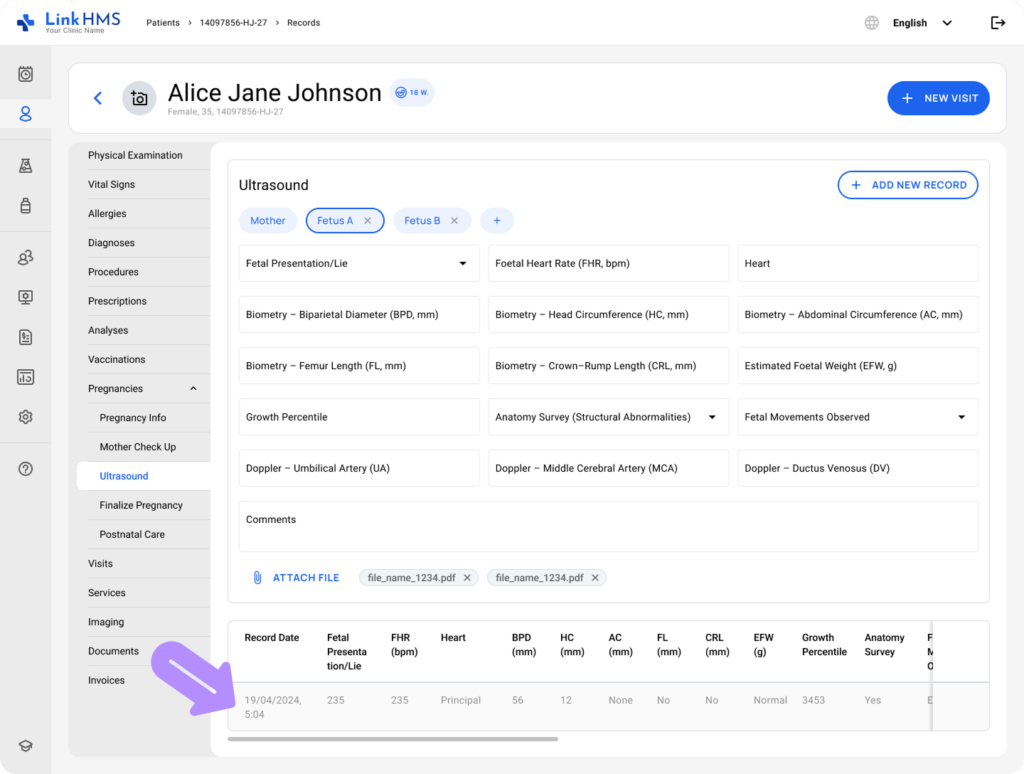
- You can also exclude added mother ultrasound records by selecting Exclude from the three-dot menu.
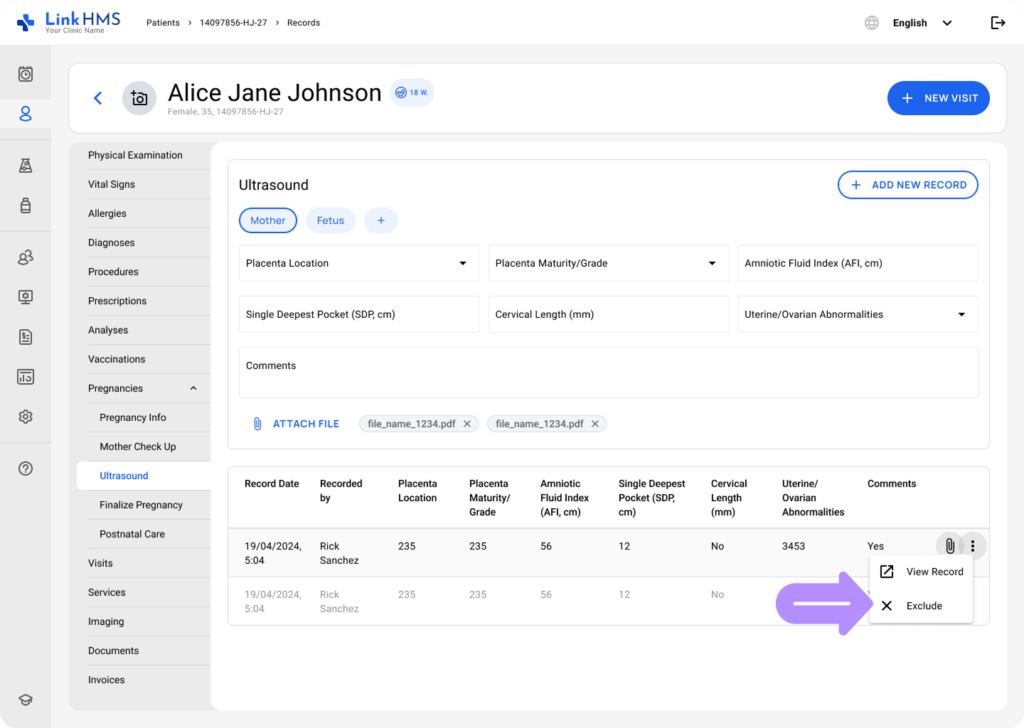
- Once excluded, the record is greyed out and retained in the table to support historical review and post-finalization reference.
Managing Fetus Ultrasound Records
After selecting Fetus, LinkHMS presents individual views for each fetus (e.g., Fetus A, Fetus B), so you can choose the one you want to add ultrasound records for.
Adding and Removing Fetuses
💡Notes
The Ultrasound subtab controls fetus management. When you add or remove fetuses here, the system automatically updates the Number of Fetuses in the Pregnancy Info subtab.
- Click the + button to add the new fetus.
- To keep pregnancy records clear and consistent, LinkHMS uses a stable fetus naming system:
- If a pregnancy starts with one fetus and another is added, the original Fetus 1 is renamed Fetus A, and the new fetus is labeled Fetus B.
- If Fetus B is later removed, Fetus A keeps its original name.
- Any additional fetuses are labeled sequentially (Fetus C, Fetus D, and so on).
- Once a letter is assigned to a fetus, it remains permanently linked to that fetus, even if the fetus is later removed.
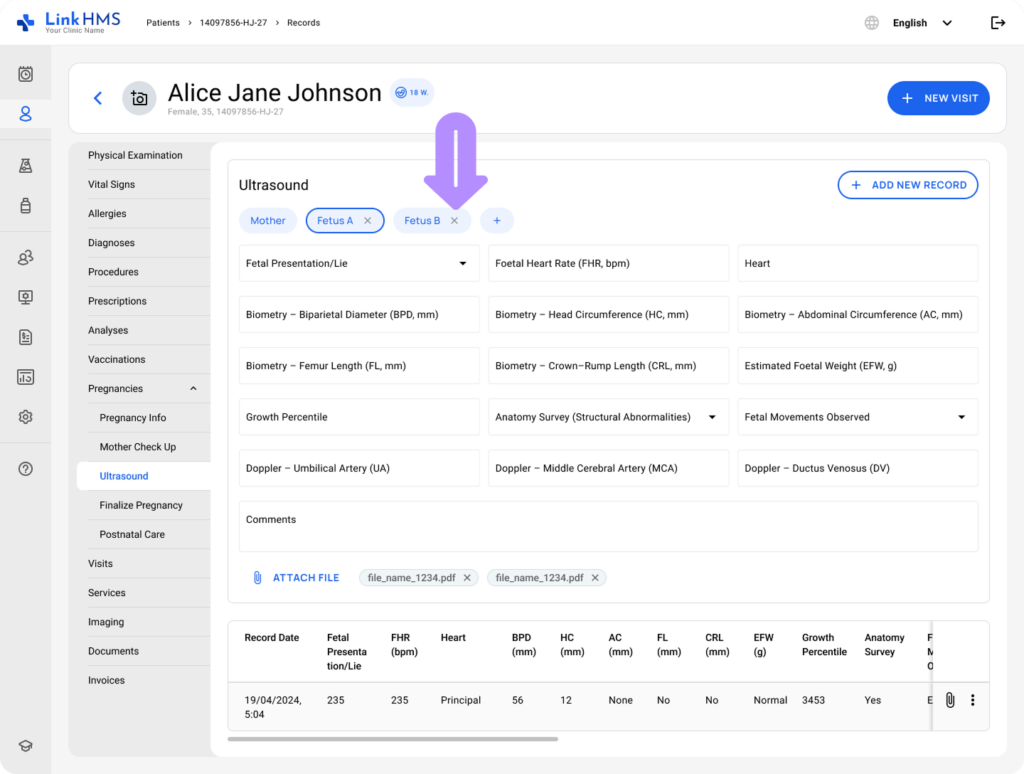
- Each fetus label includes an x icon for deletion.
- Click it to delete the fetus.
- A confirmation pop-up appears to verify the fetus removal. Click Remove to proceed or Cancel to stop.
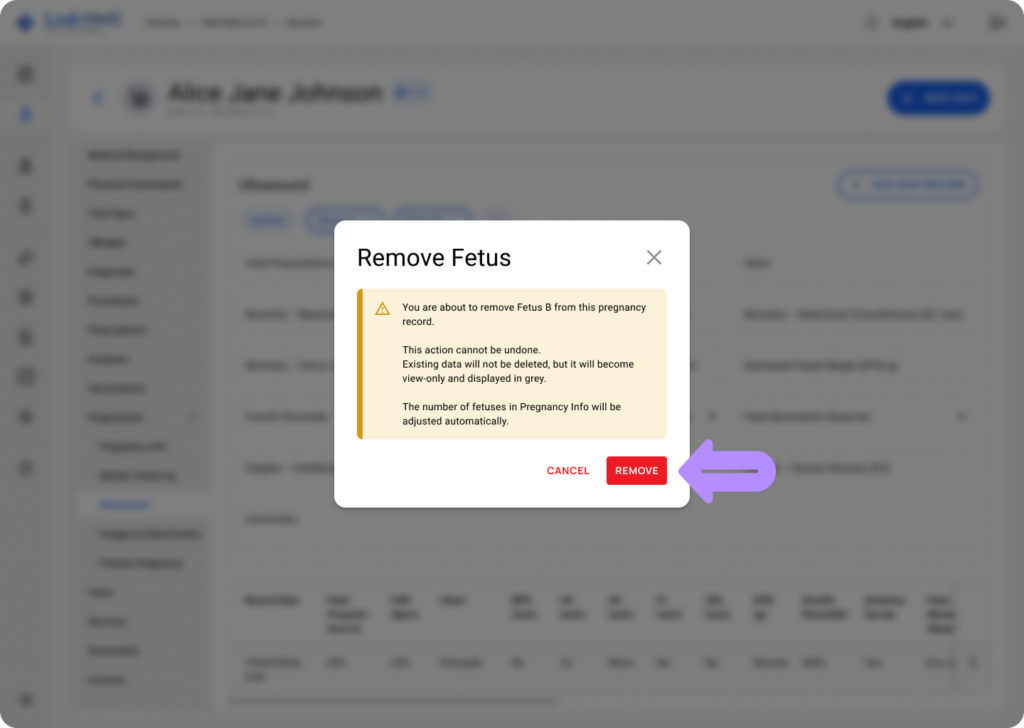
💡Notes
This action cannot be undone. Existing data will remain available in read-only mode and will be displayed in grey, and the number of fetuses in Pregnancy Info will be updated automatically.
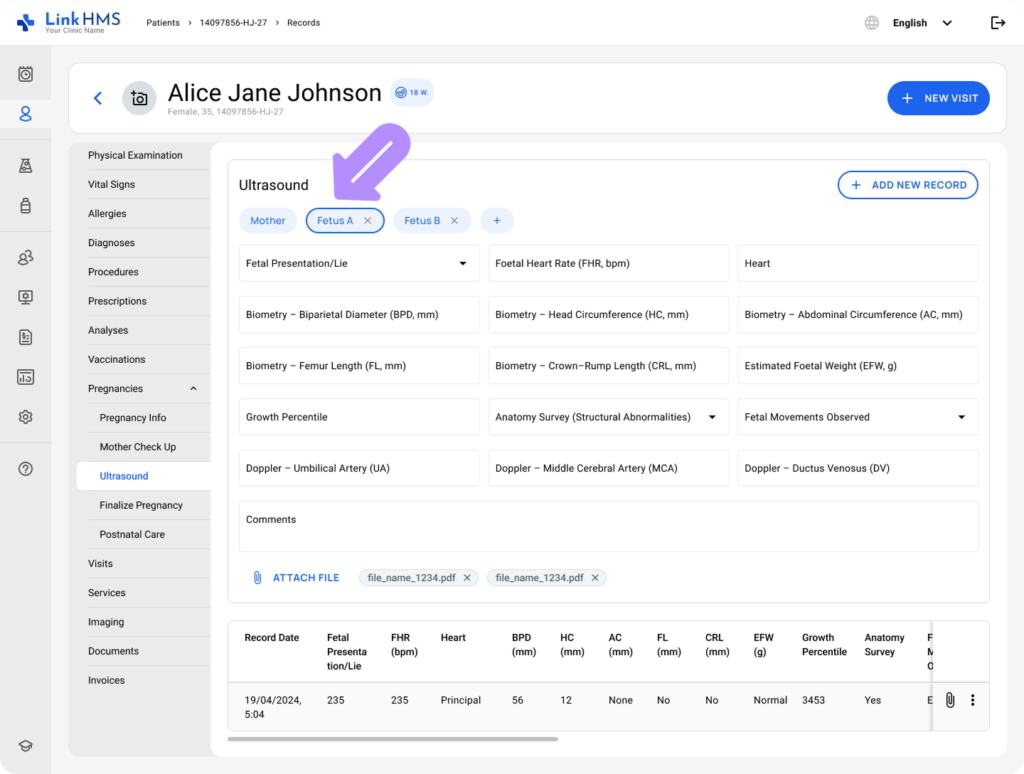
Adding the Fetus Ultrasound Record with File Attachments
💡Notes
Make sure to enter data for one fetus at a time.
- Select the fetus you want to document the ultrasound findings. You can save a record when at least one field has been entered.
- You can record the following data in the included fields for each fetus.
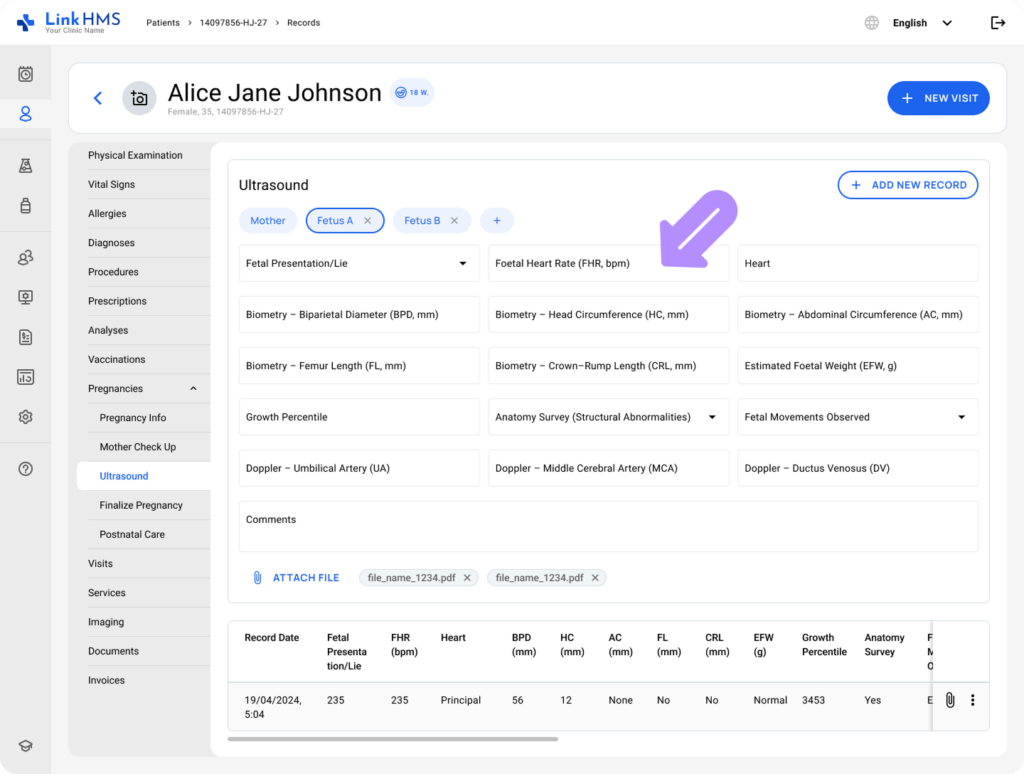
- Fetal Presentation/Lie – Choose the fetal presentation from the available options. (Cephalic, Breech, Transverse, Other)
- Fetal Heart Rate (FHR, bpm) – Record the FHR measurement.
- Heart – Specify heart findings using free text.
- Biometry – Biparietal Diameter (BPD, mm) – Document the biparietal diameter measurement.
- Biometry – Head Circumference (HC, mm) – Add the head circumference under Biometry.
- Biometry – Abdominal Circumference (AC, mm) – Record the abdominal circumference in the Biometry section.
- Biometry – Femur Length (FL, mm) – Enter the FL measurement in millimeters.
- Biometry – Crown–Rump Length (CRL, mm) – Record the crown–rump length.
- Estimated Foetal Weight (EFW, g) – Enter the EFW in grams.
- Growth Percentile – Specify the growth percentile value.
- Anatomy Survey (Structural Abnormalities) – Indicate the anatomy survey result. (Normal, Abnormal)
- Fetal Movements Observed – Select the fetal movement status. (Normal, Reduced, Absent)
- Doppler – Umbilical Artery (UA) – Enter the umbilical artery measurement.
- Doppler – Middle Cerebral Artery (MCA) – Specify the middle cerebral artery measurement.
- Doppler – Ductus Venosus (DV) – Record the ductus venosus value.
- Comments – Add additional text notes.
💡Notes
You can upload and attach supporting files like images, PDF reports, or other directly to the specific fetus ultrasound record.
- Select Attach File to add a file to the fetus ultrasound record.
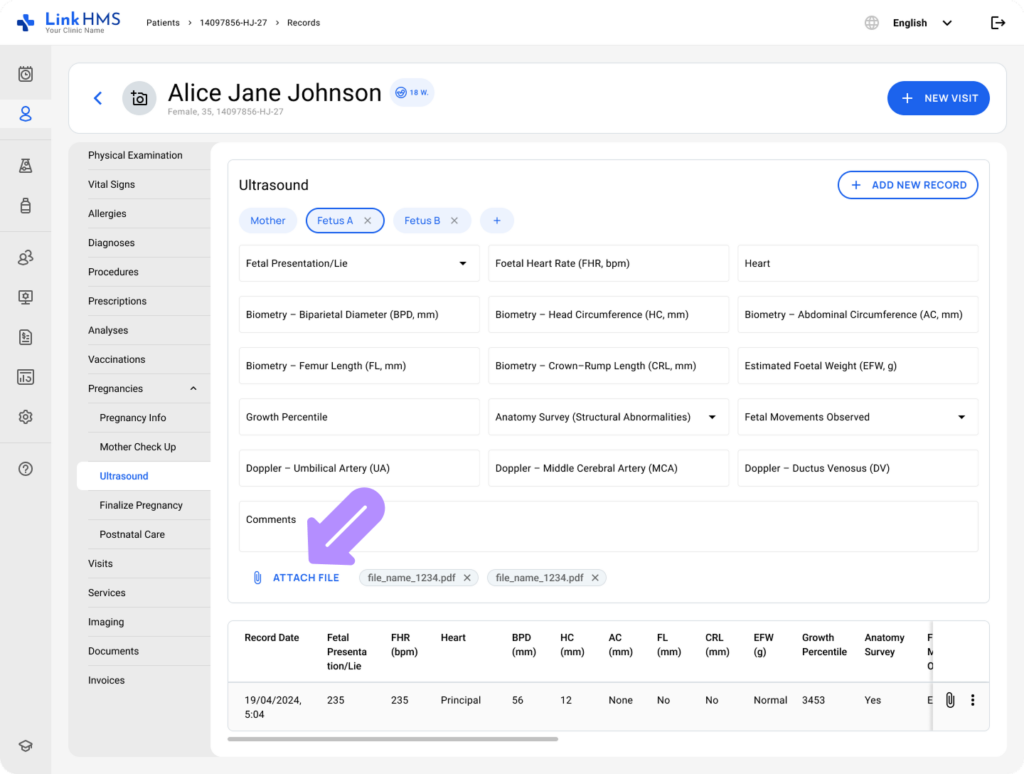
- A pop-up opens to upload the selected file.
- Click Choose Files on Your Computer to select files.
- Ensure the file follows the supported format and size limitations before uploading.
- Formats: PDF, JPG, PNG.
- Size: max 20 MB
- Choose the file type that applies (Ultrasound image, Report, or Other).
- Add optional comments (up to 100 characters)
- Click Upload to attach the file.
💡Notes
Uploaded files appear in the Attachments area with the file name and an option to remove them before saving.
- Once you click + Add New Record, the new record and its attachments are saved.
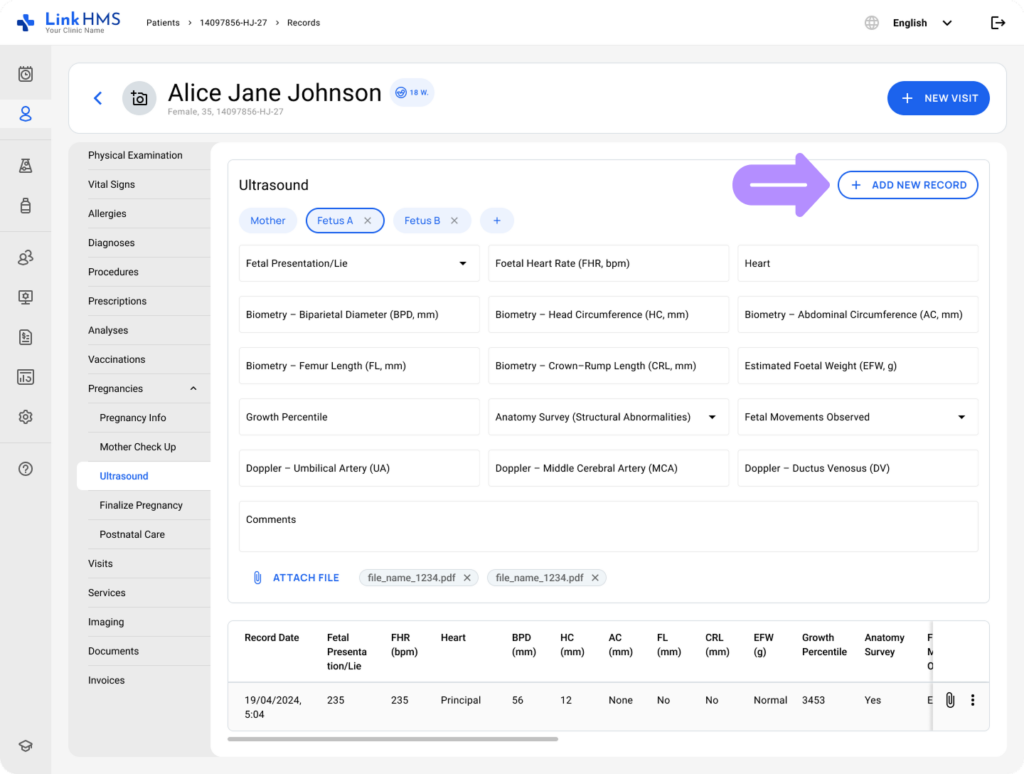
- The record is shown in the fetus ultrasound history table, and attachments remain available for review.
Reviewing the Fetus Ultrasound Records and Attachments
💡Notes
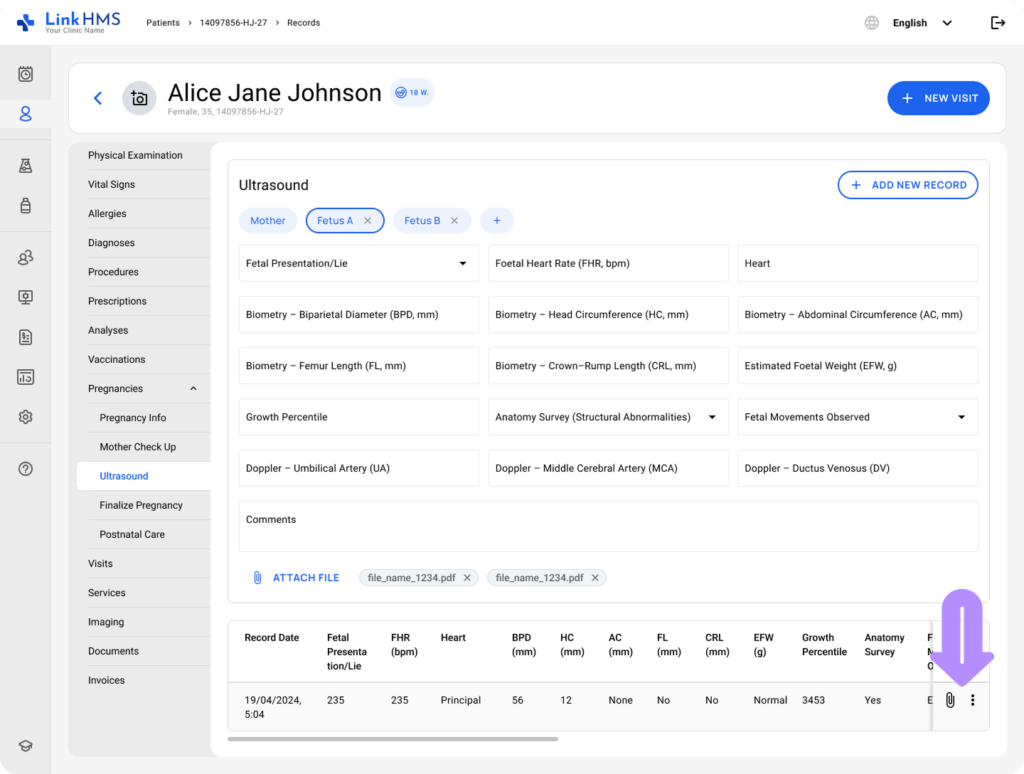
The table below displays all saved fetus ultrasound entries and supports both horizontal and vertical scrolling.
- For the chosen fetus, each table row includes recorded findings, the entry date, and attached files.
- If some value was not entered, the field appears as a dash.
- Use the three-dot menu to open the ultrasound record in full detail.
- Select the attachment icon to download and review the associated file.
Excluding the Fetus Ultrasound Records
- To exclude a specific fetus ultrasound record, open the three-dot menu and select Exclude.
- When excluded, the record stays in the table in a greyed-out state for reference and historical review.
The Ultrasound subtab in LinkHMS provides a structured way to record and review ultrasound findings for both mother and fetus records, with clear support for multiple pregnancies.