💡Notes
Once the admission is started, you can access and start using the fluids charts. For more information, refer to the How to Create an Inpatient Admission guide.
Opening the Patient Admission
- Go to the Patient profile and click the Admissions tab.
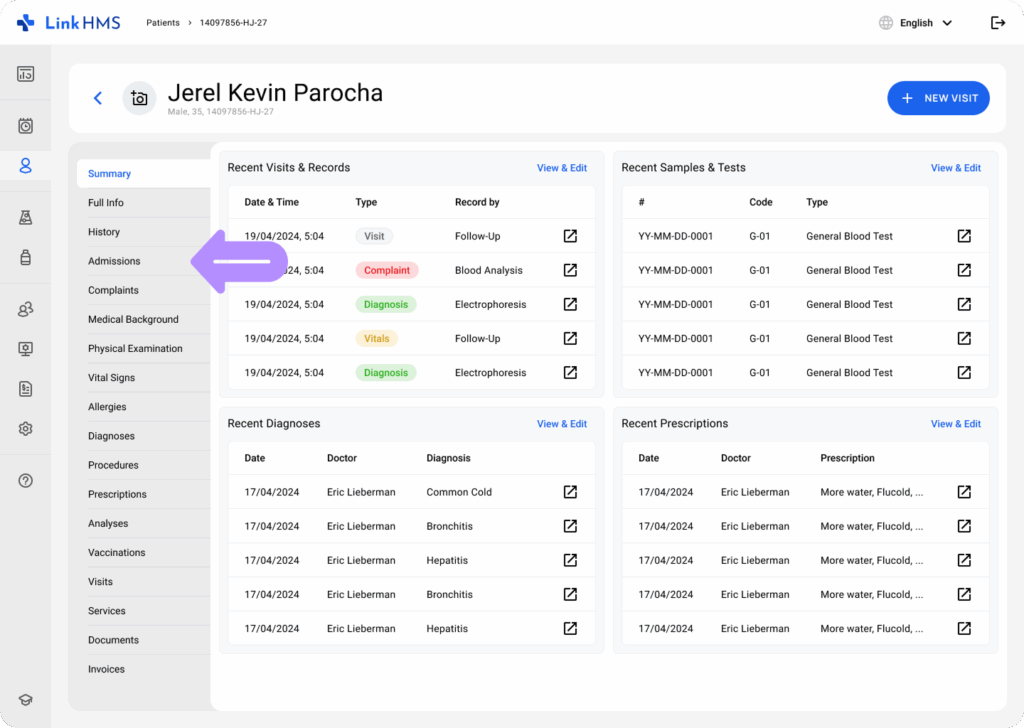
- Select the patient’s active admission labeled with the On Admission status.

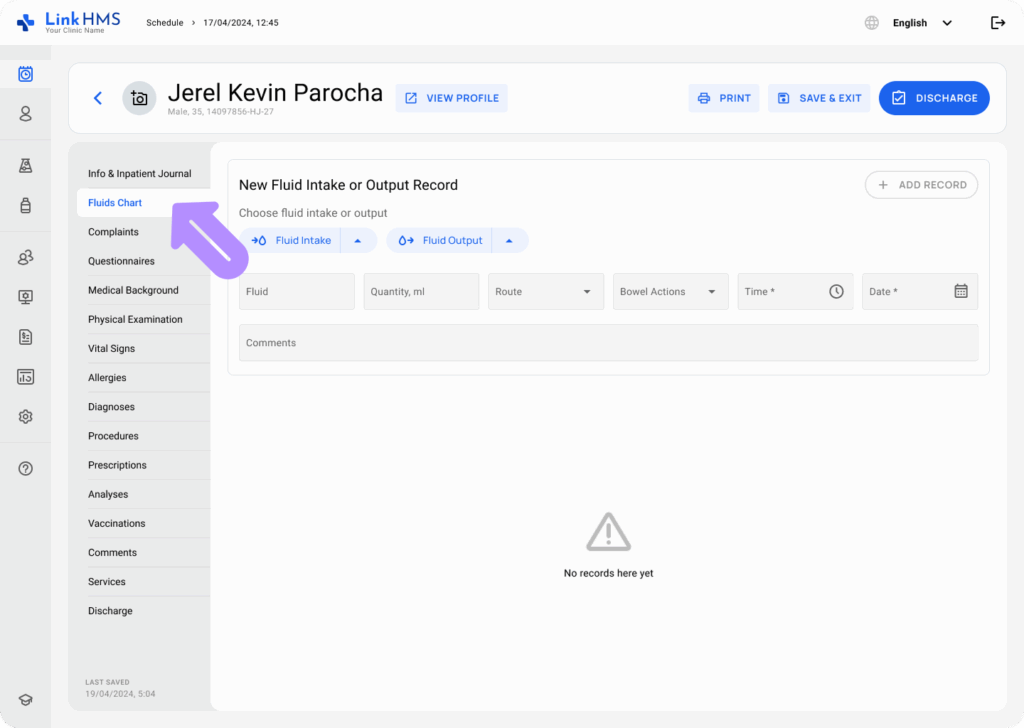
Adding the Fluid Record
- Navigate to the Fluids Chart tab.
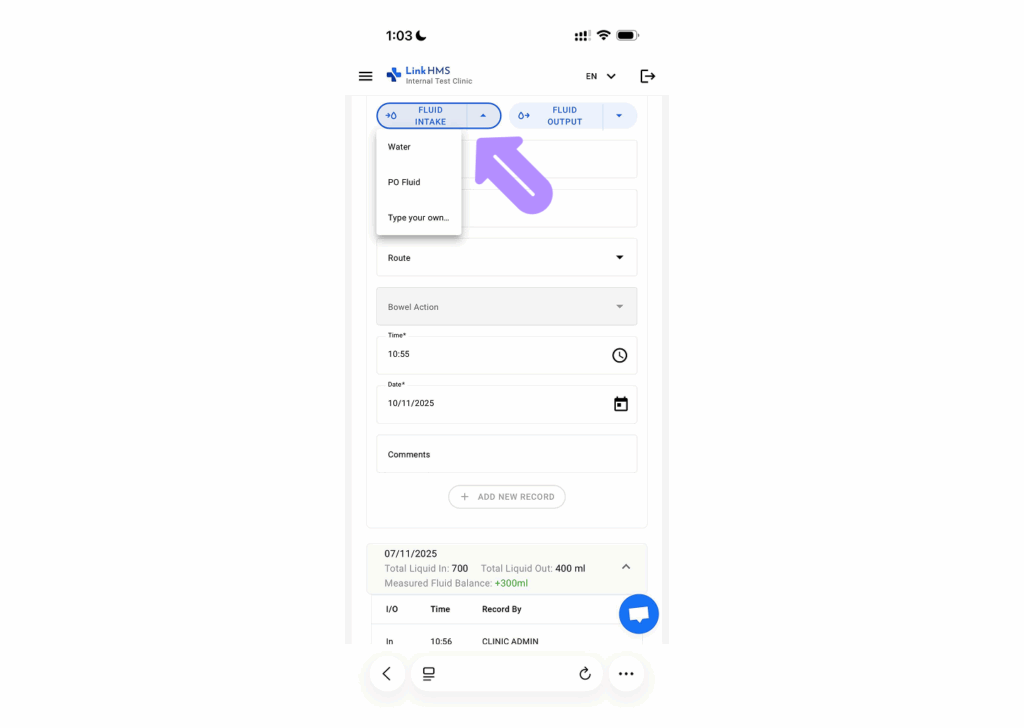
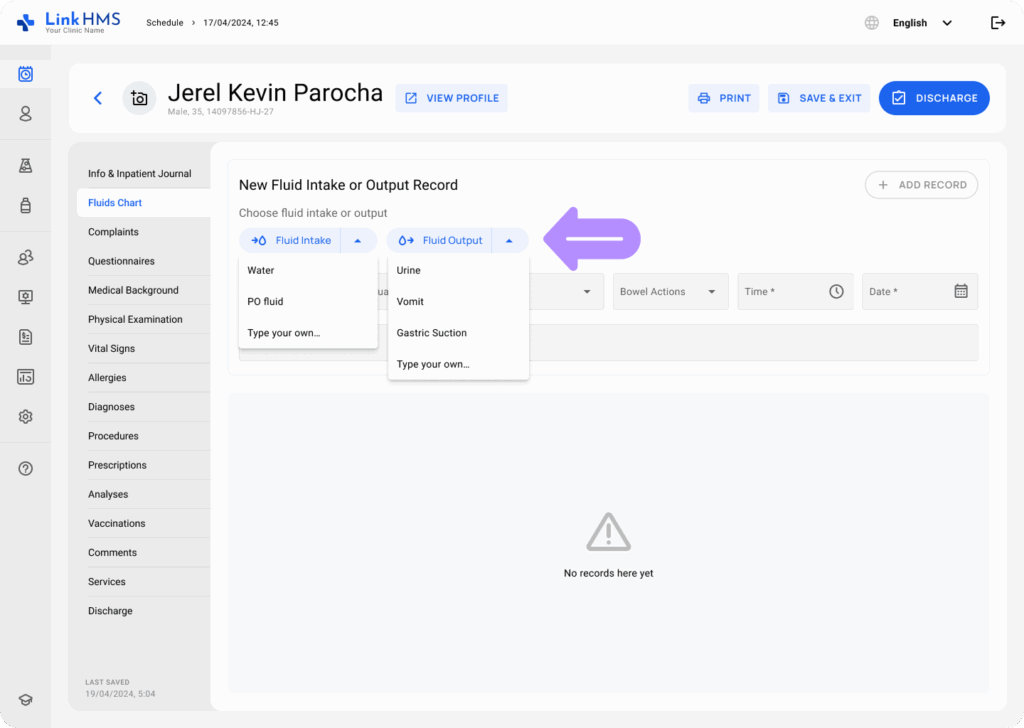
- Select the necessary Fluid Intake (Water, PO Fluid, Type your own…) or Fluid Output (Urine, Vomit, Gastric Suction, Type your own…).
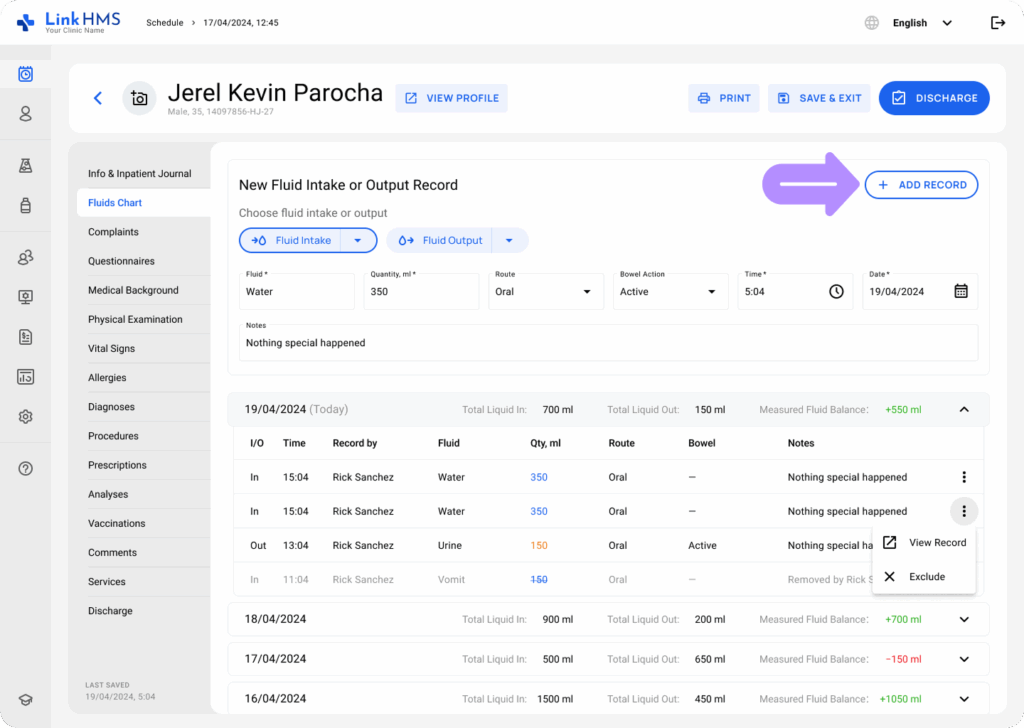
- Fill in the following fields on the chosen fluid.
- Fluid (required): Select from the dropdown menu, or enter your option if needed.
- Quantity (required): Enter the amount of fluid intake or output in milliliters (ml).
- Route (not required): Choose from the dropdown menu (Oral, Intravenous, Naso Gastric Tube, PEG Tube, Wound Drain, Chest Tube, Type your own…) or enter your option.
- Bowel Action (not required): Use the dropdown menu to select the available option (Active, None, Constipated, Diarrhea, Incontinence, Flatus only, Type your own…) or enter yours.
- Time (required): Specify the exact time.
- Date (required): Select the date.
- Notes (not required): Add comments or notes about the recorded fluid.
- Click + Add Record to create a new fluid intake or output entry.
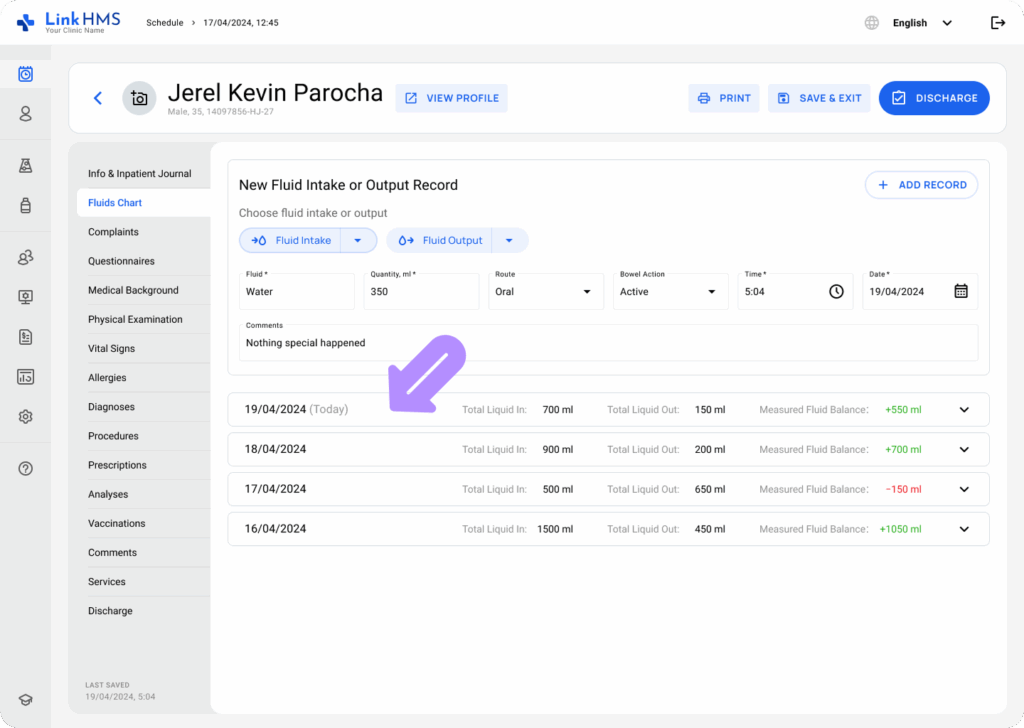
Reviewing the Fluid History and Added Records
💡Notes
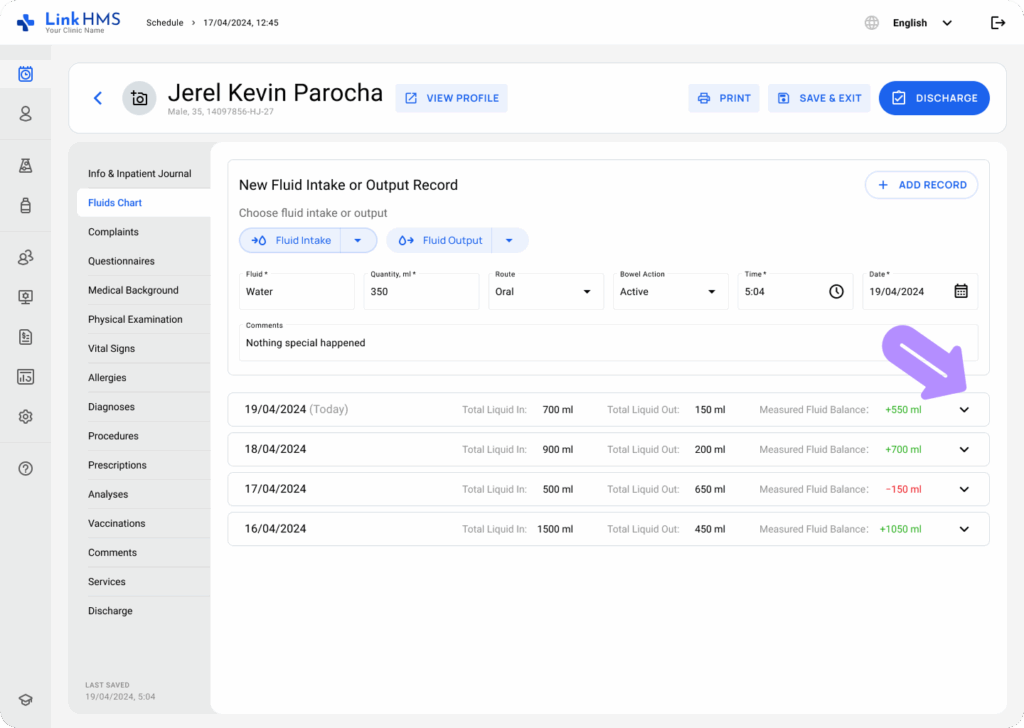
The history of fluid records is grouped by date, so the system automatically calculates the fluid balance for each day.
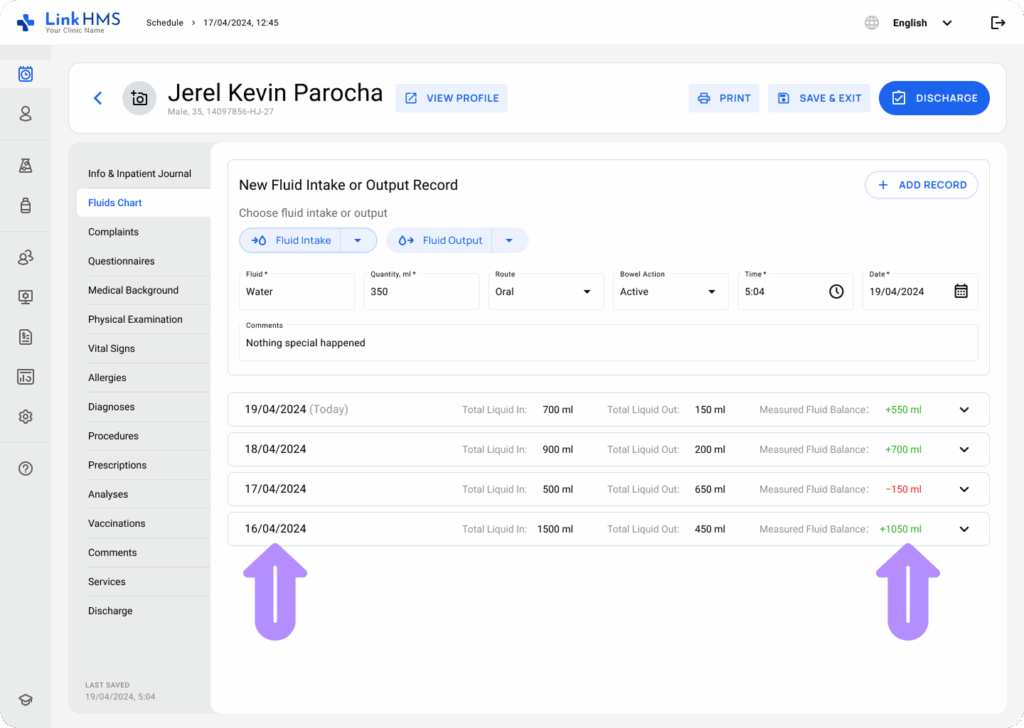
- Head to the specific date to review three key daily values.
- Total Liquid In: The total amount of all fluid intake recorded for that day.
- Total Liquid Out: The total amount of all fluid output recorded for that day.
- Measured Fluid Balance: The difference between intake and output to show whether the patient is in a positive or negative fluid balance.
💡Notes
Positive balances appear in green with a “+” sign, while negative balances are shown in red with a “–” sign.
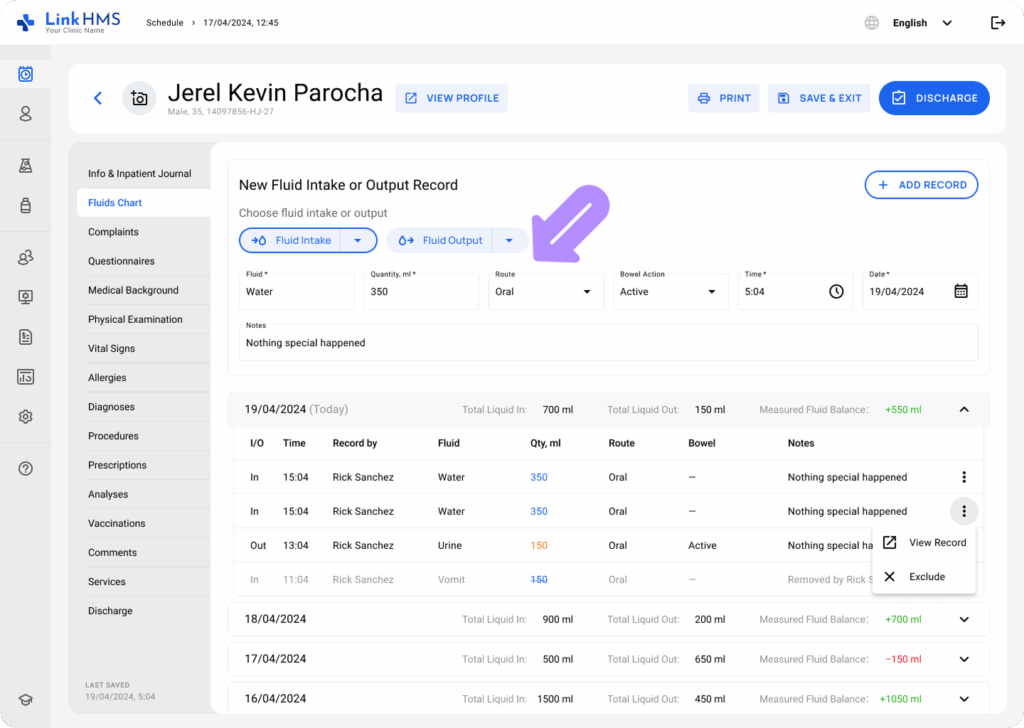
- Select the necessary date to review the fluid records added on this admission day.
- It includes the intake and output records with details such as I/O, Time, Record by, Fluid, Quantity, Route, Bowel, and Notes for the selected admission day.
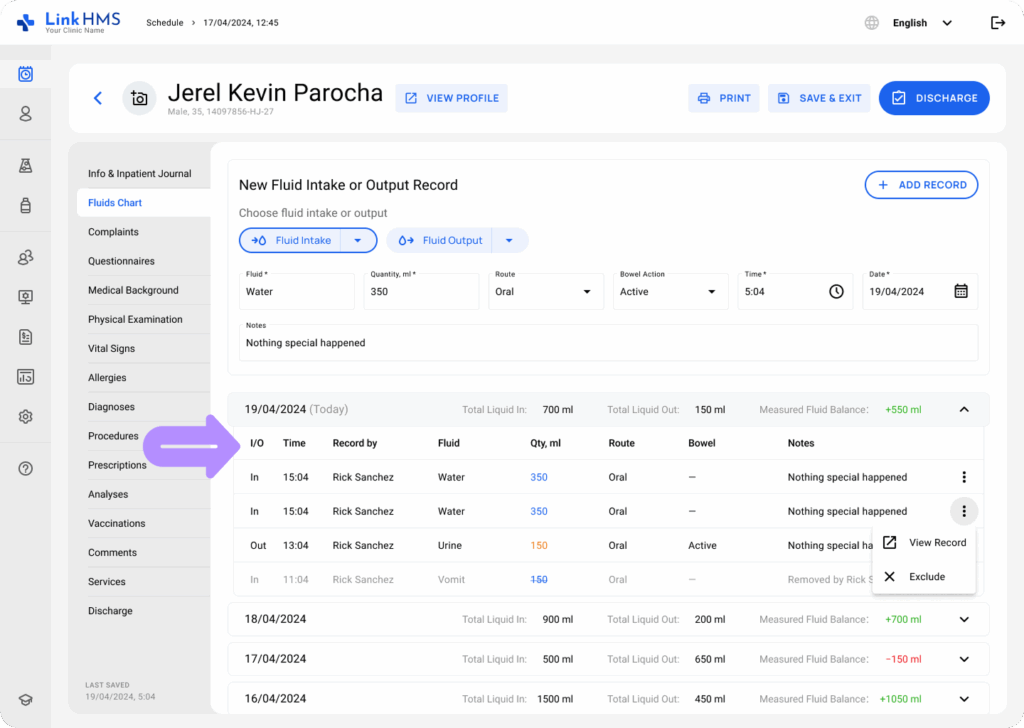
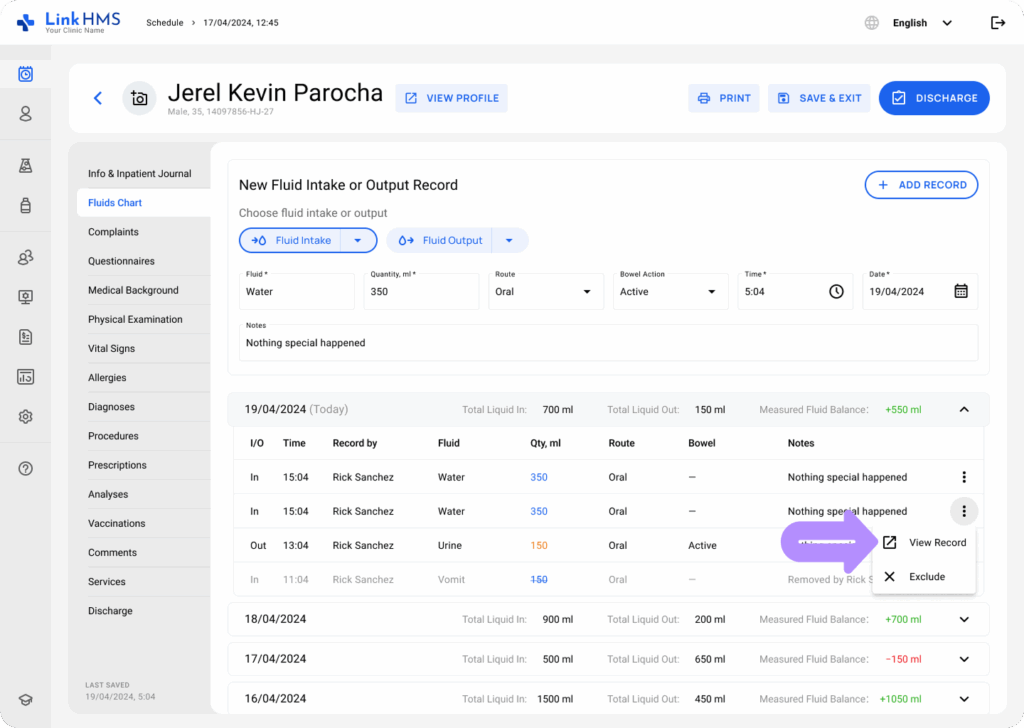
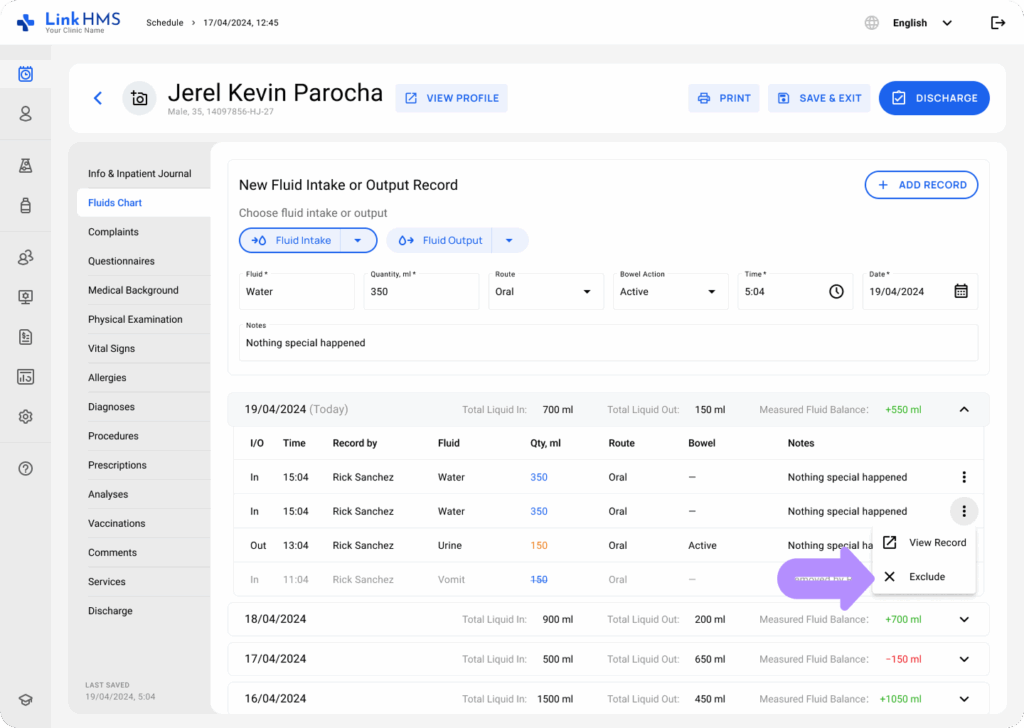
- To access a specific fluid record, use the three-dot menu and choose the View Record option.
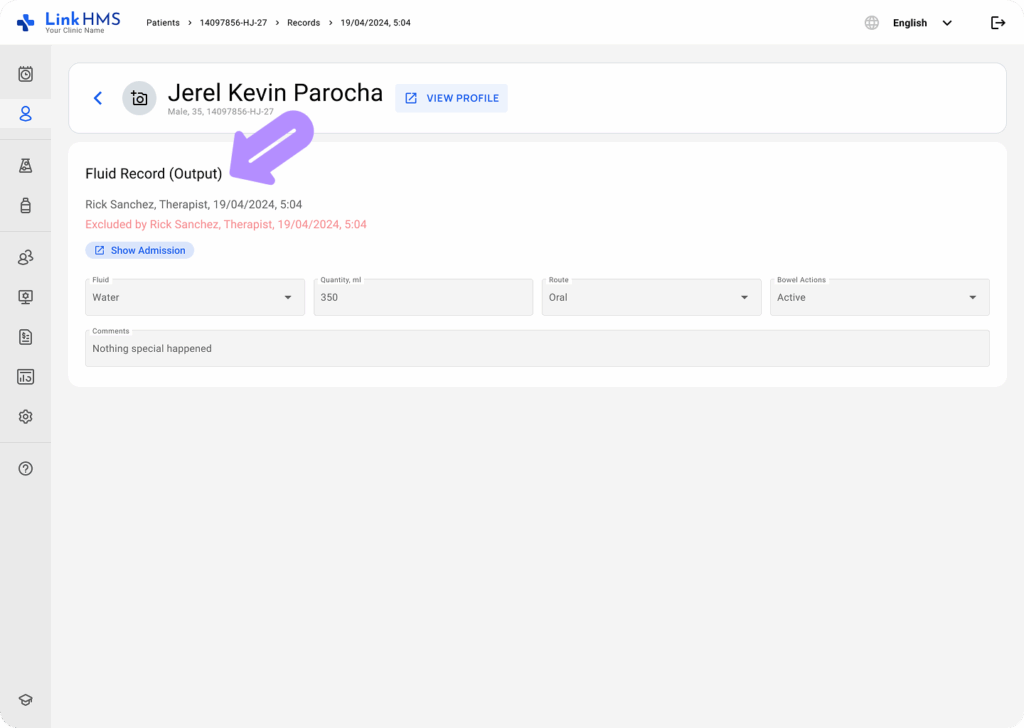
- Review the selected fluid record in full detail.
Excluding Fluid Records
💡Notes
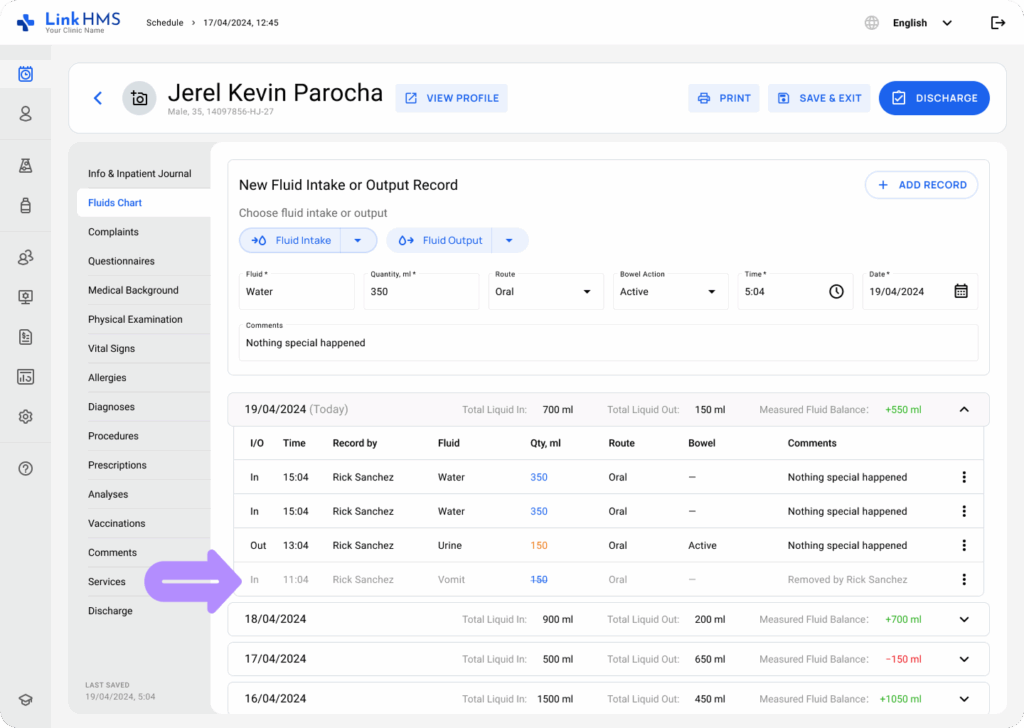
Fluid records cannot be deleted, but can be excluded if entered by mistake. Excluded records appear grayed out, and the system automatically updates input/output totals and measured fluid balances to reflect the change.
- Choose the fluid record you want to exclude, then open the three-dot menu next to it and click Exclude.
- The excluded record appears grayed out to distinguish it from active entries. The calculation is instantly updated to reflect the most current fluid data.
💡Tip for Nurses
You can use the fluids charts on your mobile device right at the patient’s bedside. Follow the same steps as above to record fluid information without returning to a workstation.