Steps to Upload a Logo
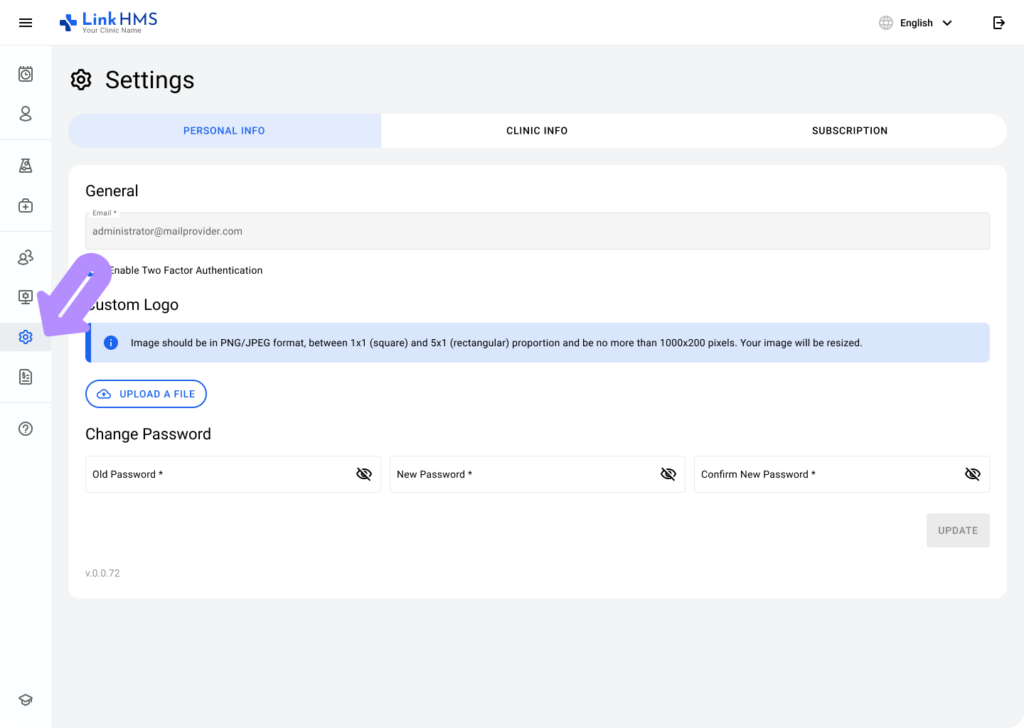
Access the Settings Section:
-
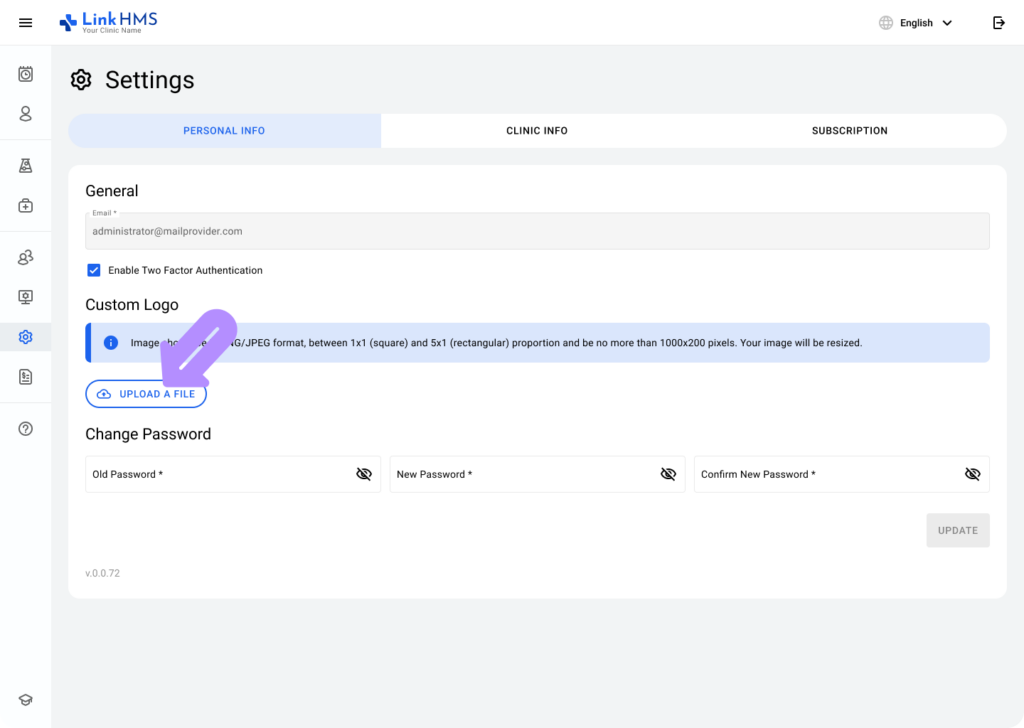
Navigate to the sidebar menu and click on the Settings icon.
-
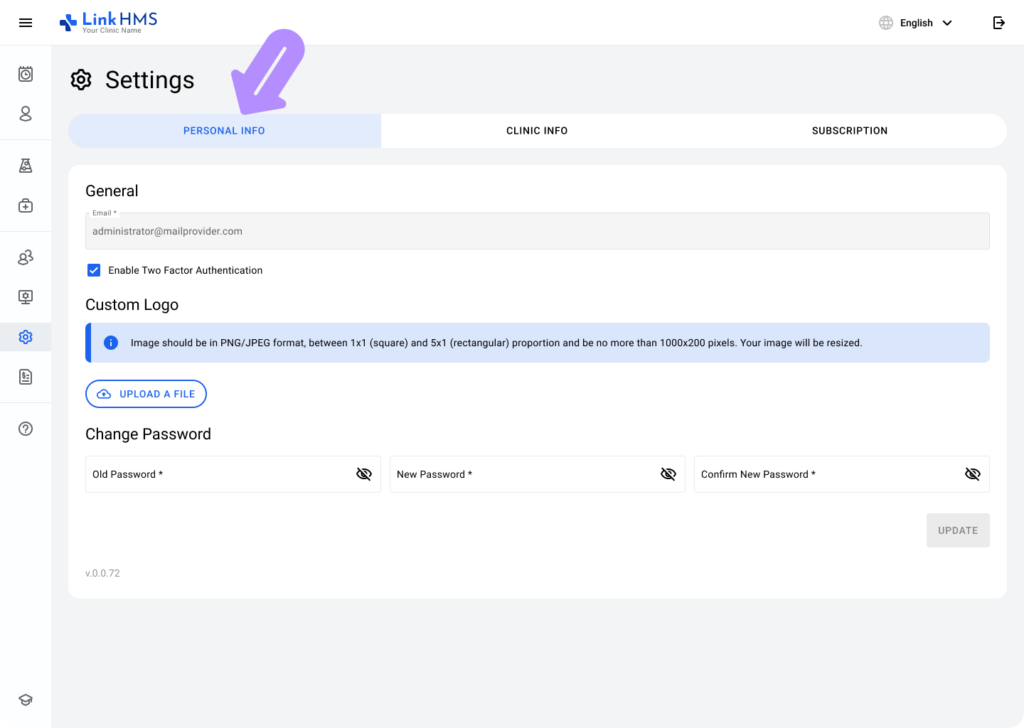
By default, the system will open the Personal Info tab.
Locate the Logo Upload Section:
-
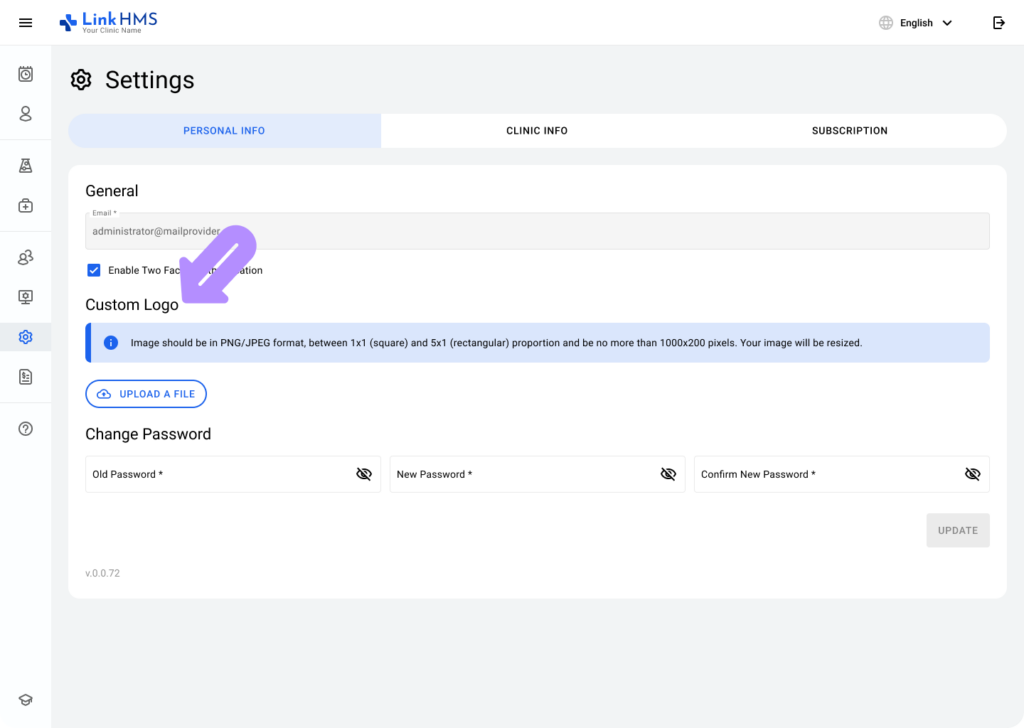
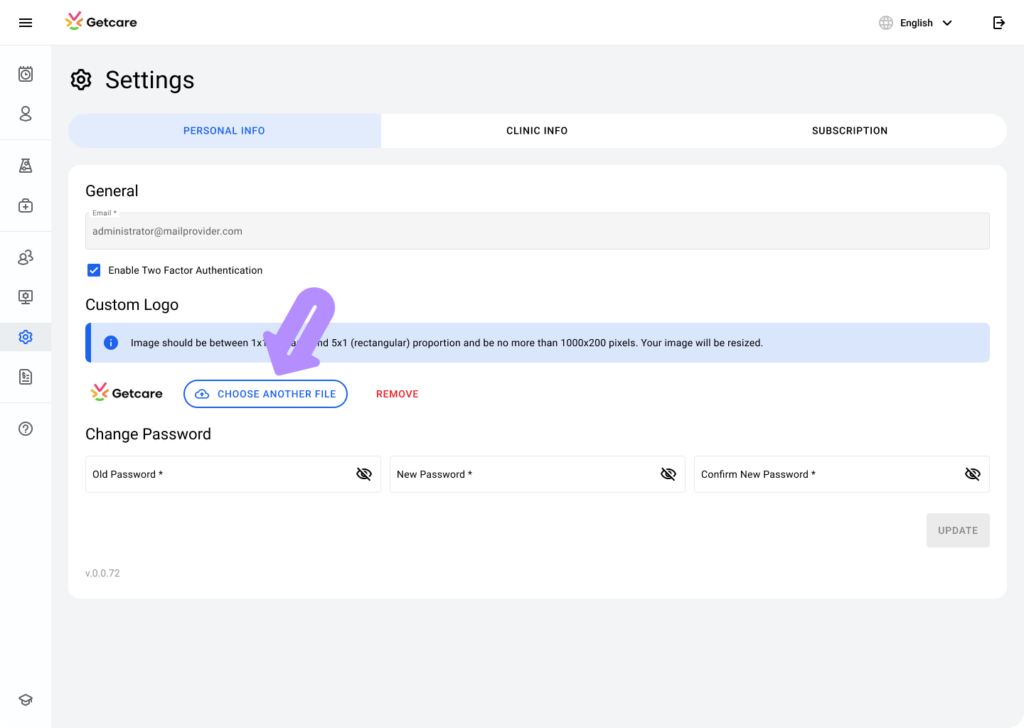
Scroll down to find the Custom Logo section.
-
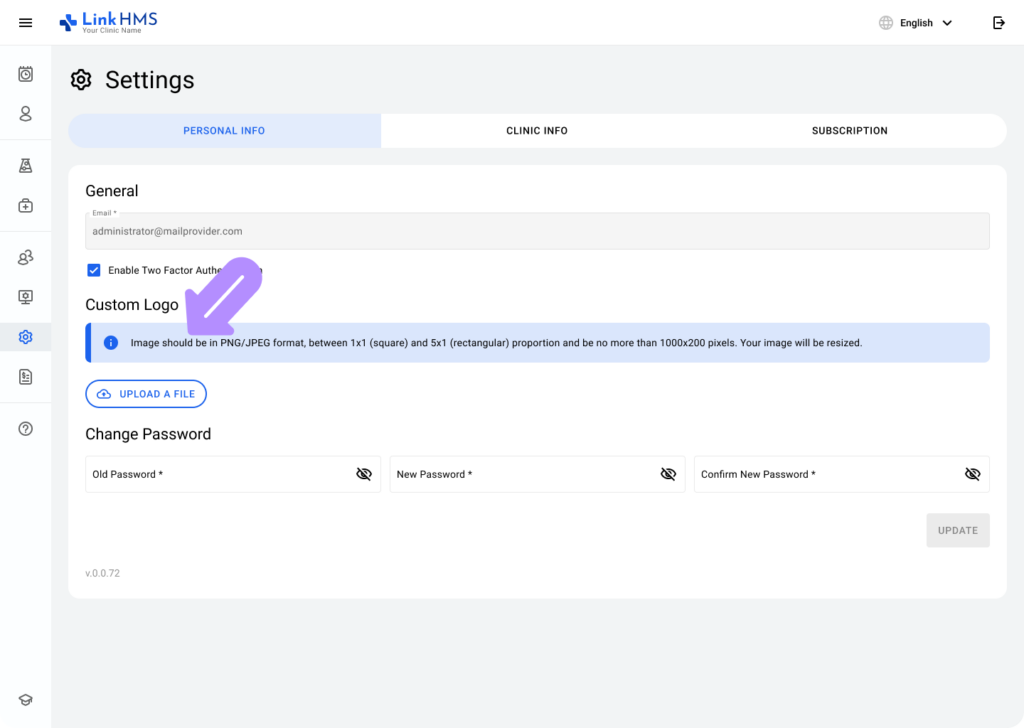
Read the upload requirements:
-
The file must be in PNG/JPEG format.
-
The image dimensions should be between 1:1 (square) and 5:1 (rectangular).
-
The size must not exceed 1000×200 pixels.
-
Choose the File:
-
Click on the Upload a File button.
-
Select an appropriate file from your device.
Handle Errors if Any:
-
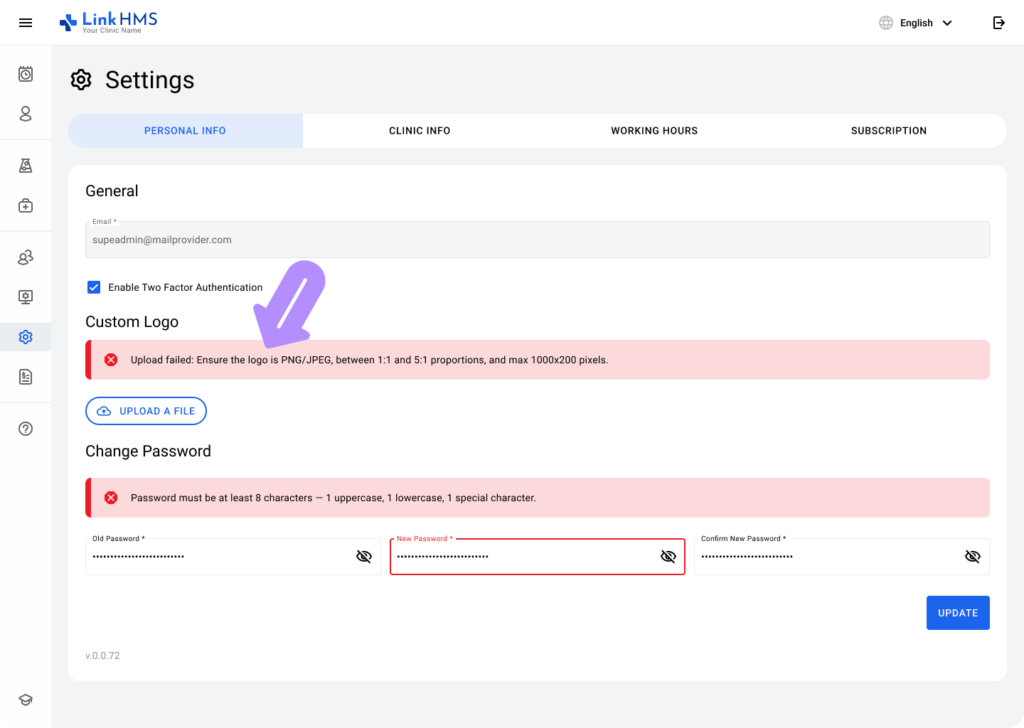
If the file doesn’t meet the format or dimension requirements, you will see an error message.
-
Adjust the file according to the instructions and re-upload it.
Preview and Save:
-
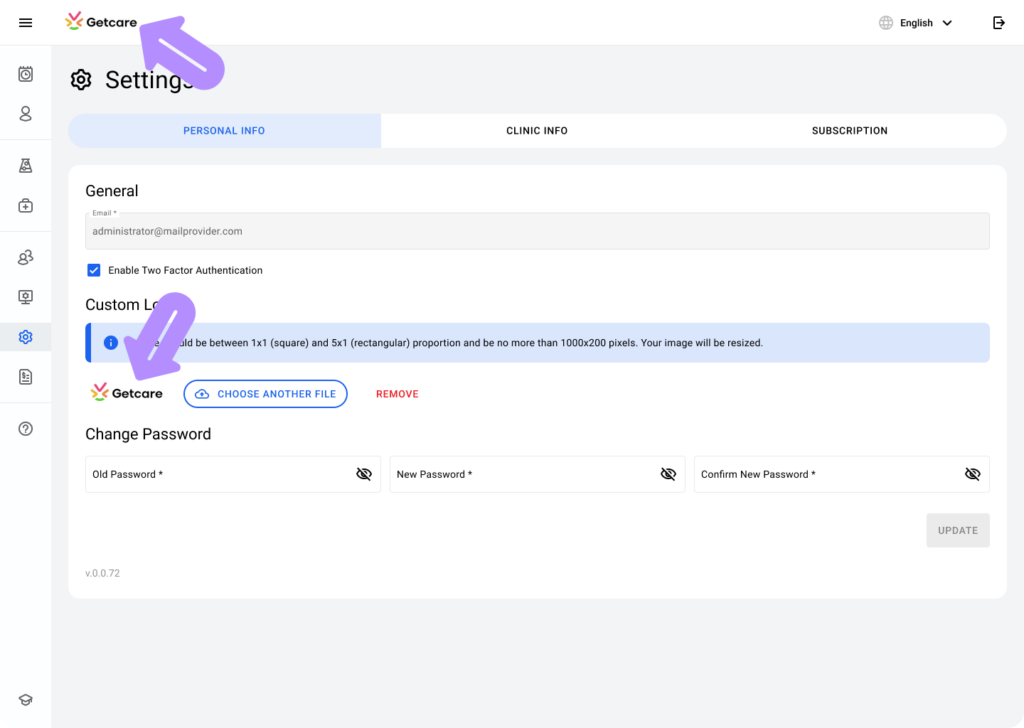
Once uploaded successfully, the logo will appear in the preview area.
-
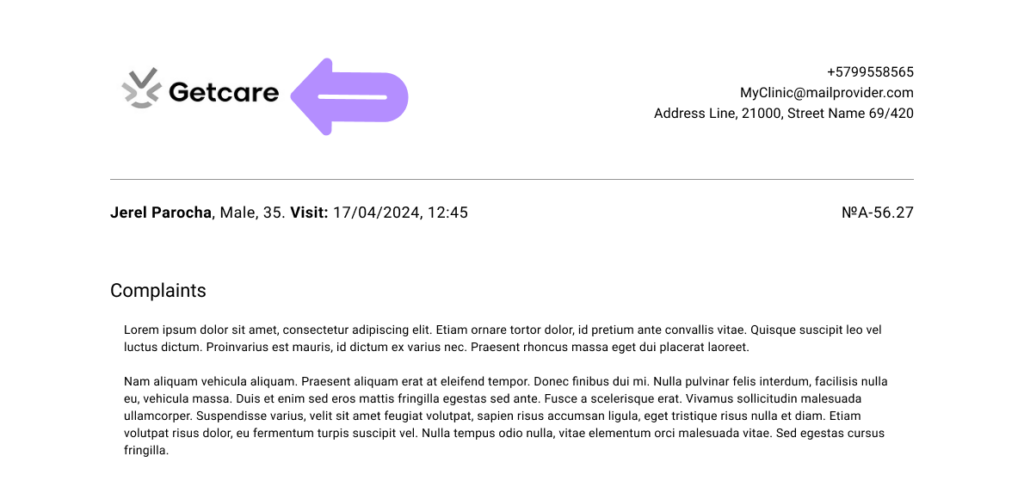
The uploaded logo will now automatically appear in all clinic invoices, giving them a professional look.
Edit or Remove the Logo:
-
To replace the logo, click on Choose Another File.
-
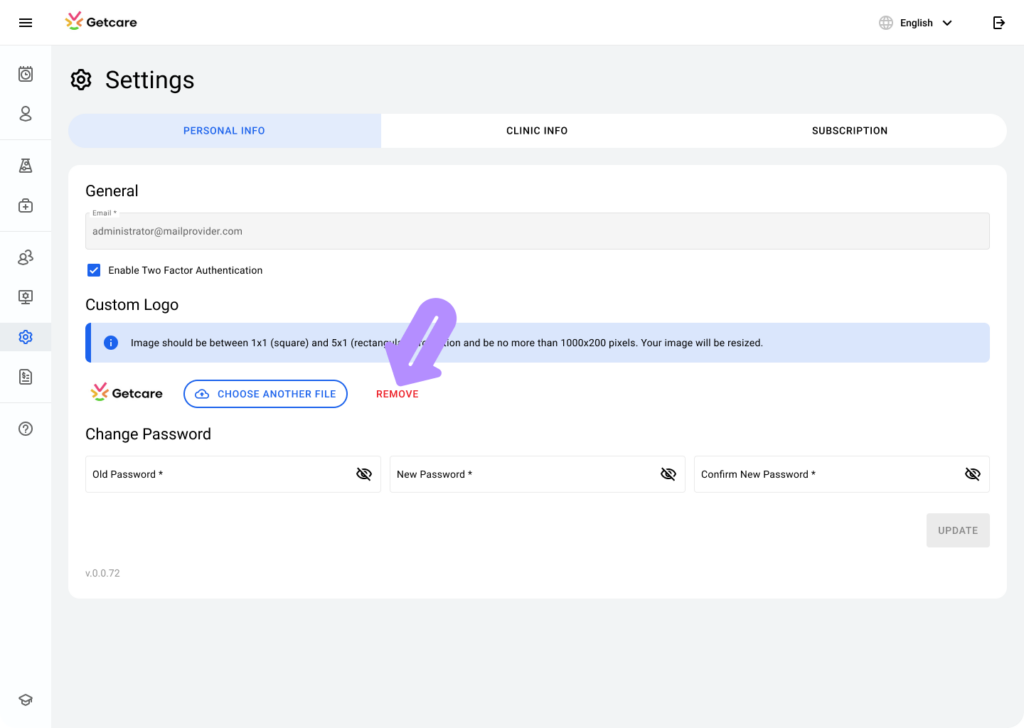
To delete it, select the Remove button.
Follow these steps to upload and manage your clinic’s logo, ensuring it appears on the interface and invoices.
